I have something of an affinity toward unique Jeeps. My first YJ was a 1990, plain old white. I fixed that up by adding some simple store bought decals, botl-on widgets, and through the application of black paint here and there. It made it mine, and helped it stand out from the sea of other white YJ’s on the road.
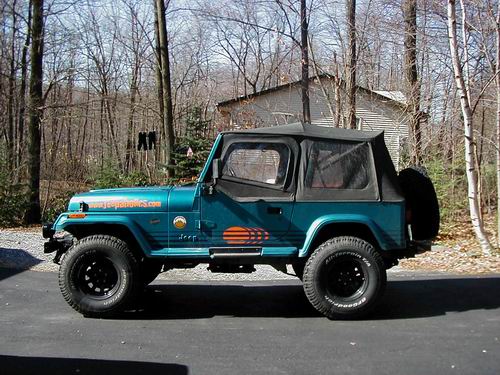
When I upgraded to the Smurf, which was a 92, with a 4.0, I landed a pretty unique jeep just by luck. Turquoise, with an islander package. I wasnt crazy about the color, or the bright orange sun decals on the doors, but it grew on me. I came to realize that I almost never saw an islander on the trail. So it became mine, unique. I accented the suns with more orange components. When i finally sold it, you couldnt mistate it on the trail. It was, The Smurf (no, I didnt chose the name, you never get to choose your own Jeep’s name).
I hope that DIYJ is equally identifyable when it’s trail ready.
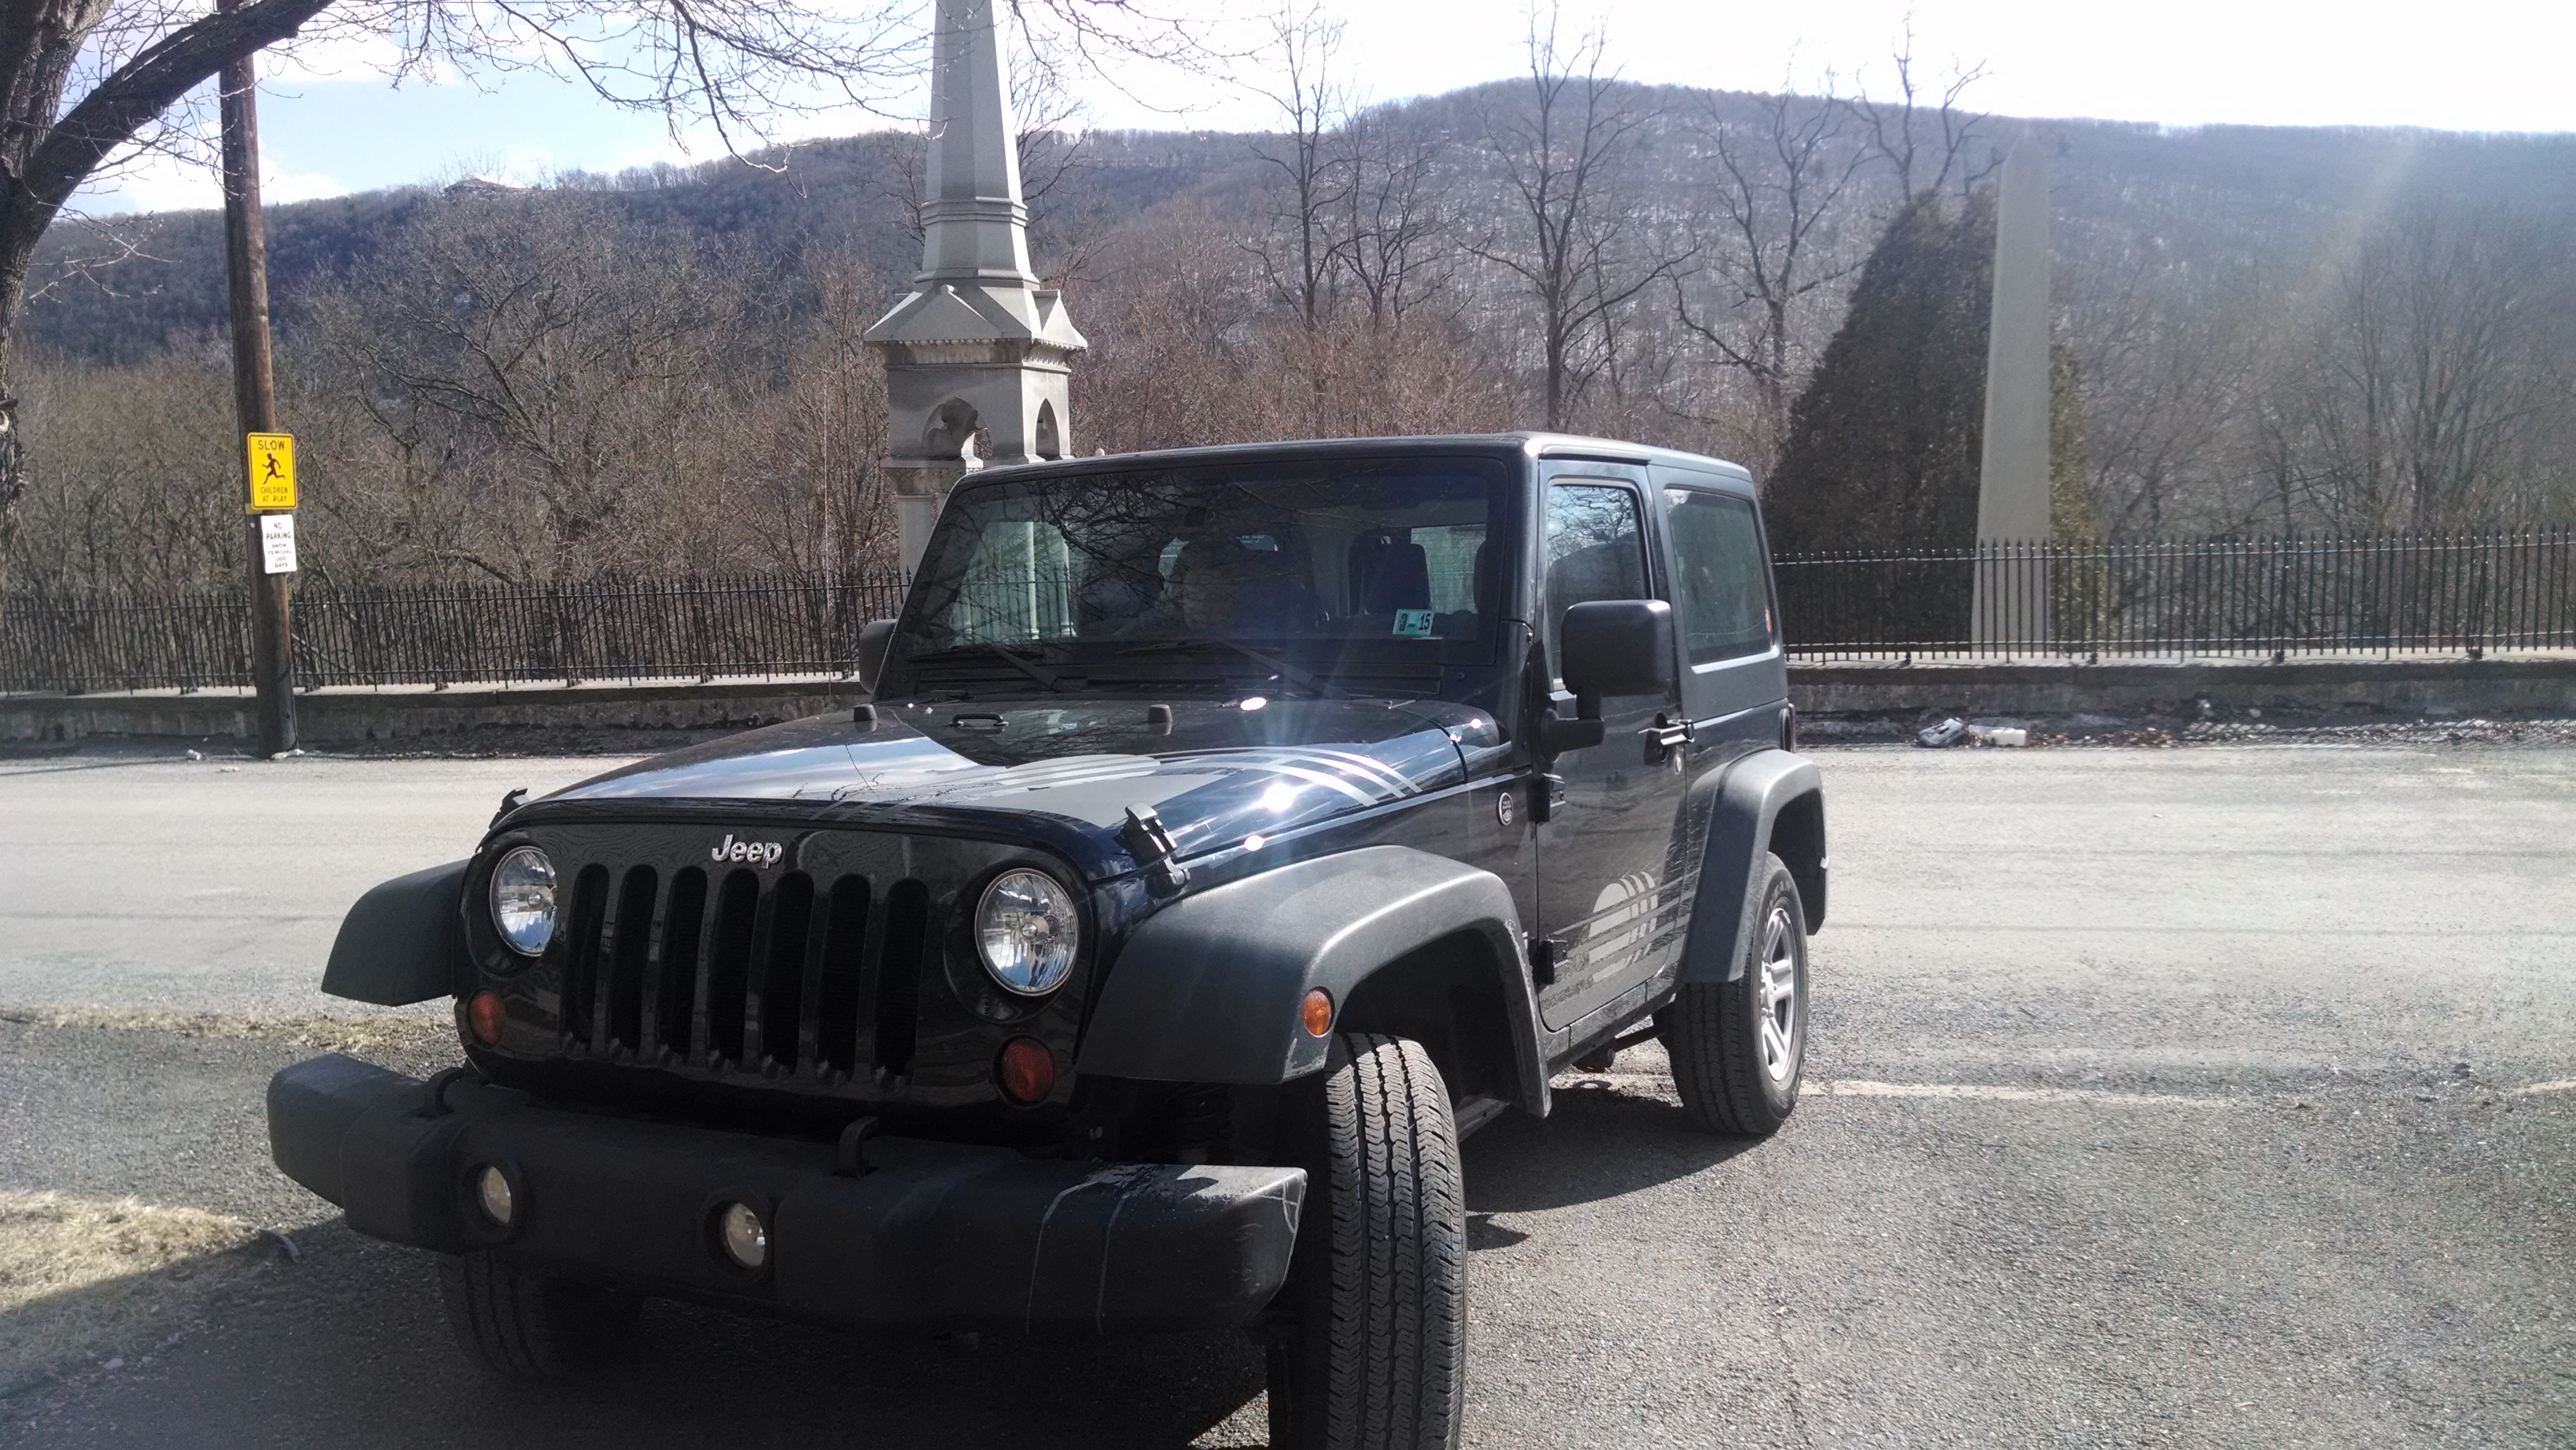
So when I bought my JK, I’d more or less settled for a rather plain looking black JK sport. Its the opposite of unique. It simply blends in with the sea of stock JK’s on the road. I do like it, but man, its sort of boring to look at. It was a few weeks ago, when I passed a friend of mine on the road, he also drives a JK (but his is bright yellow… jealous). I waved at him, he waved back, and he didn’t even realize it was me. Just a fellow Jeeper exchanging a wave. It was then that I decided that it was time to think up how to make this JK mine, make it stand out, but not spend a ton of money doing it, or ruin its fuel economy (like tires and a lift might).
I had this idea, long ago, that when DIYJ was ready, I’d paint it one of the burnt orange colors (like ember fire, or copperhead), and then have someone airbrush a sihouette of the islander decals on the doors and hood. Homage to the Smurf if you will. So, I thought, why not take that approach with the JK, and then whenever DIYJ is ready, take a different approach, or maybe not, we’ll see.
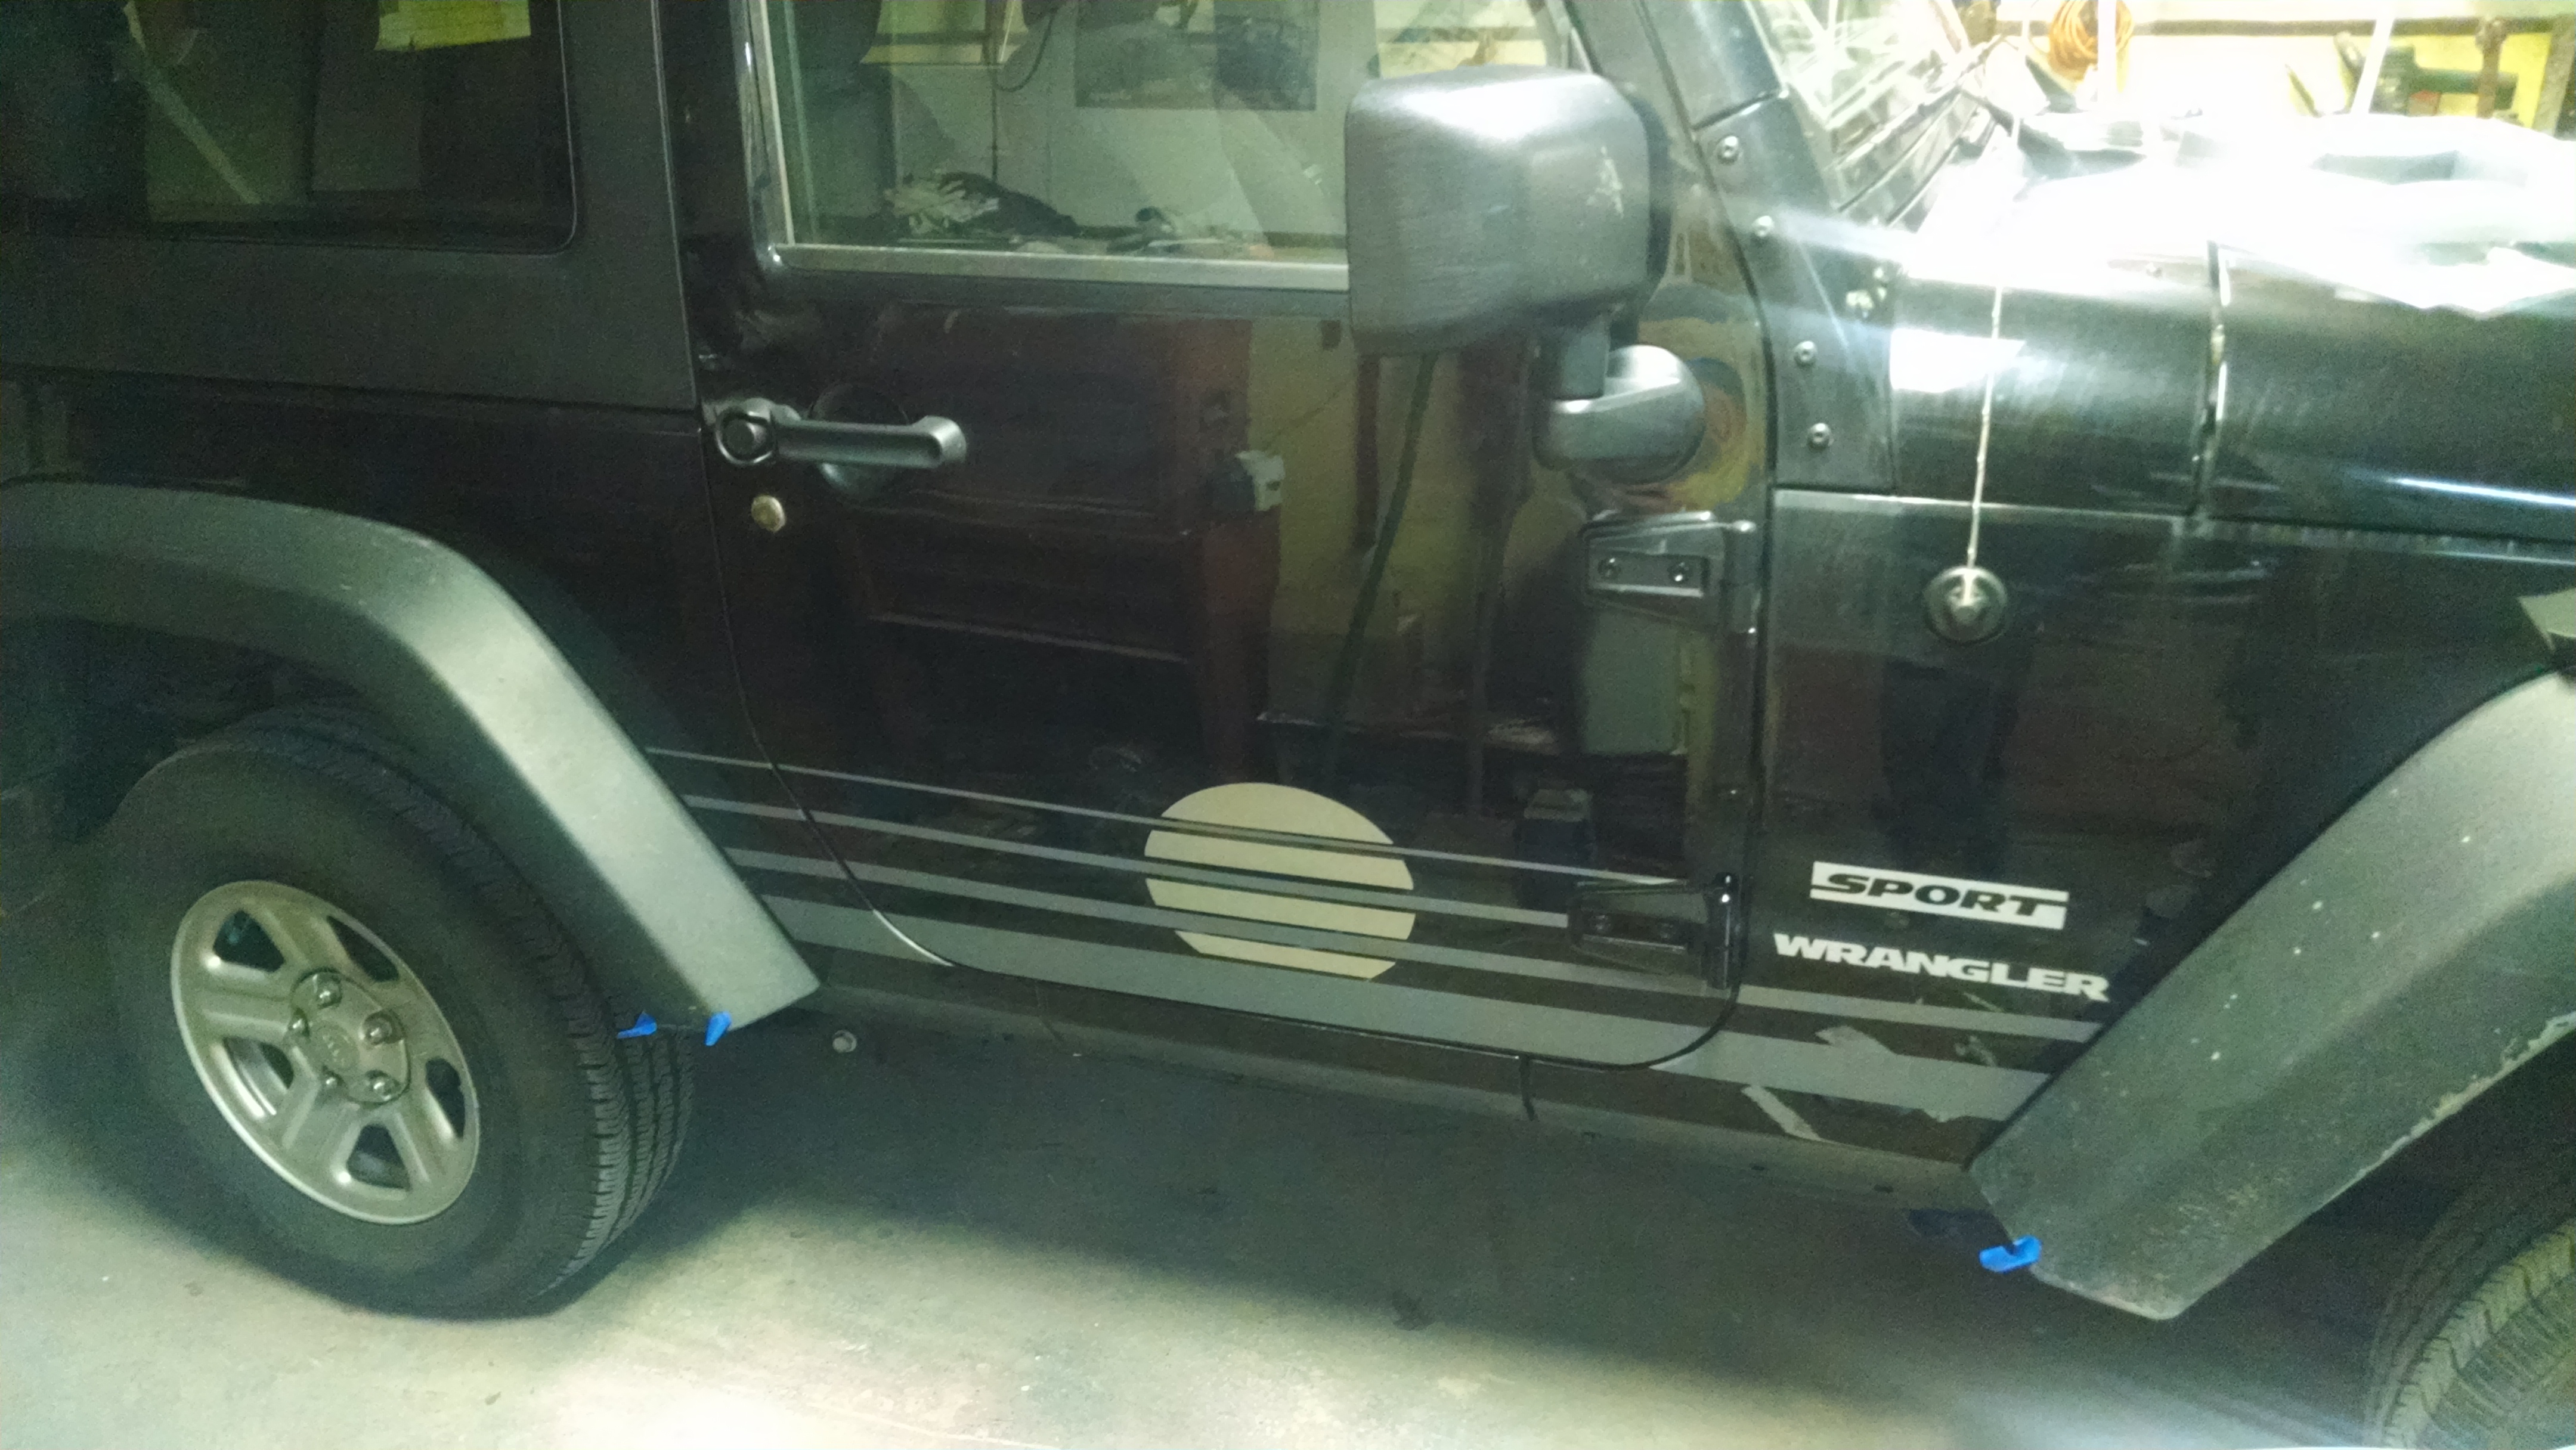
I decided to take the YJ Islander theme, and apply it to the JK. This meant, either finding a YJ decal package and retrofitting it on to the JK body, or designing my own stickers from scratch. I poked around online, and found a number of places selling remakes of the YJ Islander decals. For over $100. Which doesnt sound horrible, but for decals that likely wont fit my Jeep… I wasn’t willing to spend that much. Also, I wasnt sure I wanted the standard Islander colors. The orange and yellow theme doesnt, in my opinion, go well with the black base of my JK.
Here’s the smurf, when it was new(ish).
Now, in 2010, Jeep had an Islander JK. But it was nothing more than a hood decal, and maybe a handful of options. No sun’s on the doors, just a tiki guy, and a somoan looking font. Personally, I think that what I’m creating here, is what the JK Islander _SHOULD_ have looked like.
So, I went with the from scratch route. I have some moderate (by no means expert) Photoshop skills. My wife has a Cricut, a craft cutter that will cut vinyl. So, I set out designing a door decal that would be cuttable on her cricut. This didnt work out well. The cricut that we have, cuts on a 6″x12″ mat. The YJ Islander sun was a little over 6″ tall, and with the shadows, much wider than 12″. I know this because one of my old wheeling buddies, Jenny, has an Islander, and she was nice enough to measure her decals for me. I had an idea how to solve this problem though, it just meant extra work. Of course.
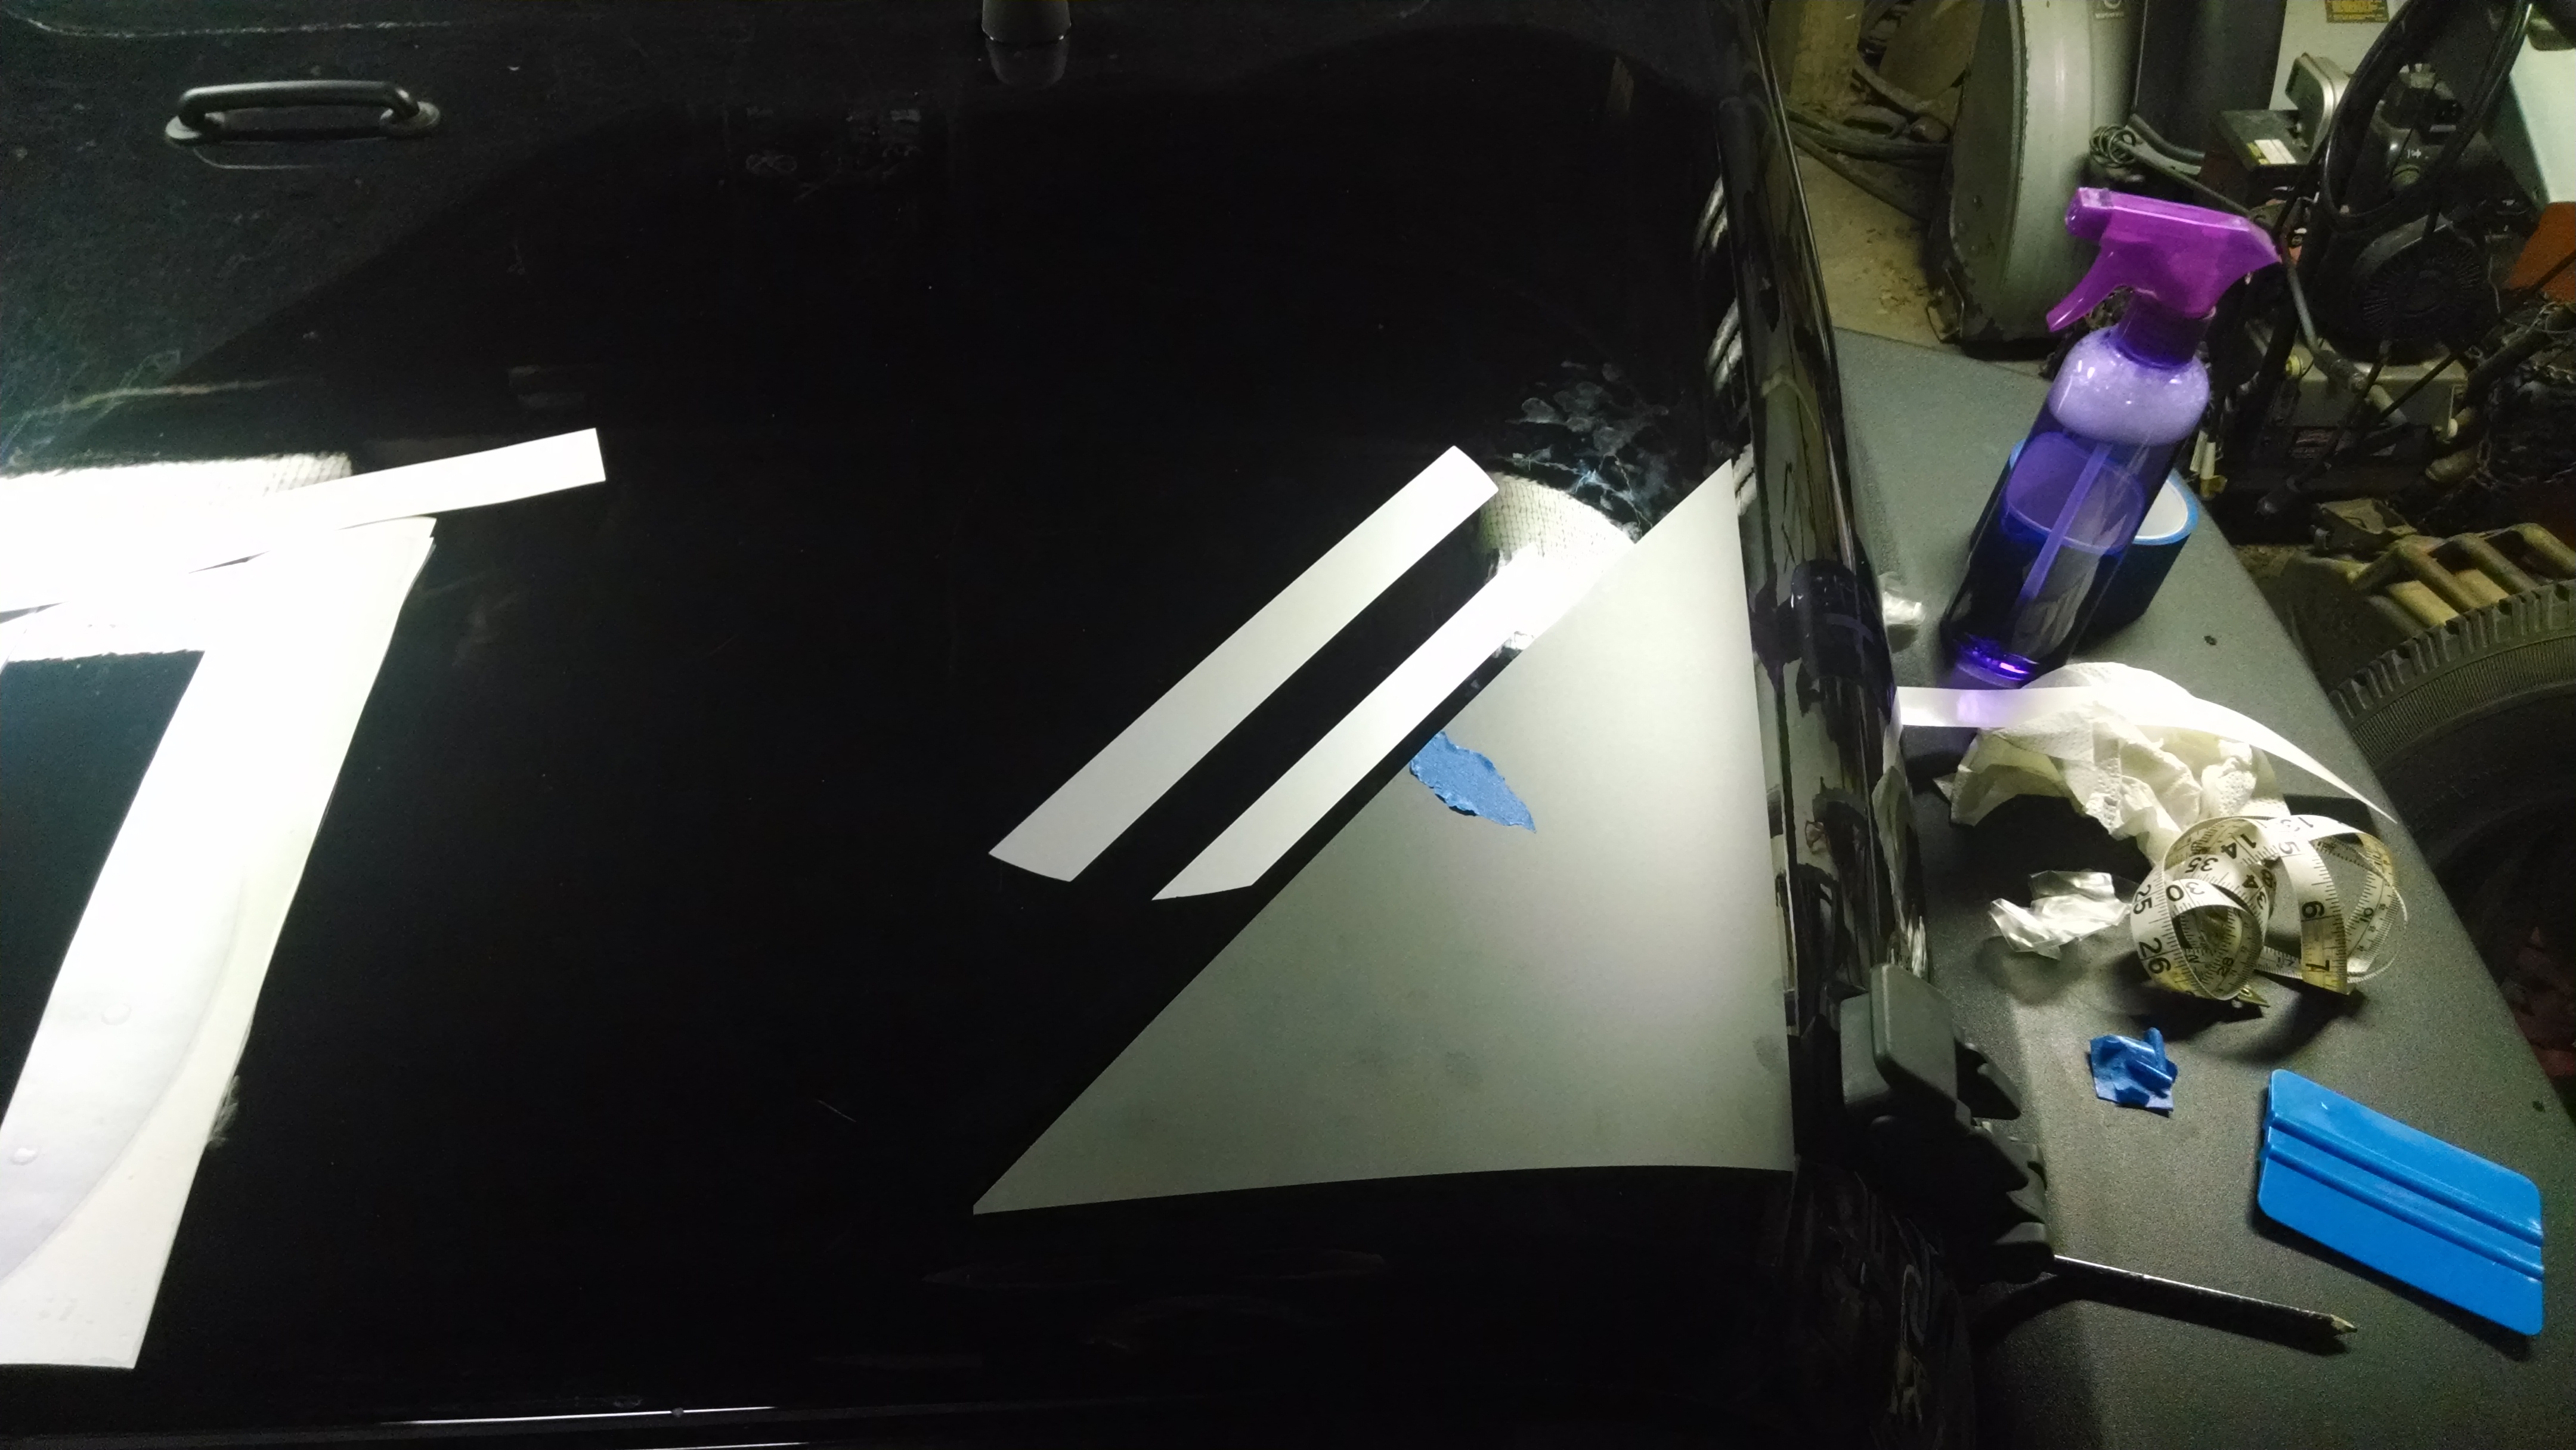
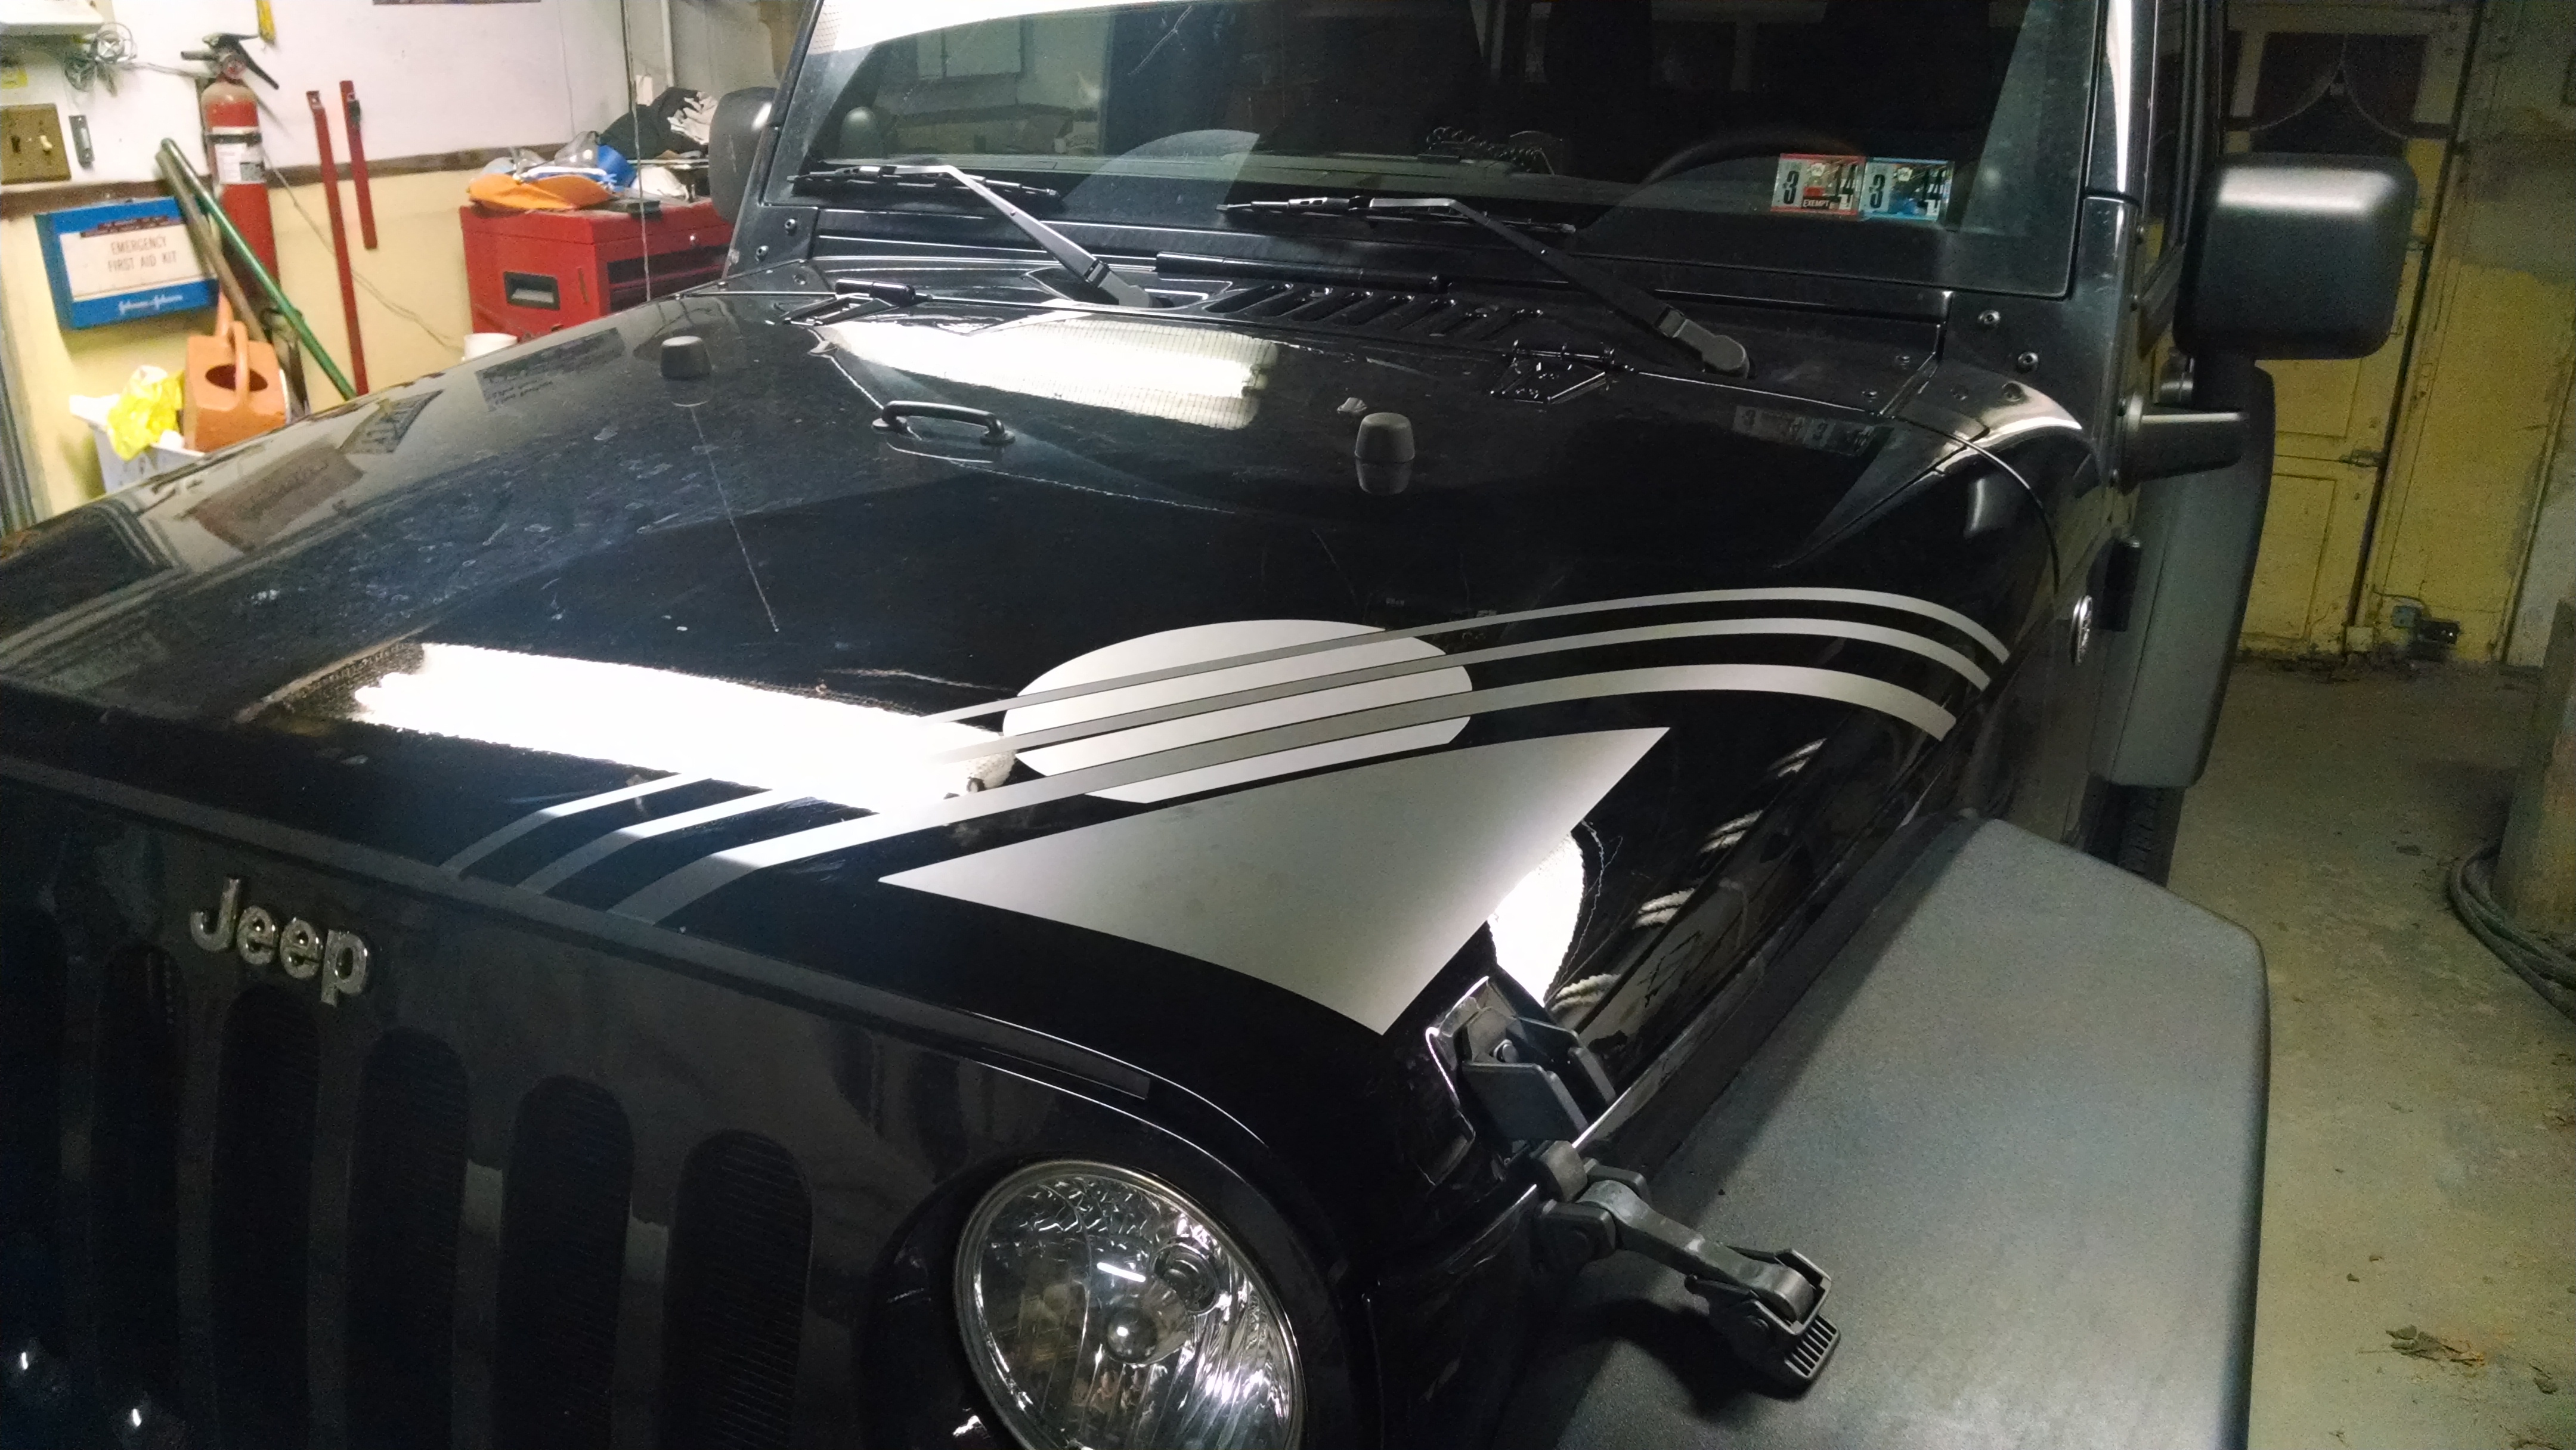
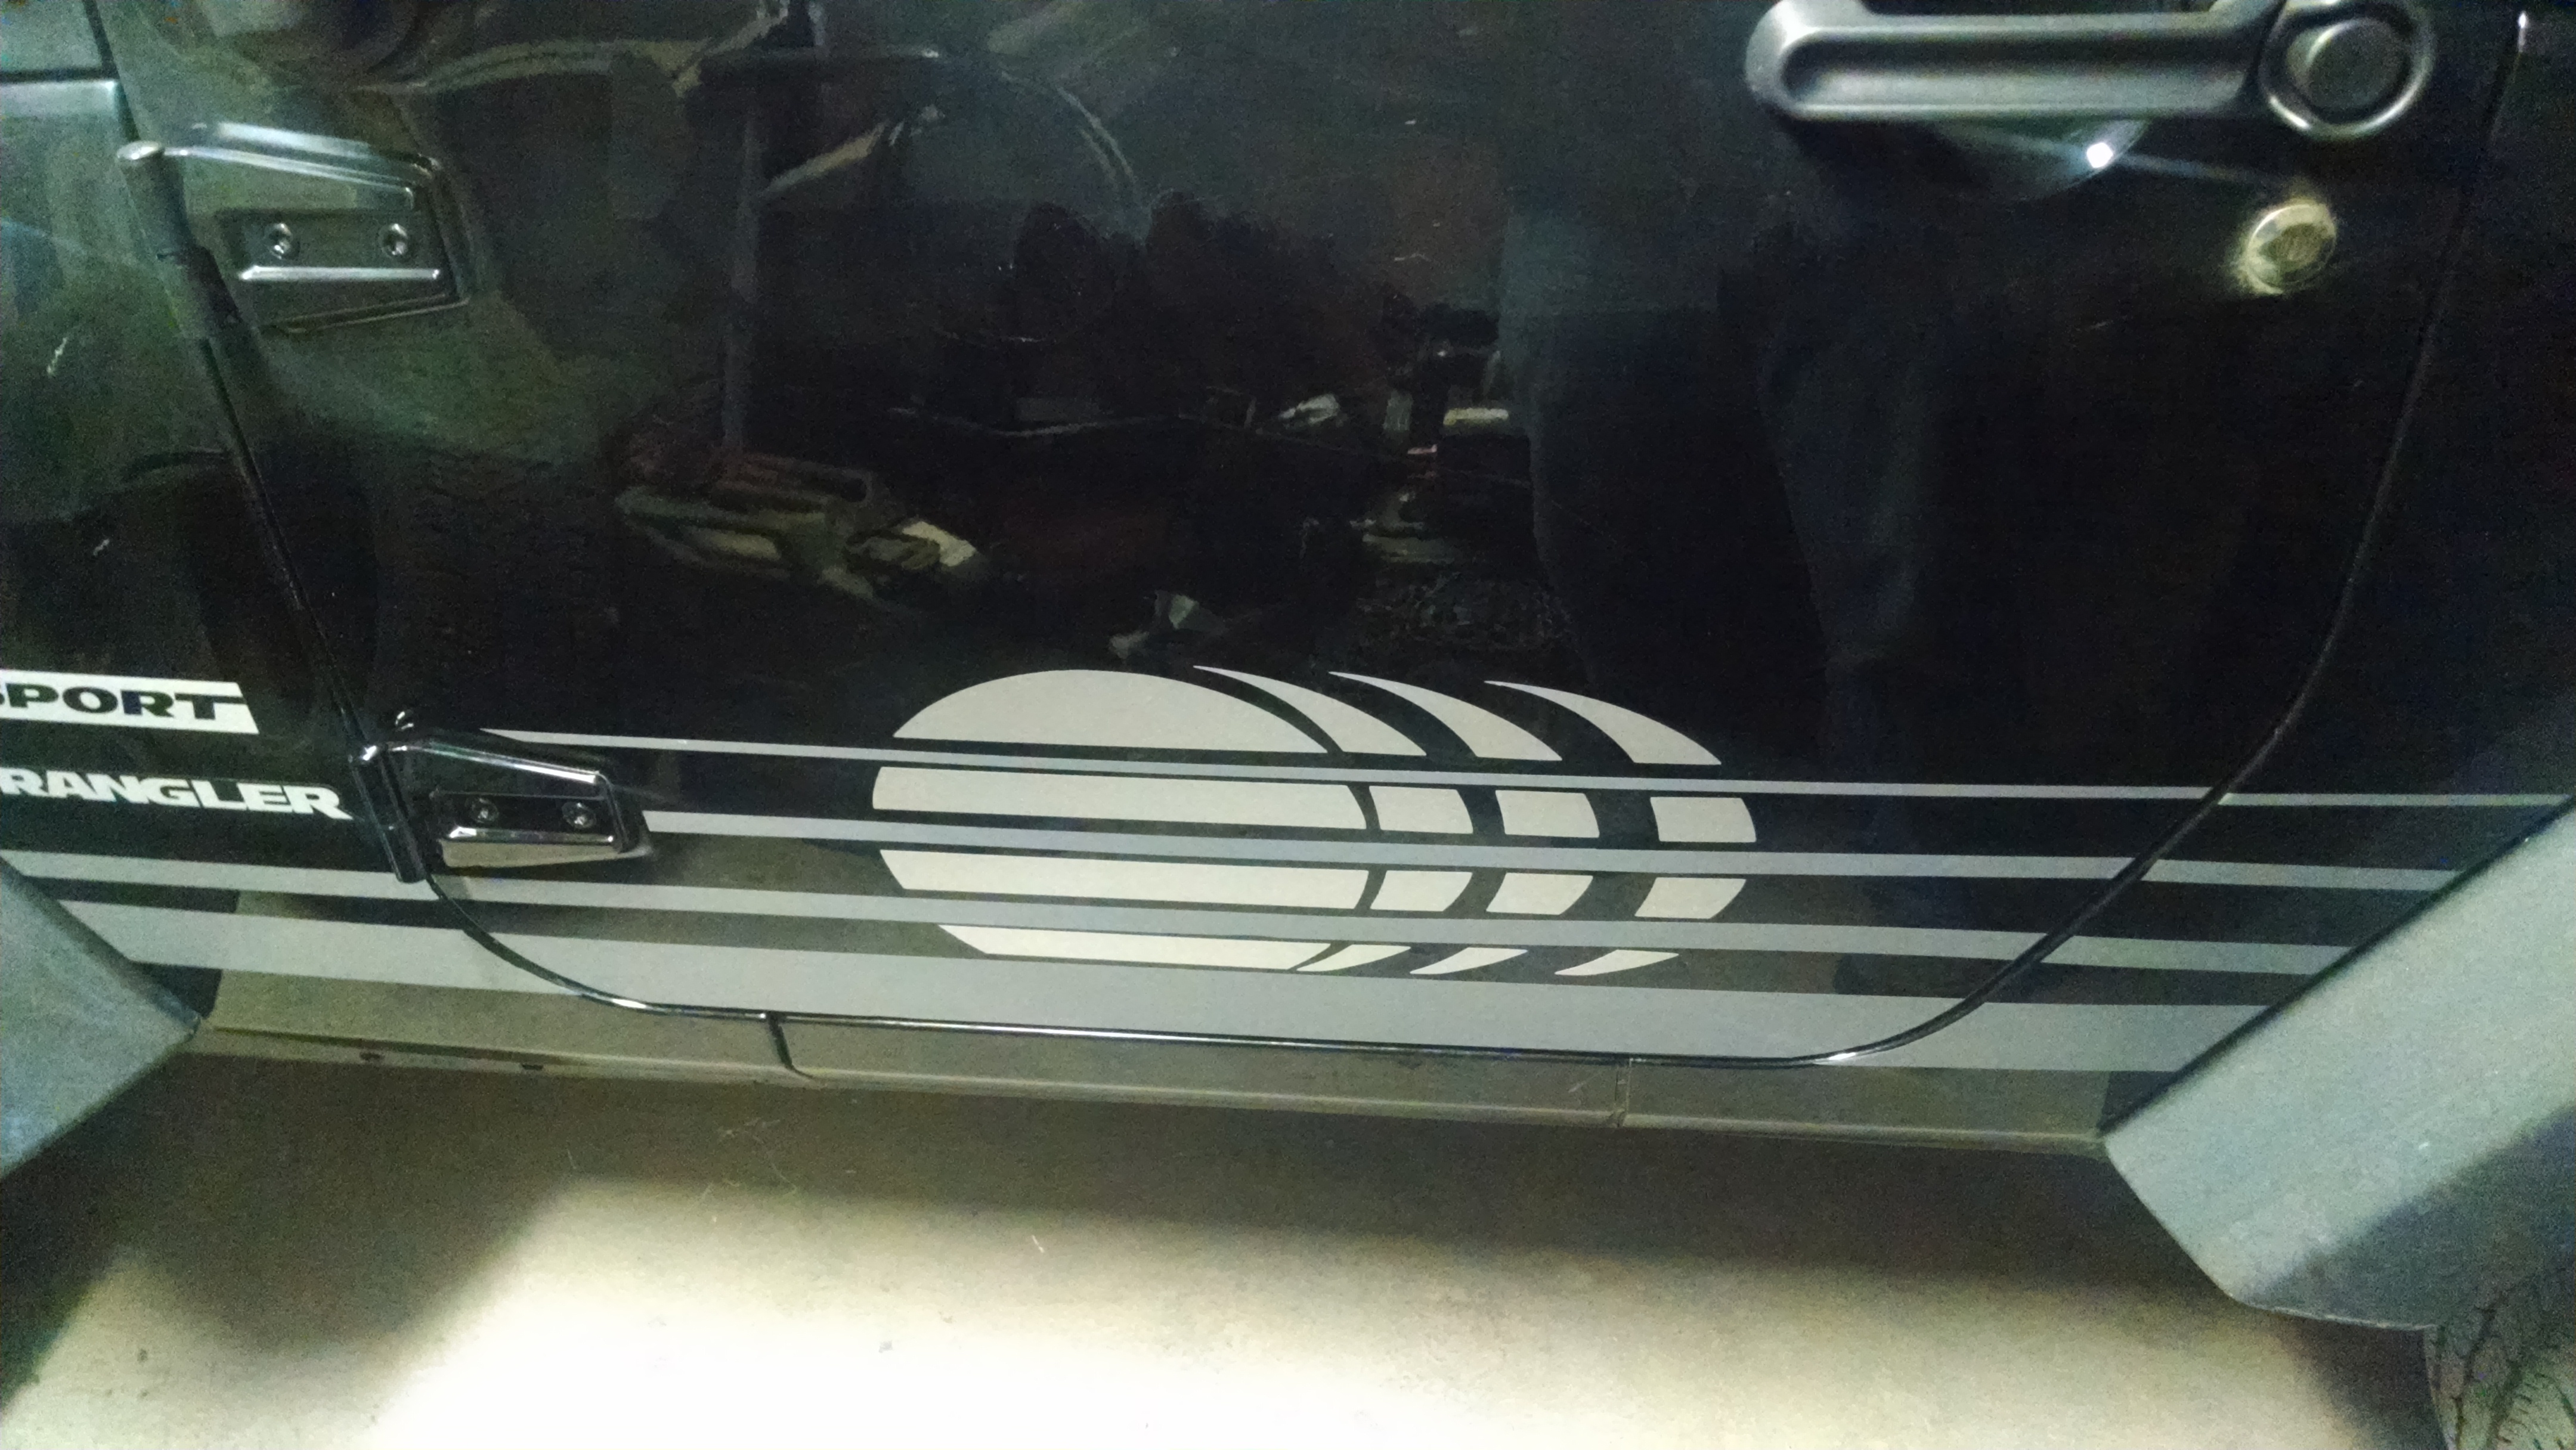
Next came the shape. This seems easy right? An oval, of the right size, split into strips. I had one hell of a time creating this to my own satisfaction. I’m hard on myself when I’m trying to duplicate other’s work (like this decal), I try to make it as close to the original as possible, and it bothers me if its not right. So I had a thought. Get the measurements, and get a good high-res picture, and then use the high-res picture as a template for my shape in photoshop. The measurements were easy, I’d already asked Jenny for those. The high-res picture.. Well…. You’d think having owned an Islander for 12 years, i’d have lots of pictures of the decals. You’d be wrong… I had lots of older photos, like the one above, but the quality wasnt high enough for what I wanted to do. All of my newer (and higher resolution, due to newer camera gear), were sans doors. See, I get most of my pictures when I’m out wheeling. I do ALL of my wheeling…. Doorless.
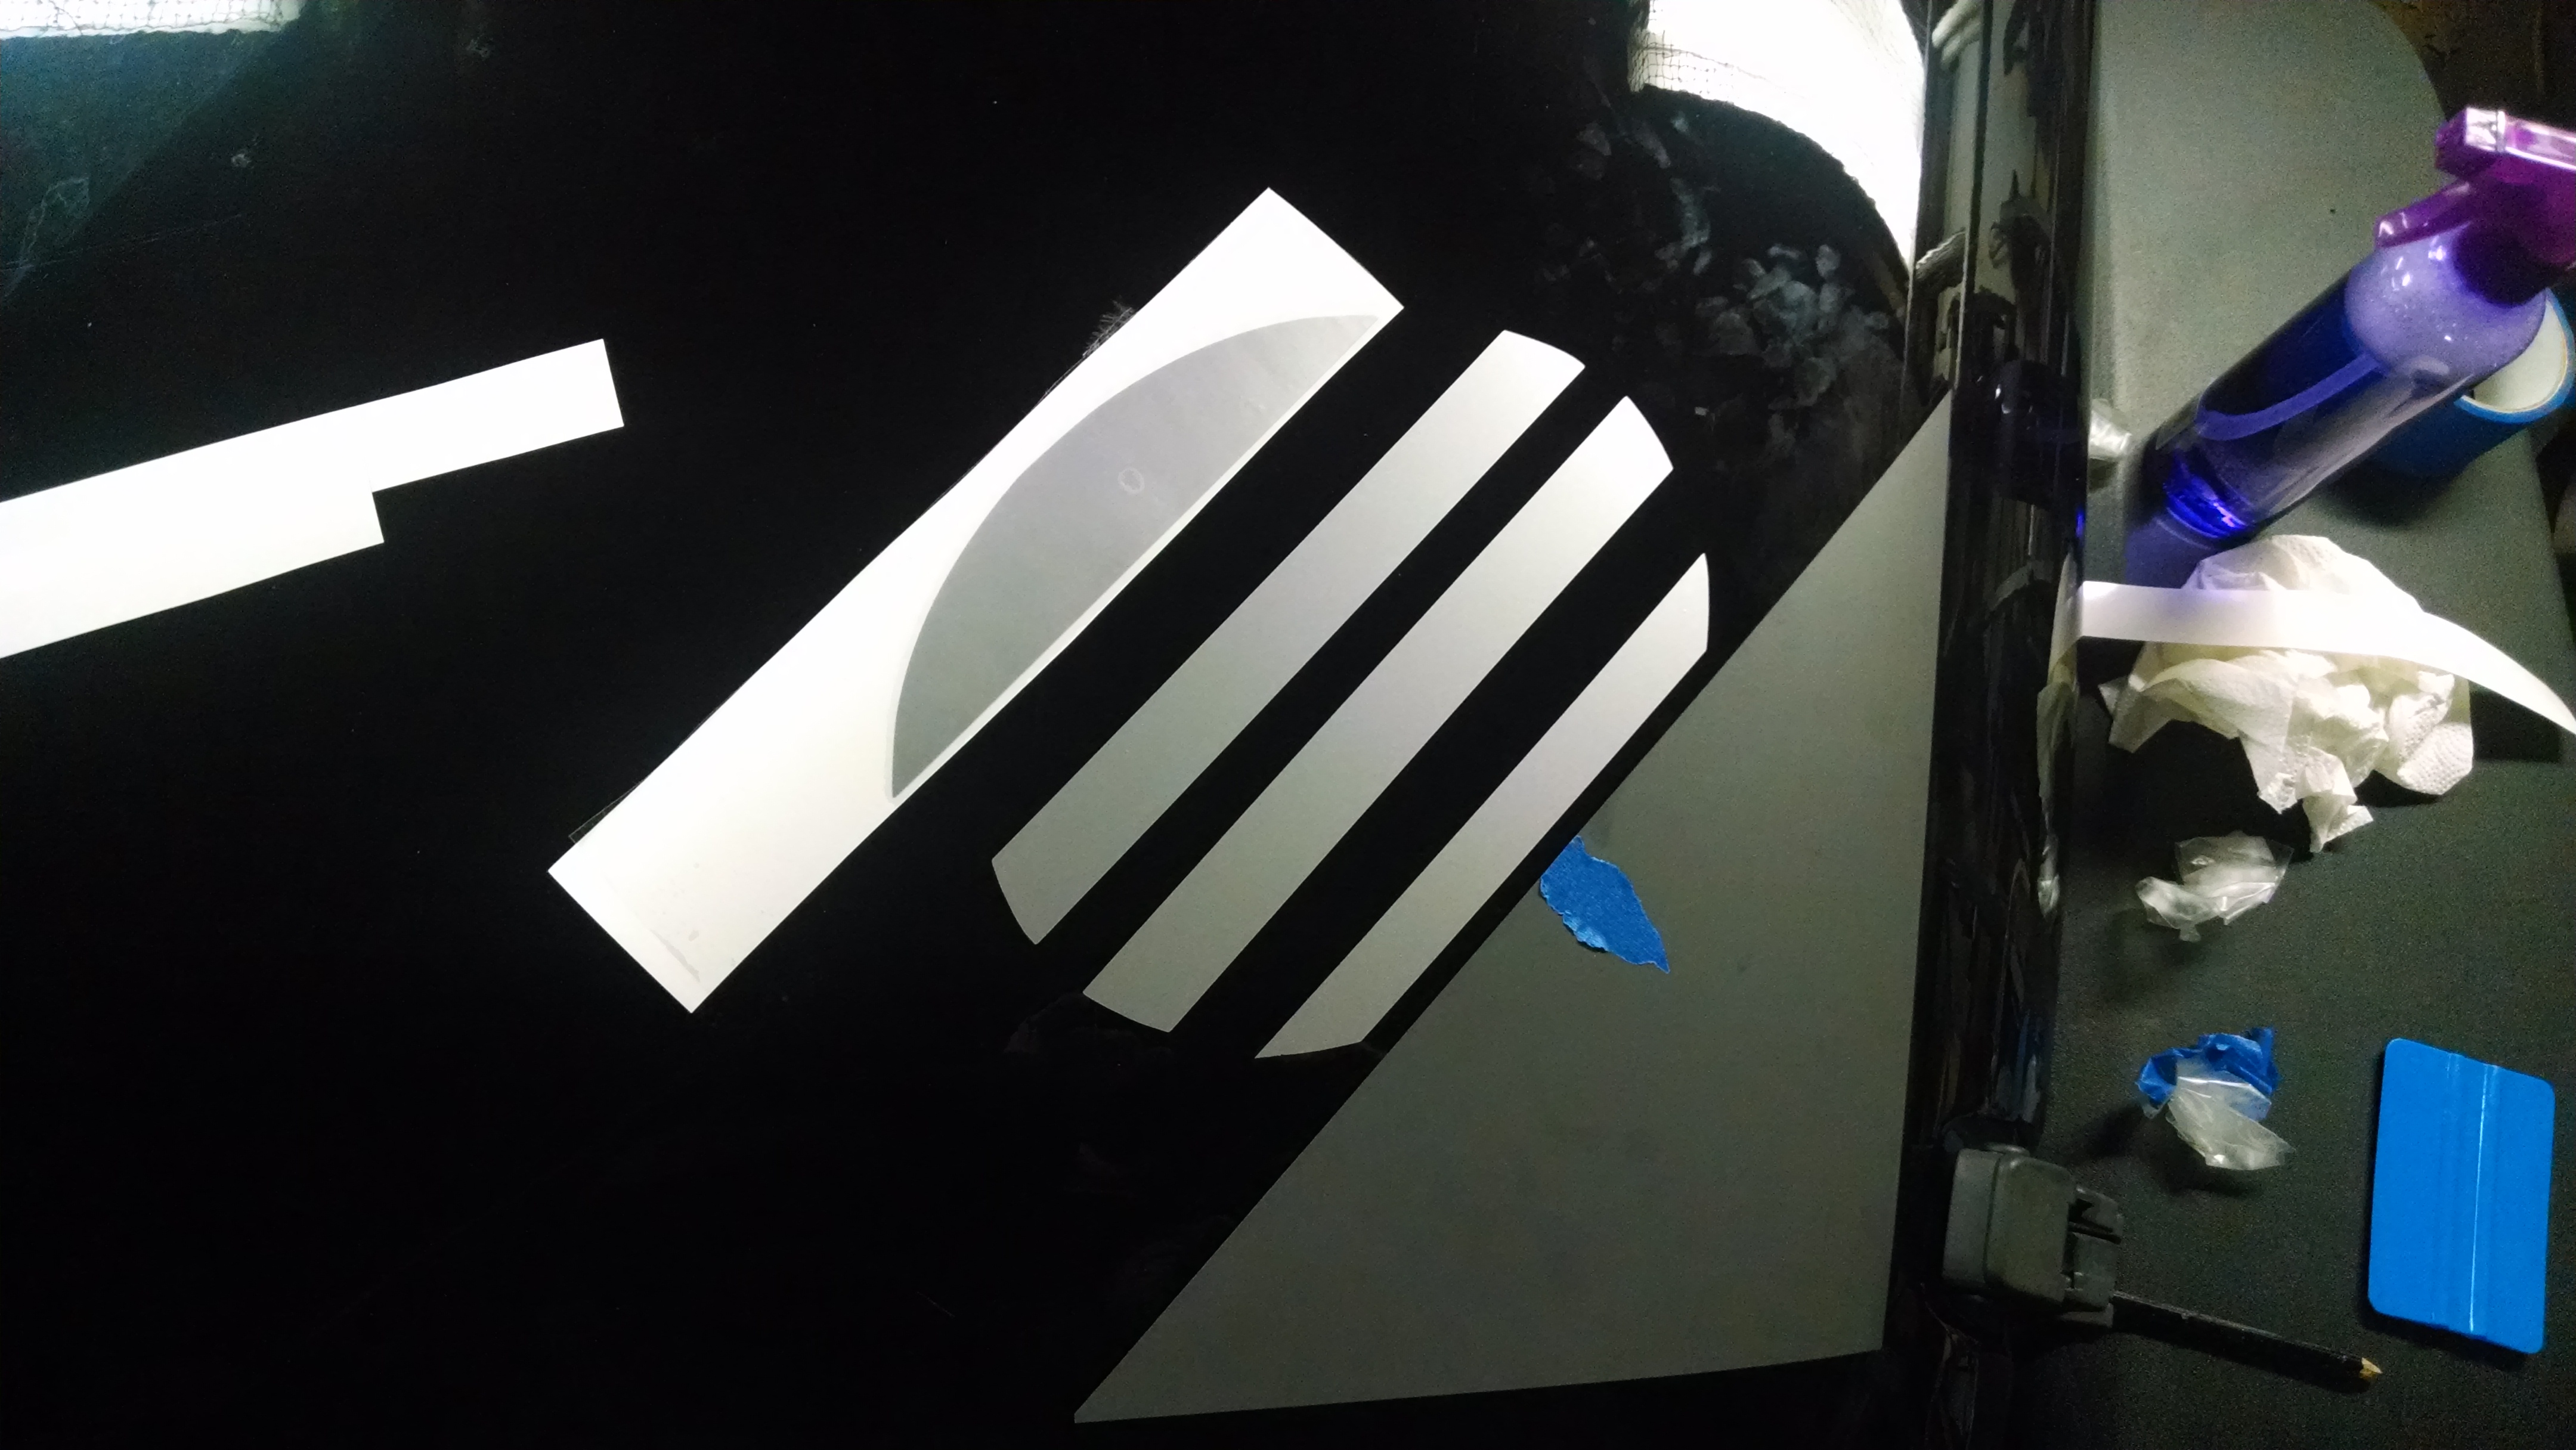
So, I had to make do with a lower quality picture, and I essentially traced the sun’s in Photoshop, and then cleaned up the selections. Then, i scaled them waaaaay up, to 12000 pixels, so I could then scale them down to whatever size I’d like without losing any quality. Then I had the mat size problem to tackle. I took the sun, and the shadow effect, which are cut into 4 sections (as you can see above). and then collapsed them. I ended up with 5 sheets cut (which is good, because I only had 6 sheets of the color I’d chosen for the sun). Three of the collapsed sun, and two of the collapsed shadow. The hood decal doesn’t have the shadow.
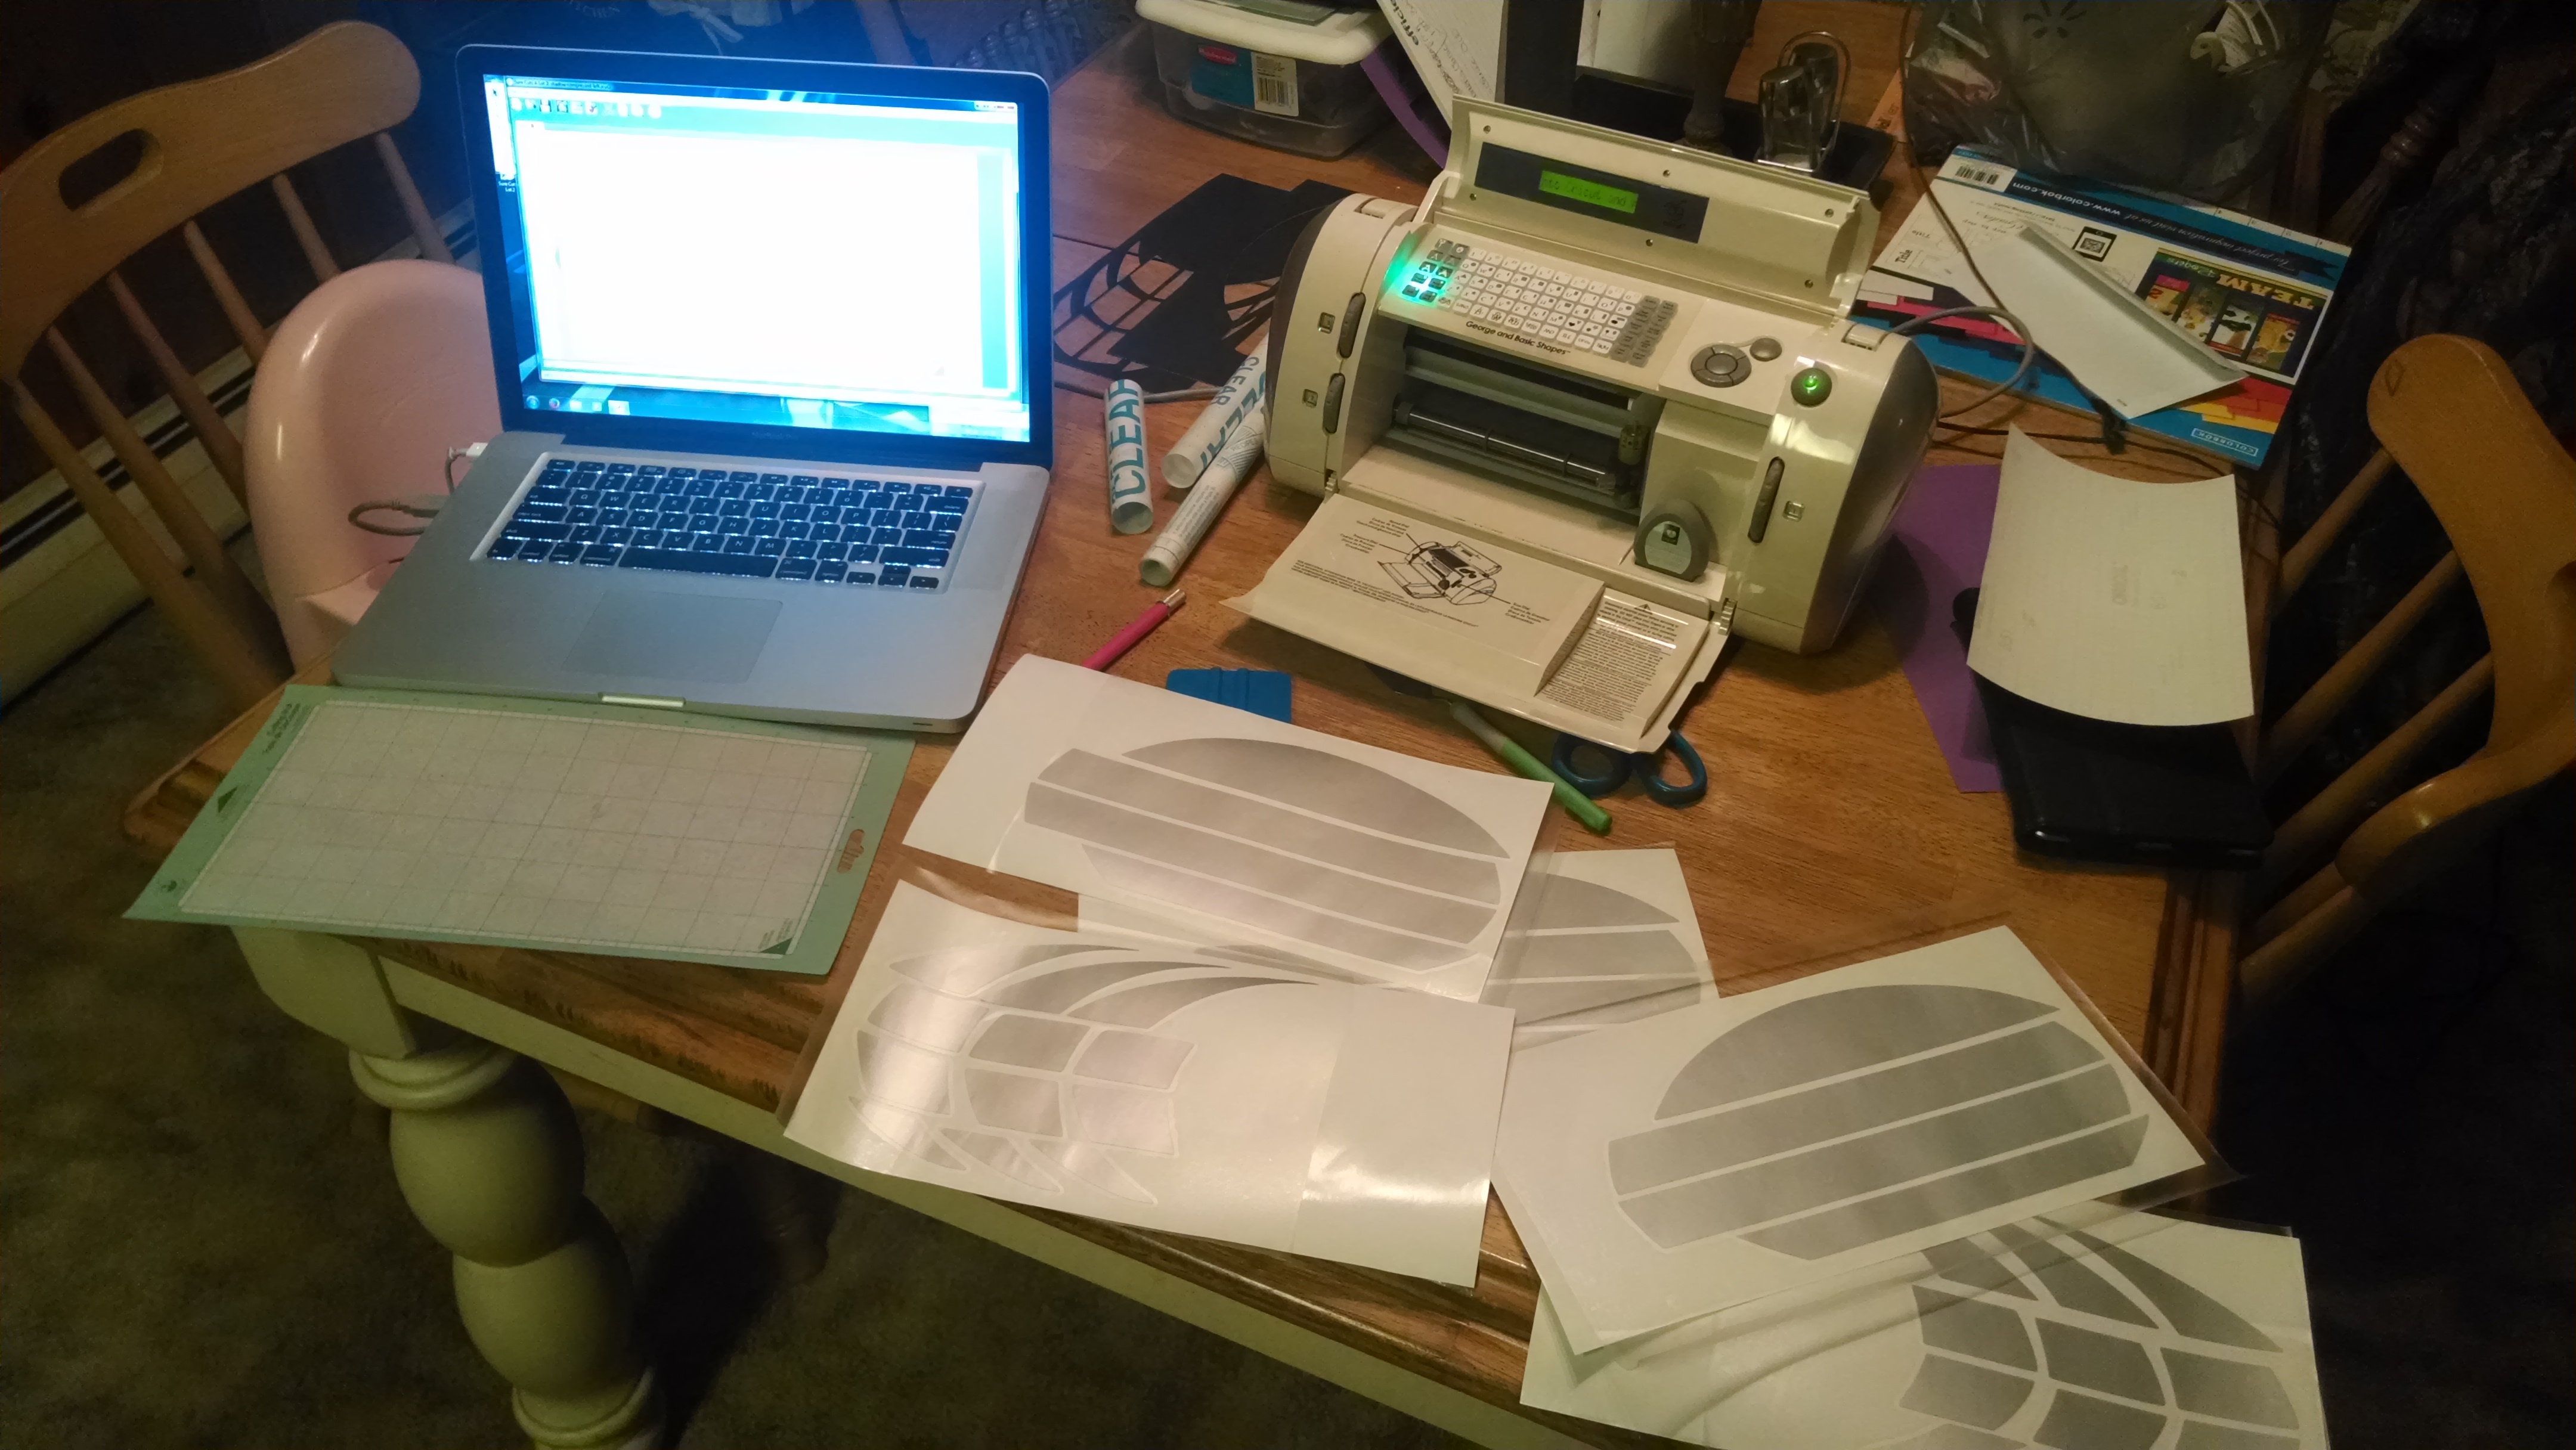
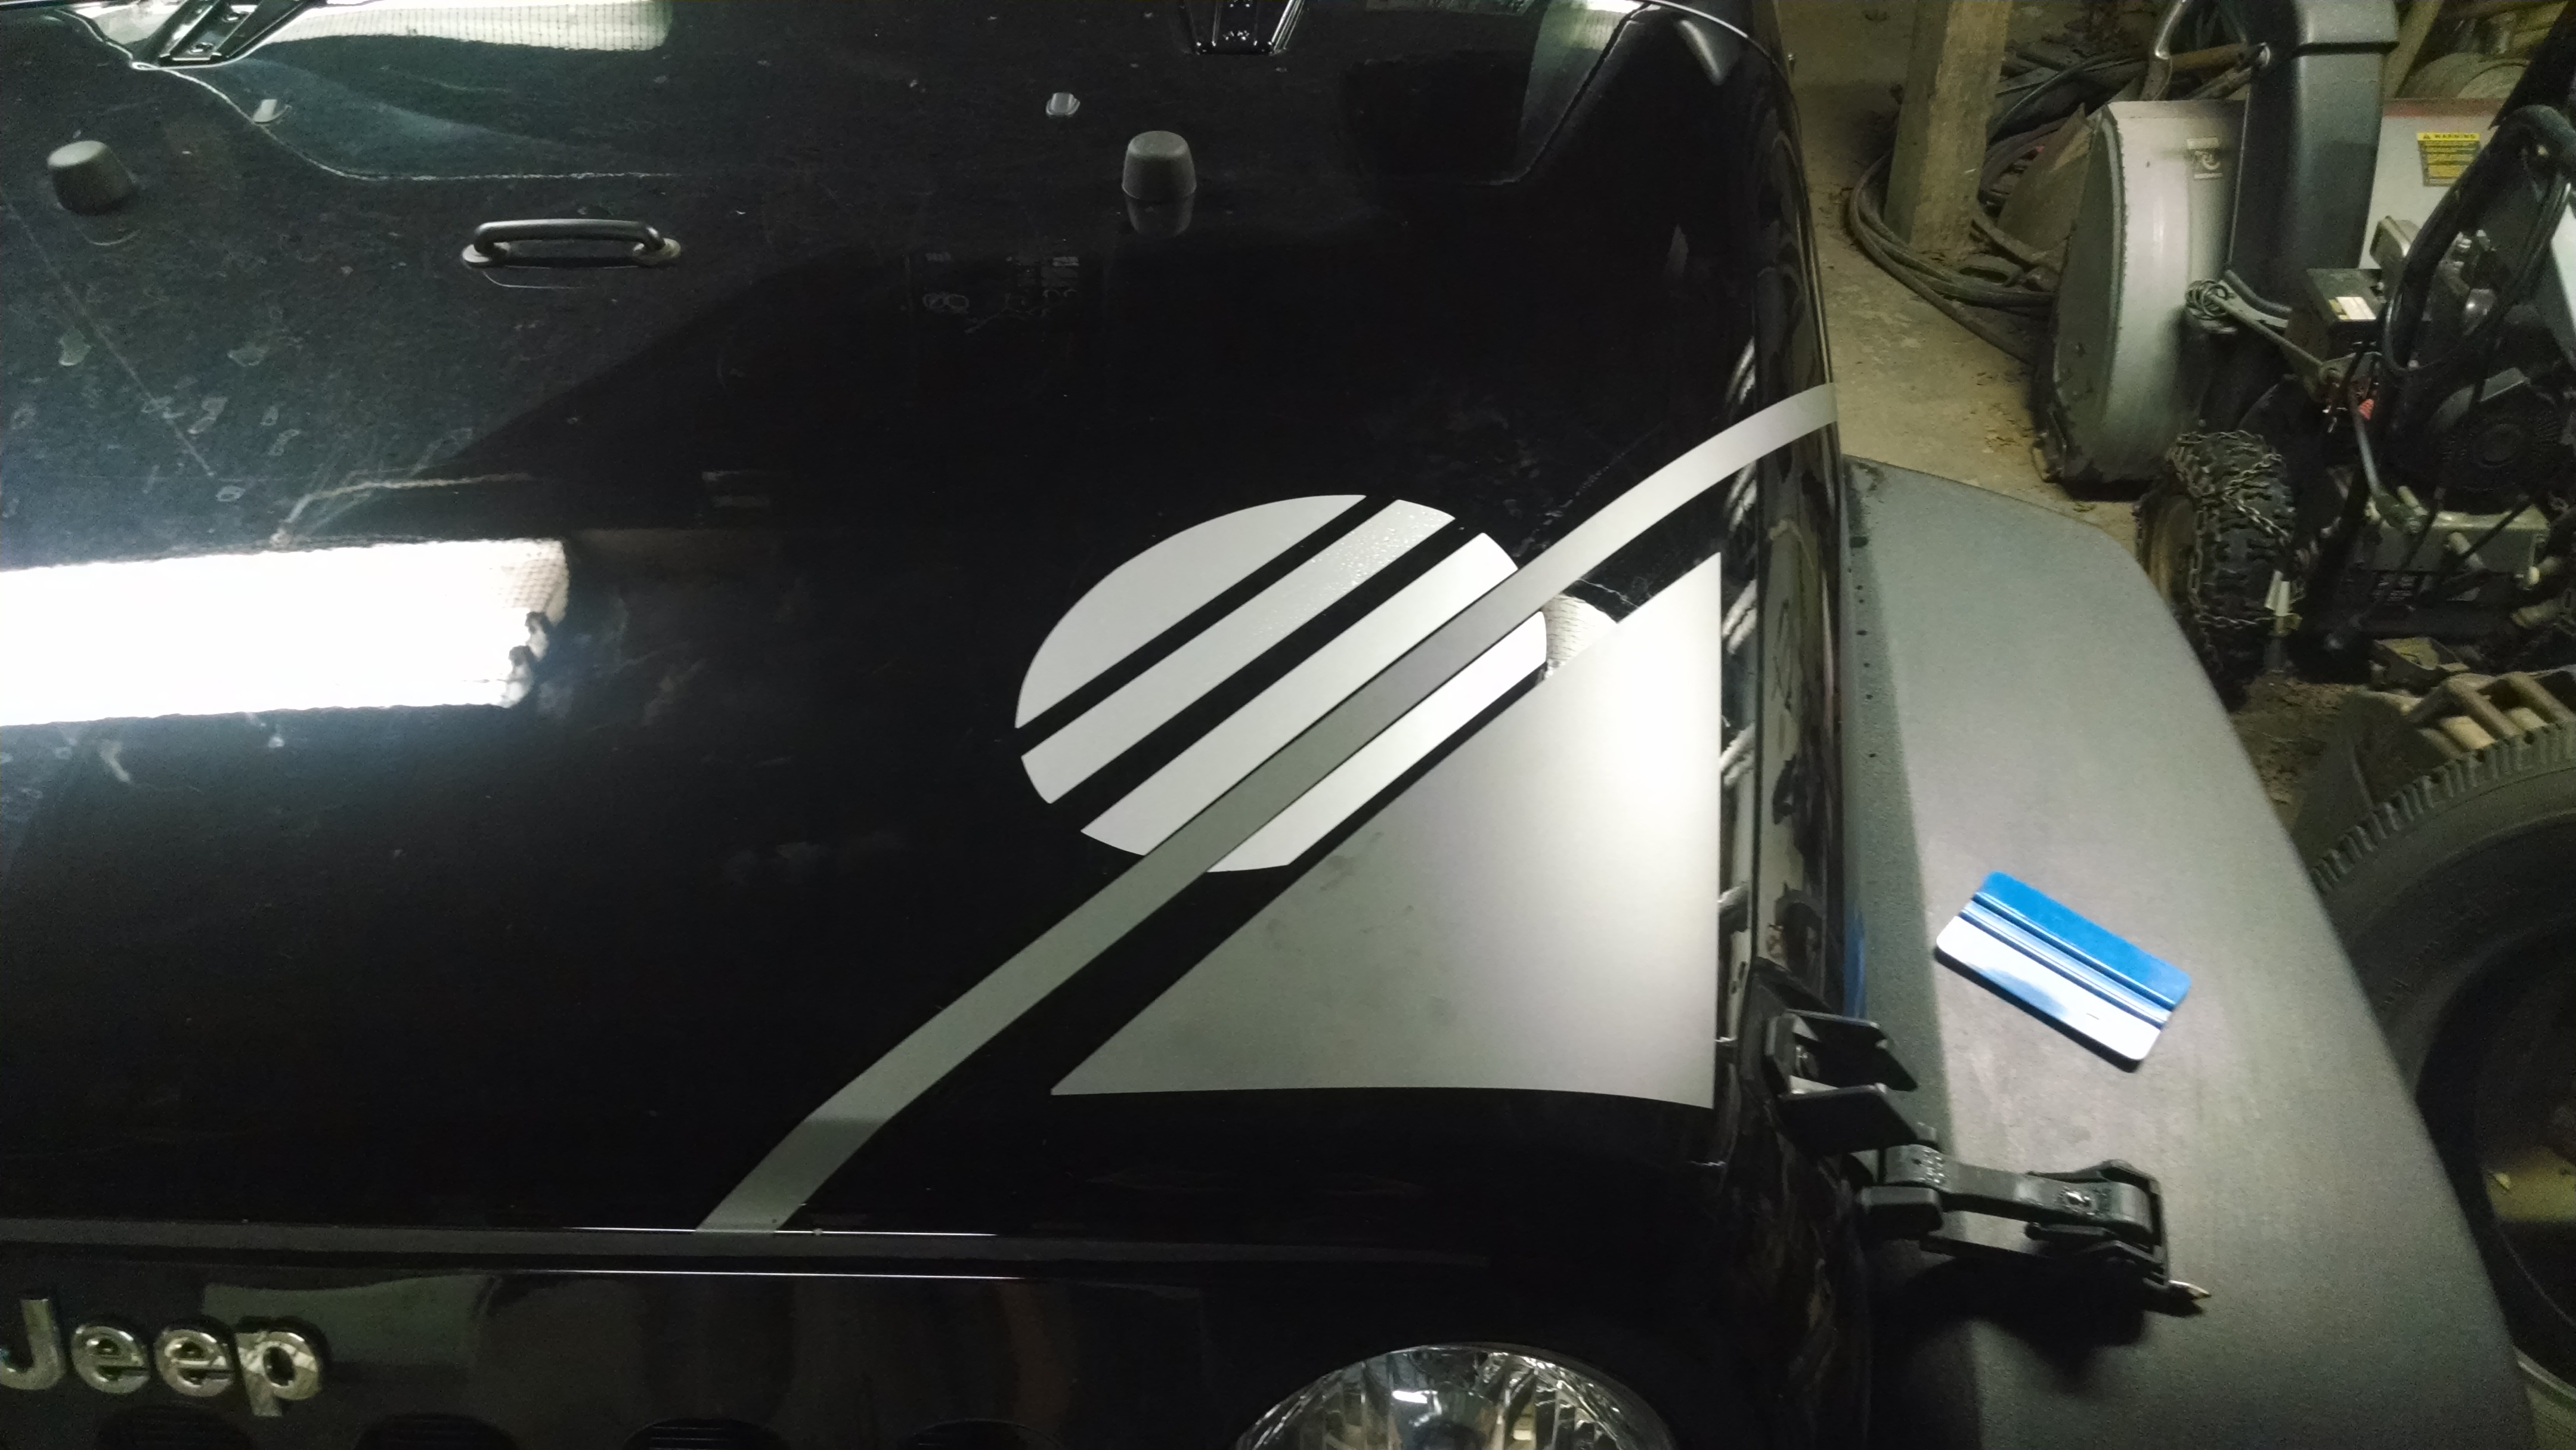
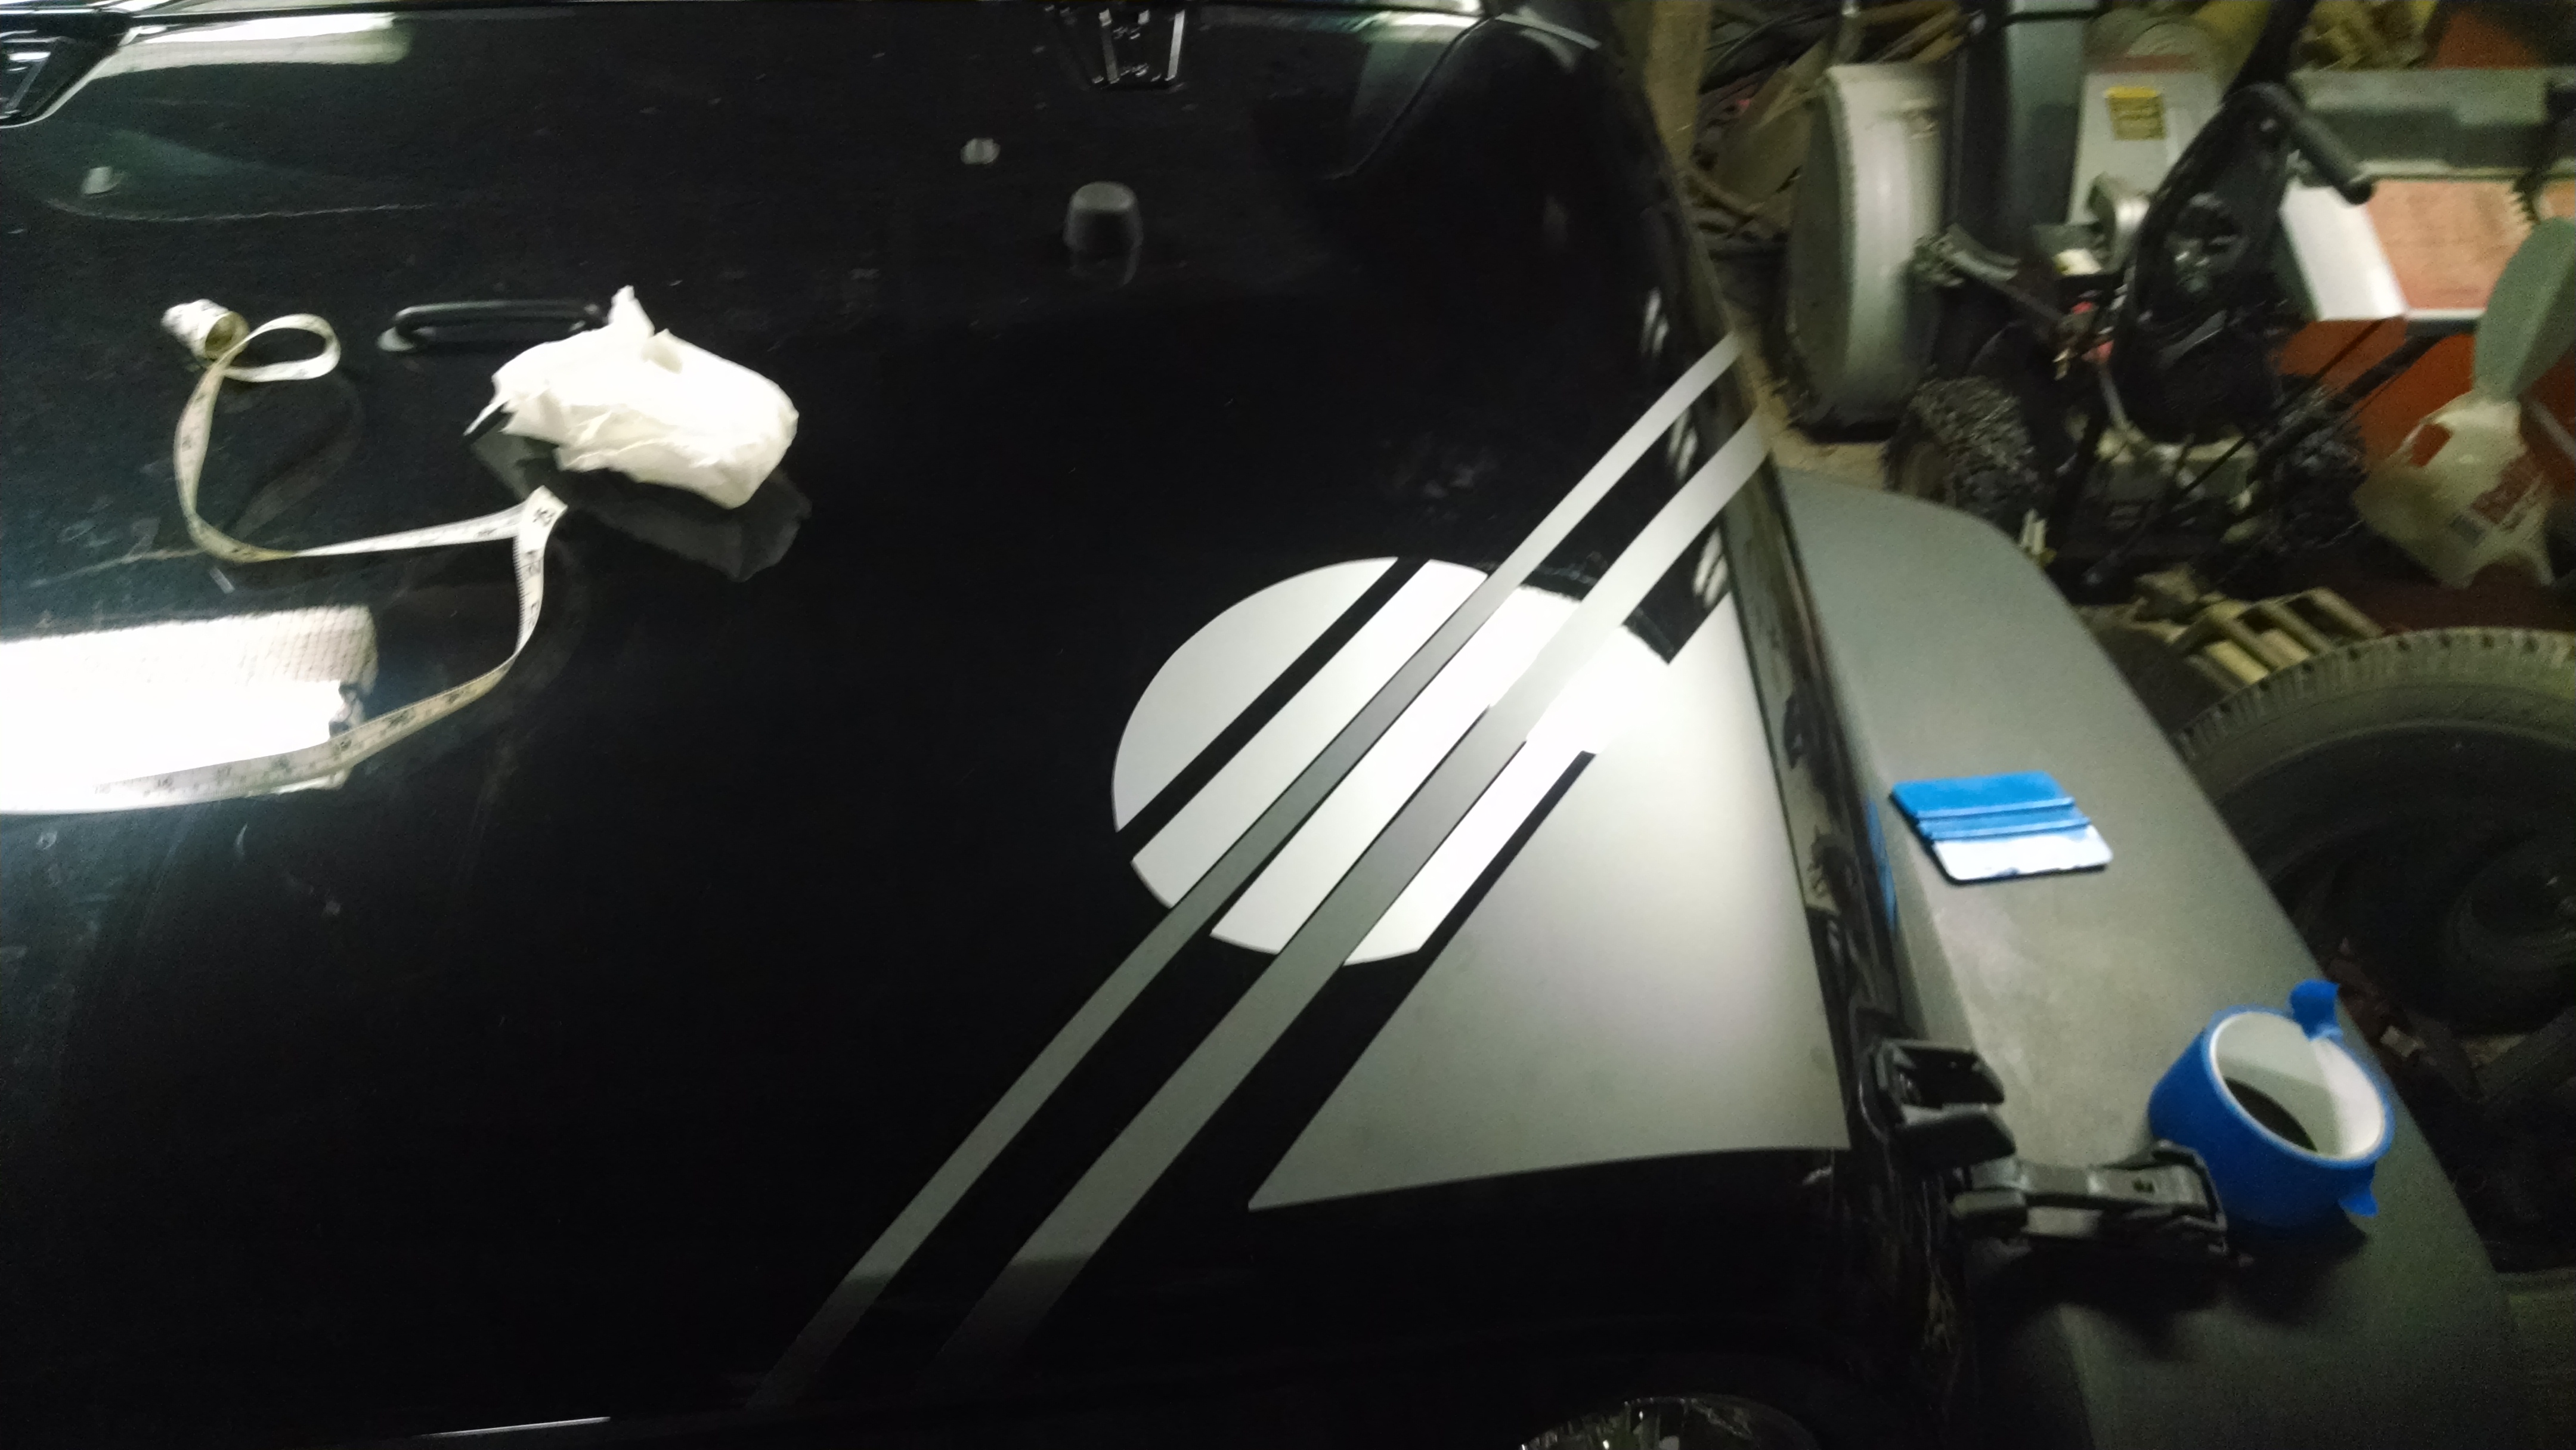
As you can see, the sun’s are silver. I decided to go with a somewhat muted color scheme. silver sun’s, and dark gray stripes. The stripes were simple, I didnt need the cricut for those, I just cut strips to length using my wife’s quilting mat and cutting wheel. Worked perfectly.
Once I had all the pieces, I went to work. First on the hood. The hood decal on the YJ went in the center raised section on the hood. It had a triangular base, meant to look like a horizon, then the sun was rising from (or setting into) it. Then the sections of the sun were separated by bars. The bars also extended just to the edges of the raised center section. All of this at about a 45 degree angle on the hood. Well, the JK doesnt have a raised center section. Its just a smooth hood. So I decided to extend the lines over the curve of the hood.
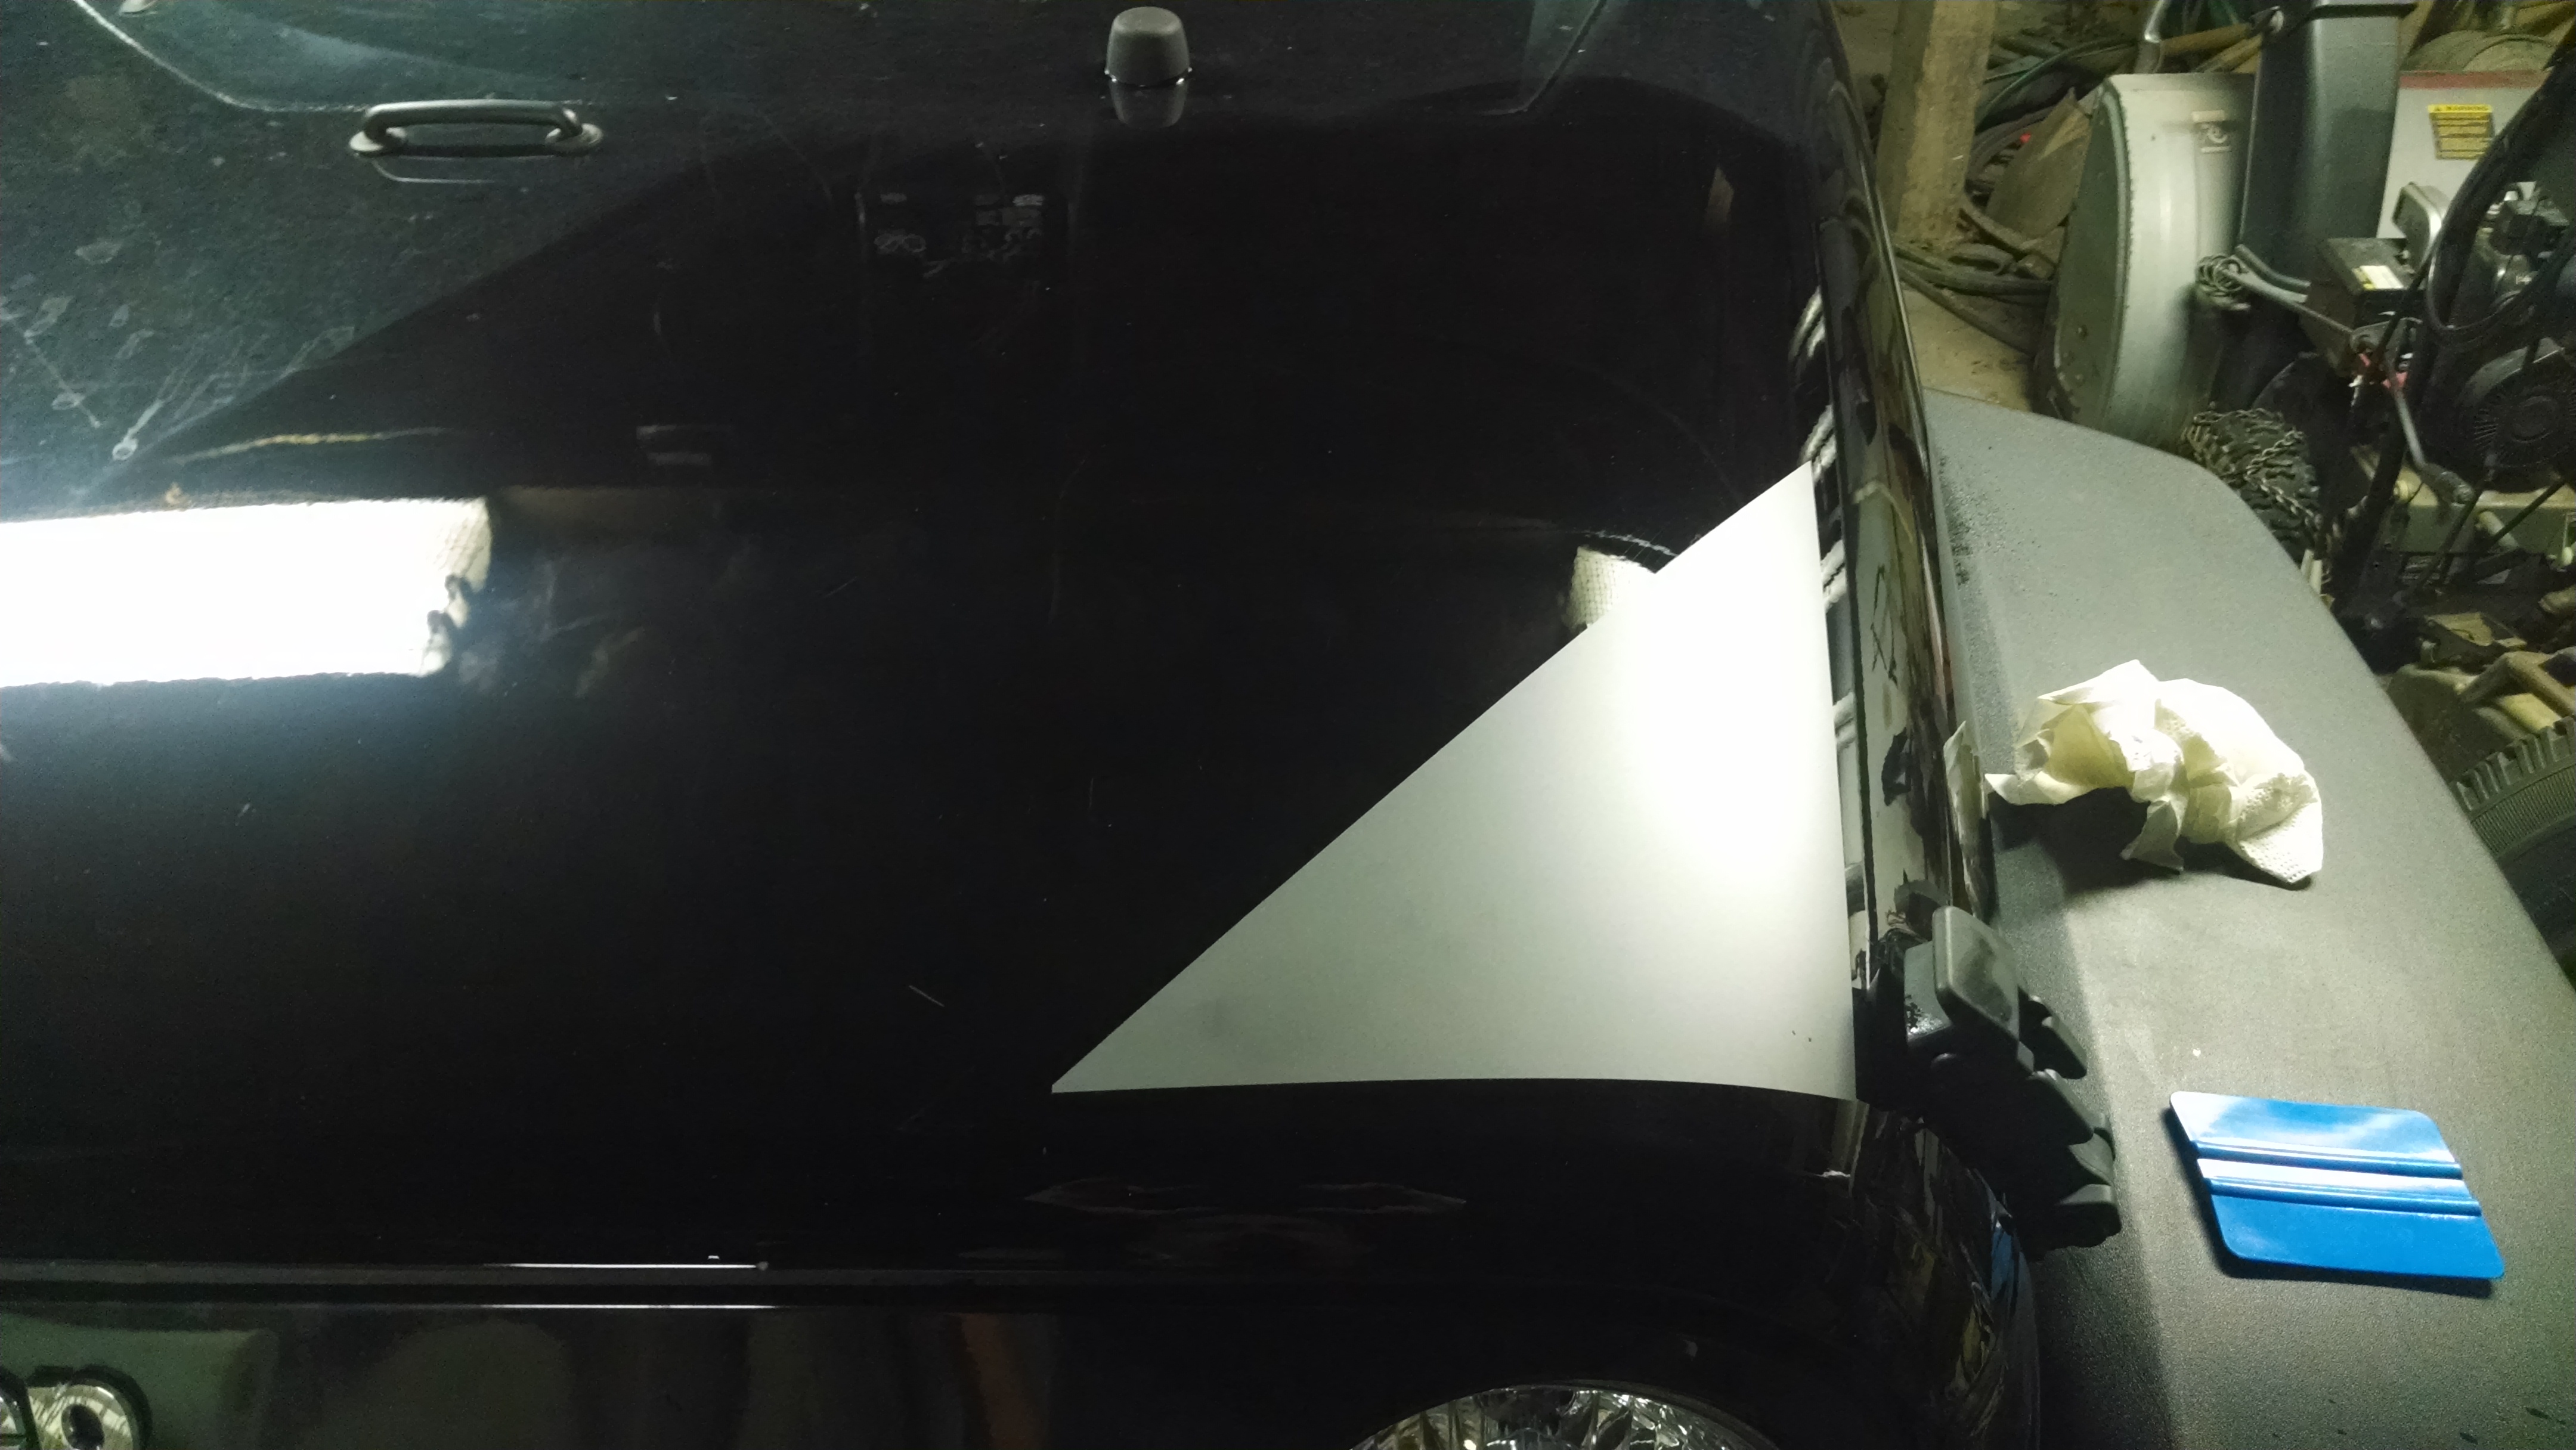

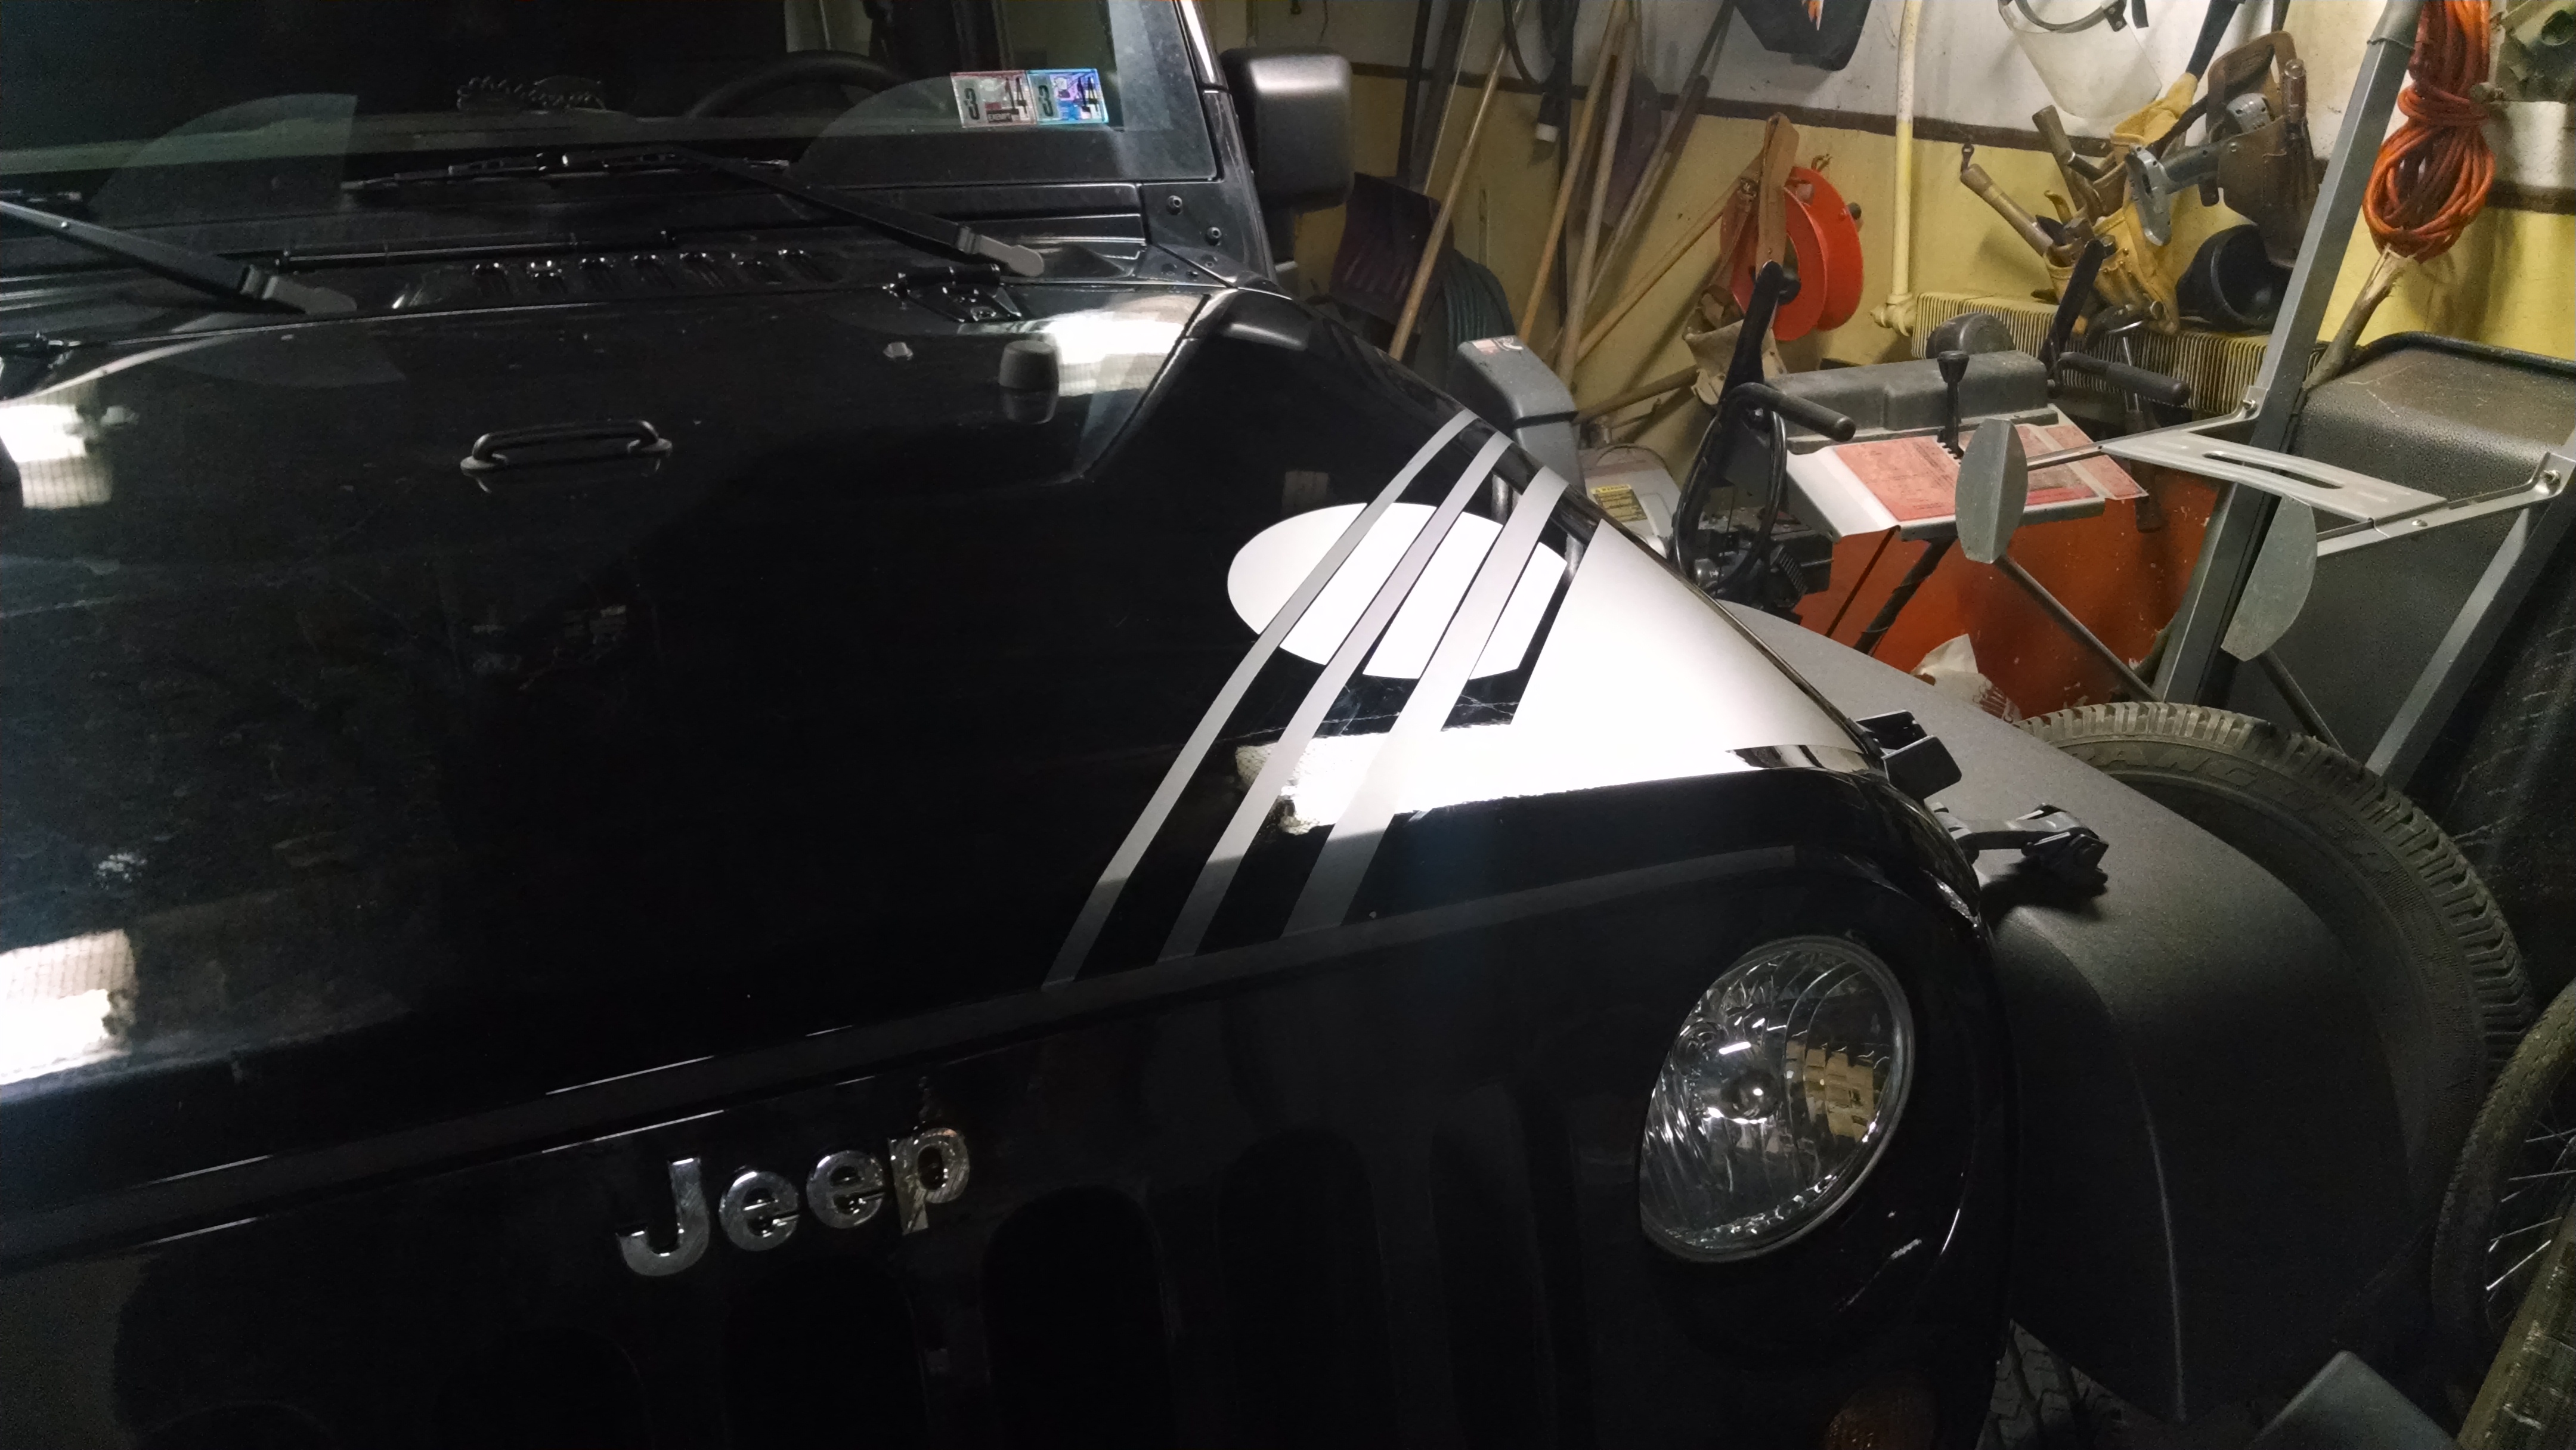

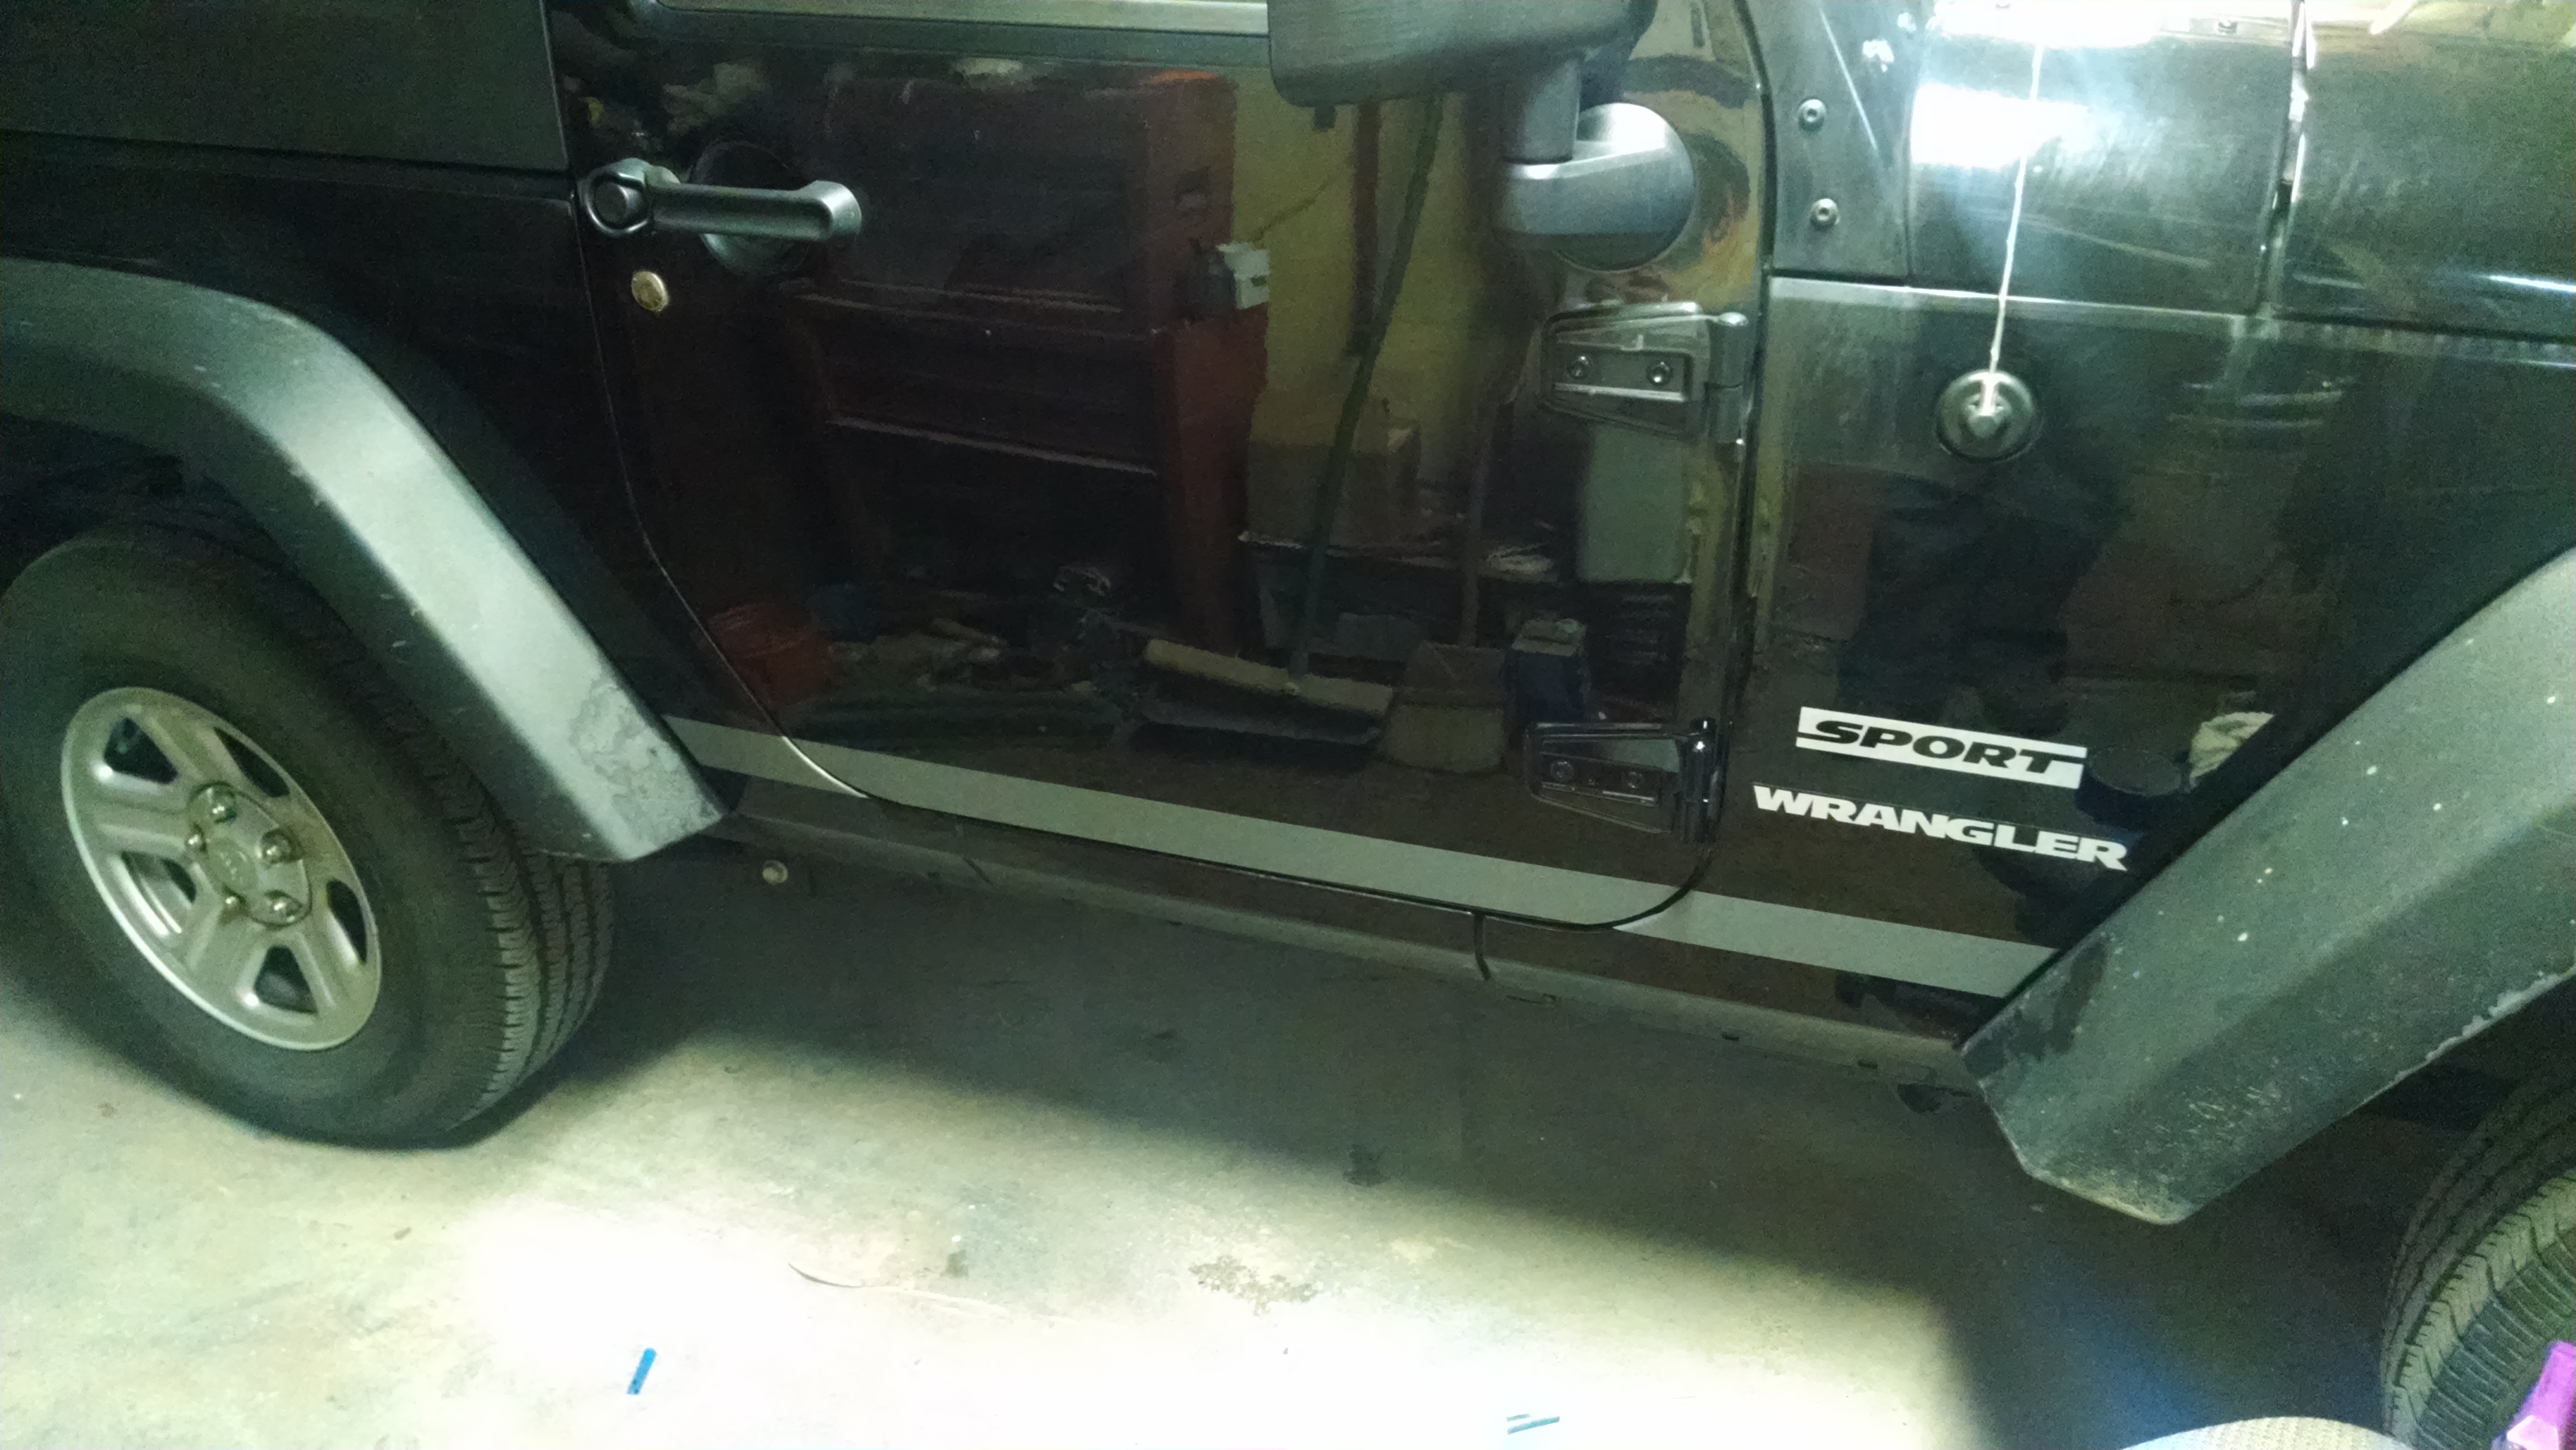
So, with the hood out of the way, I set about tackling the doors. The concept is simple, 4 strips for dark gray that run along the whole side of the Jeep, and the sun segments go between them. Then the shadow’s brace the rearward side fo the sun. It took some getting used to, but I figured out that taping the strips in place, and then applying them half at a time got them pretty well accurately applied. For the door seams, I taped the unstuck vinyl to the door, then cut the gap with an exacto knife. Same deal for the fenders. This worked really well. I left the wrangler, and sport decals as they were, and didnt put any lines over or near them, stopping those at the door hinge.
It came out nice, once I got the hang of it (after finishing the passenger side door, the driver side went together much easier), it went really well! The shadows were twelve individual segments, what a pain to get those all lined up.
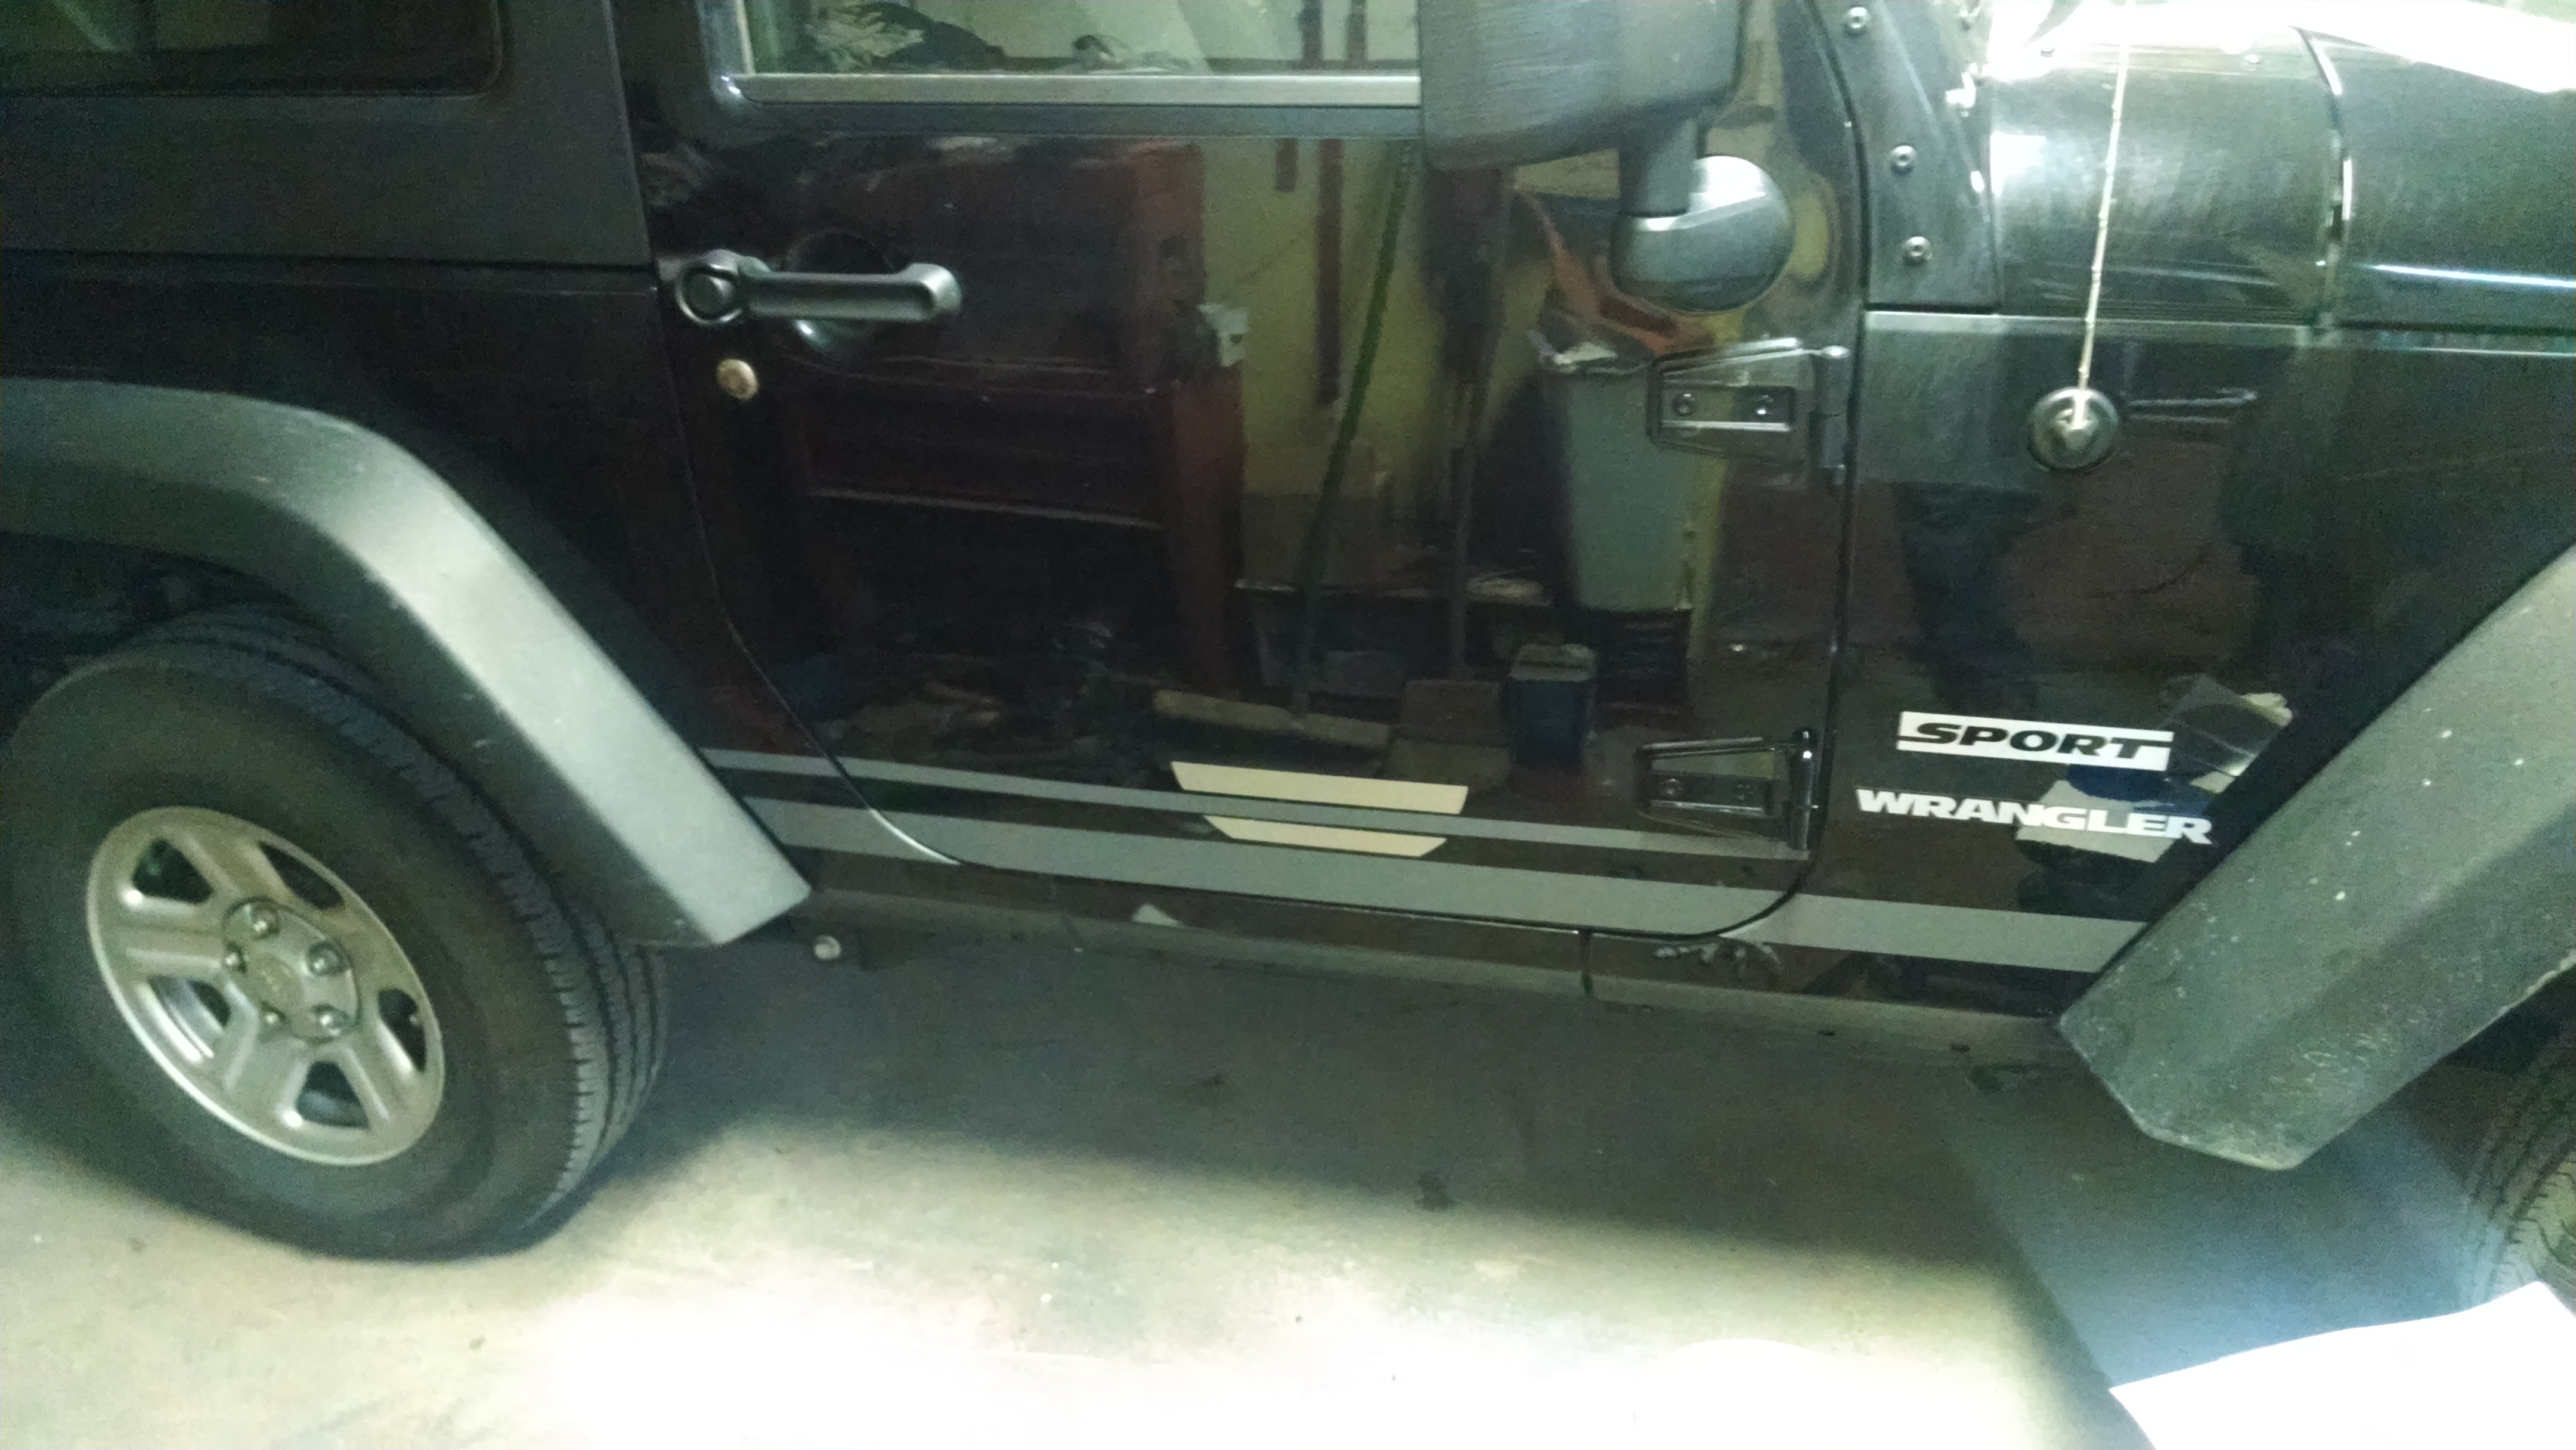

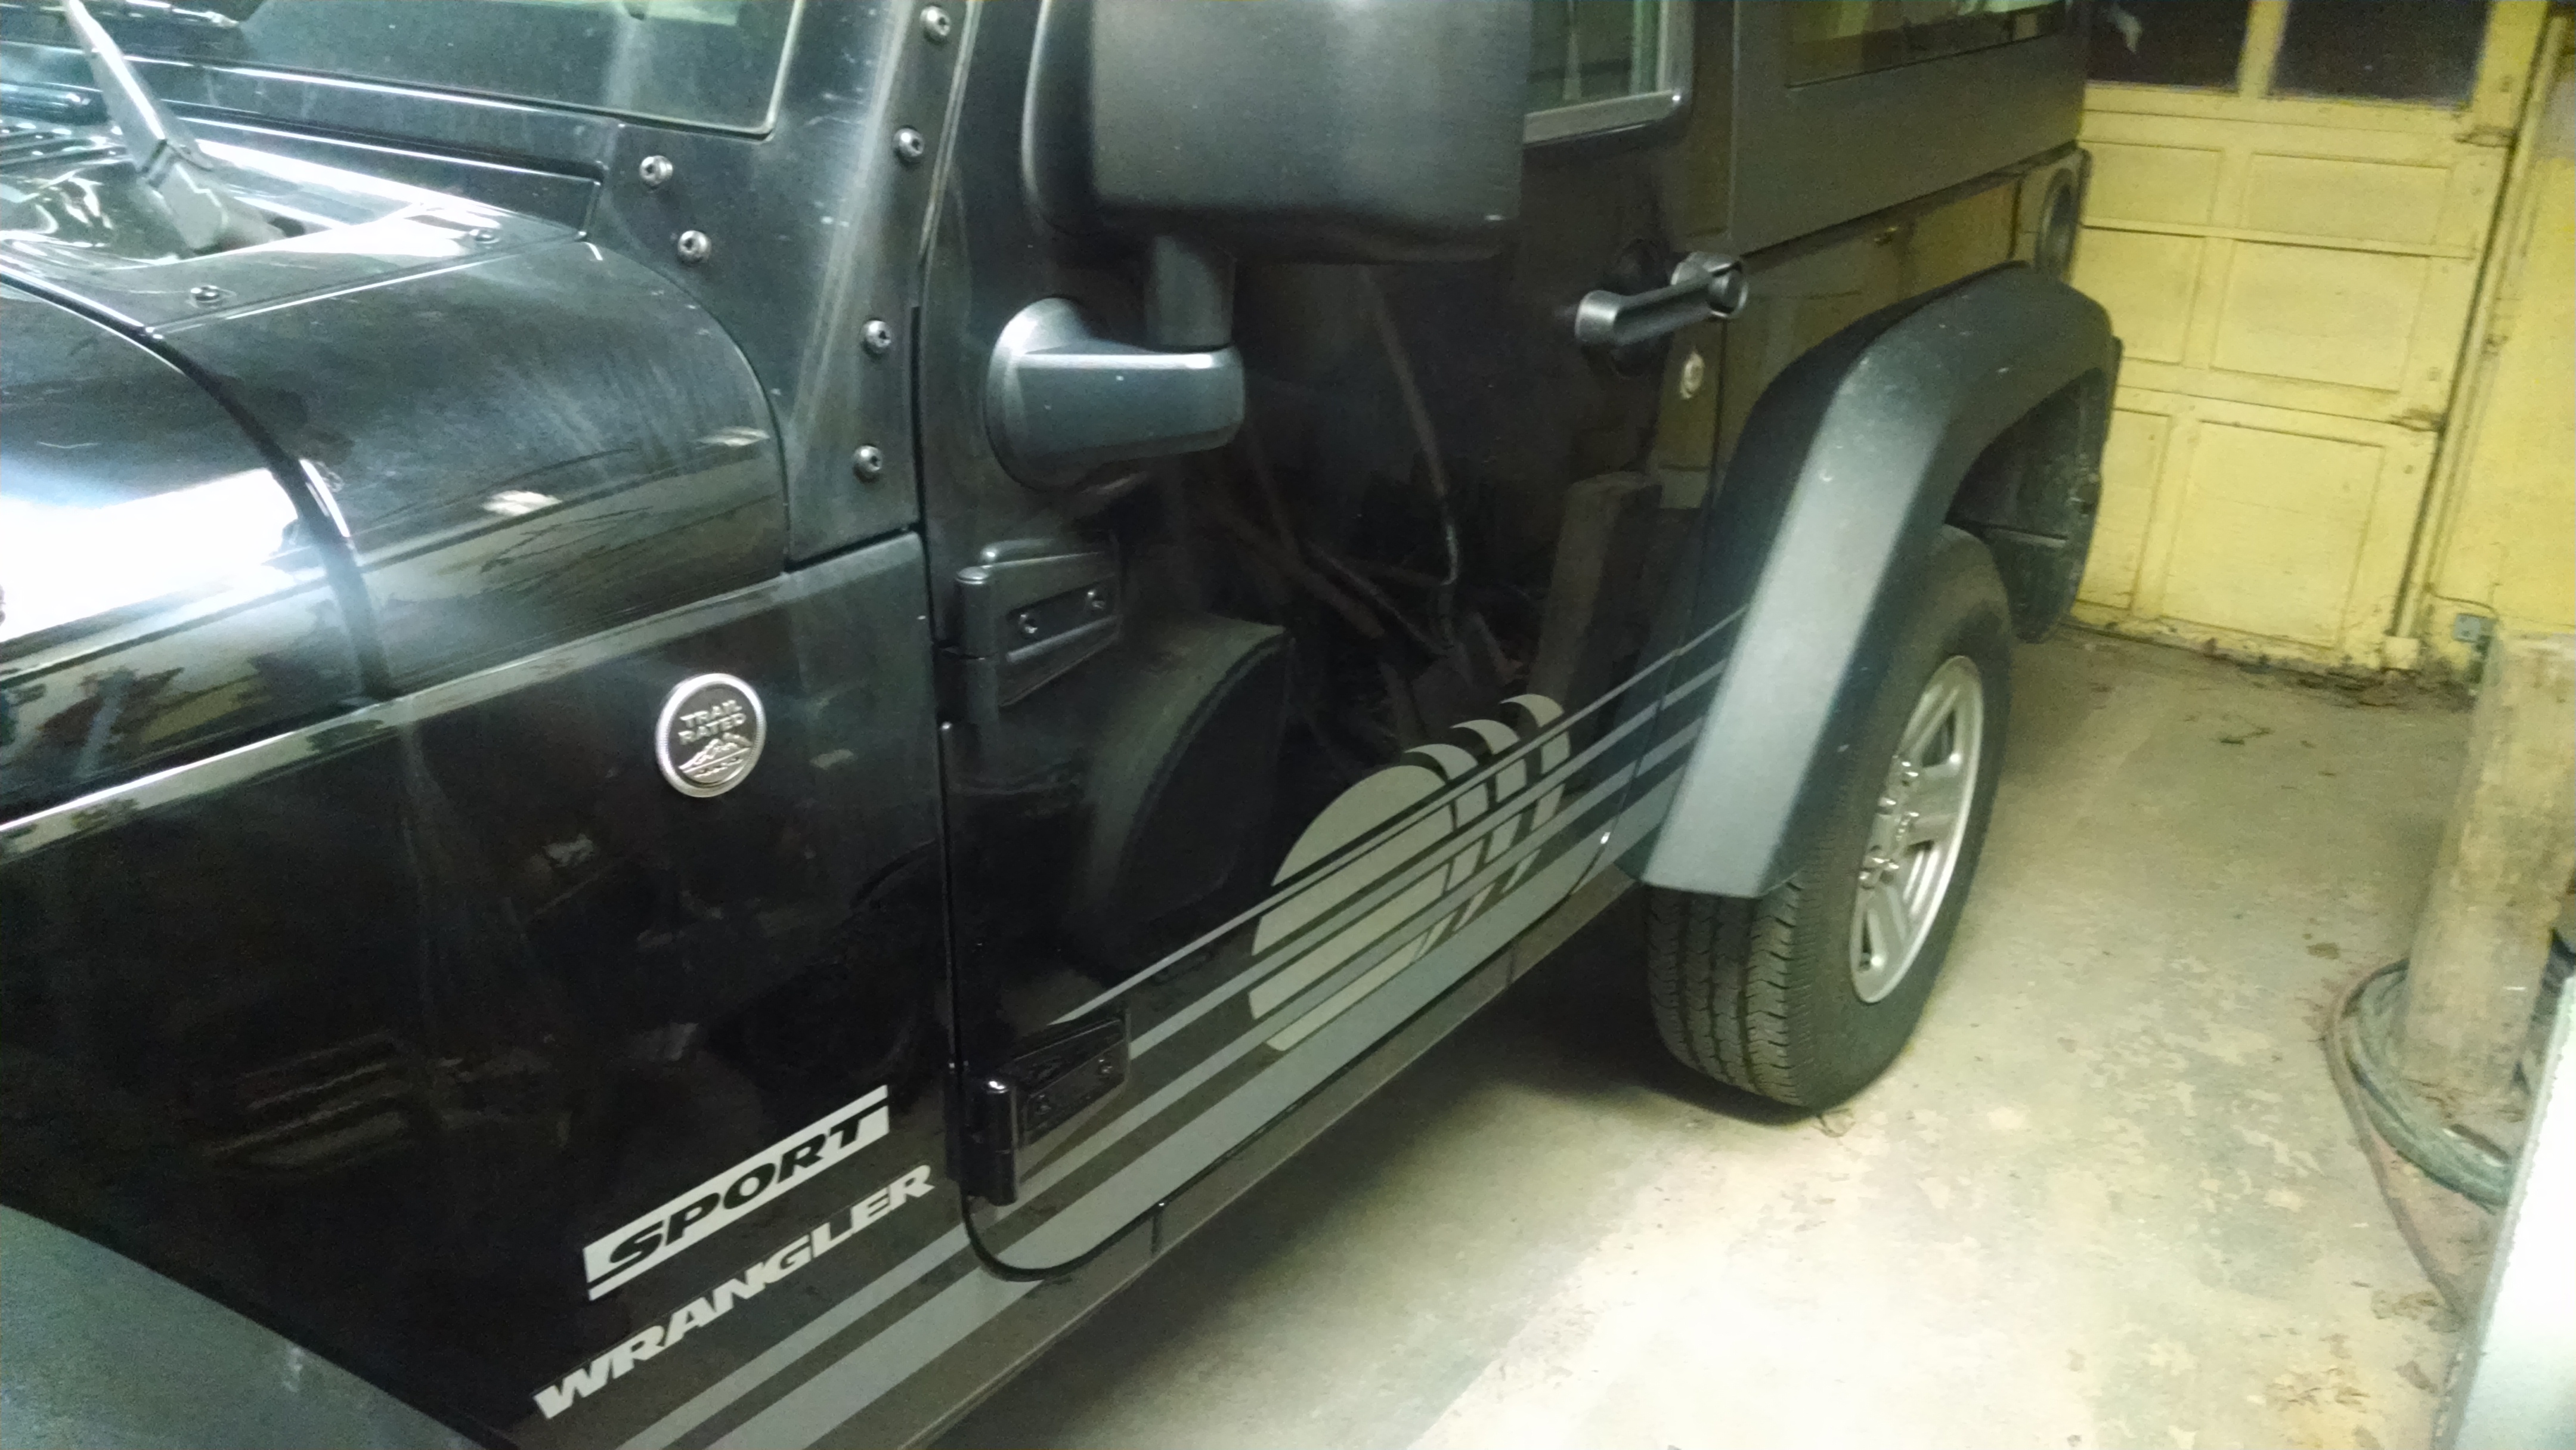
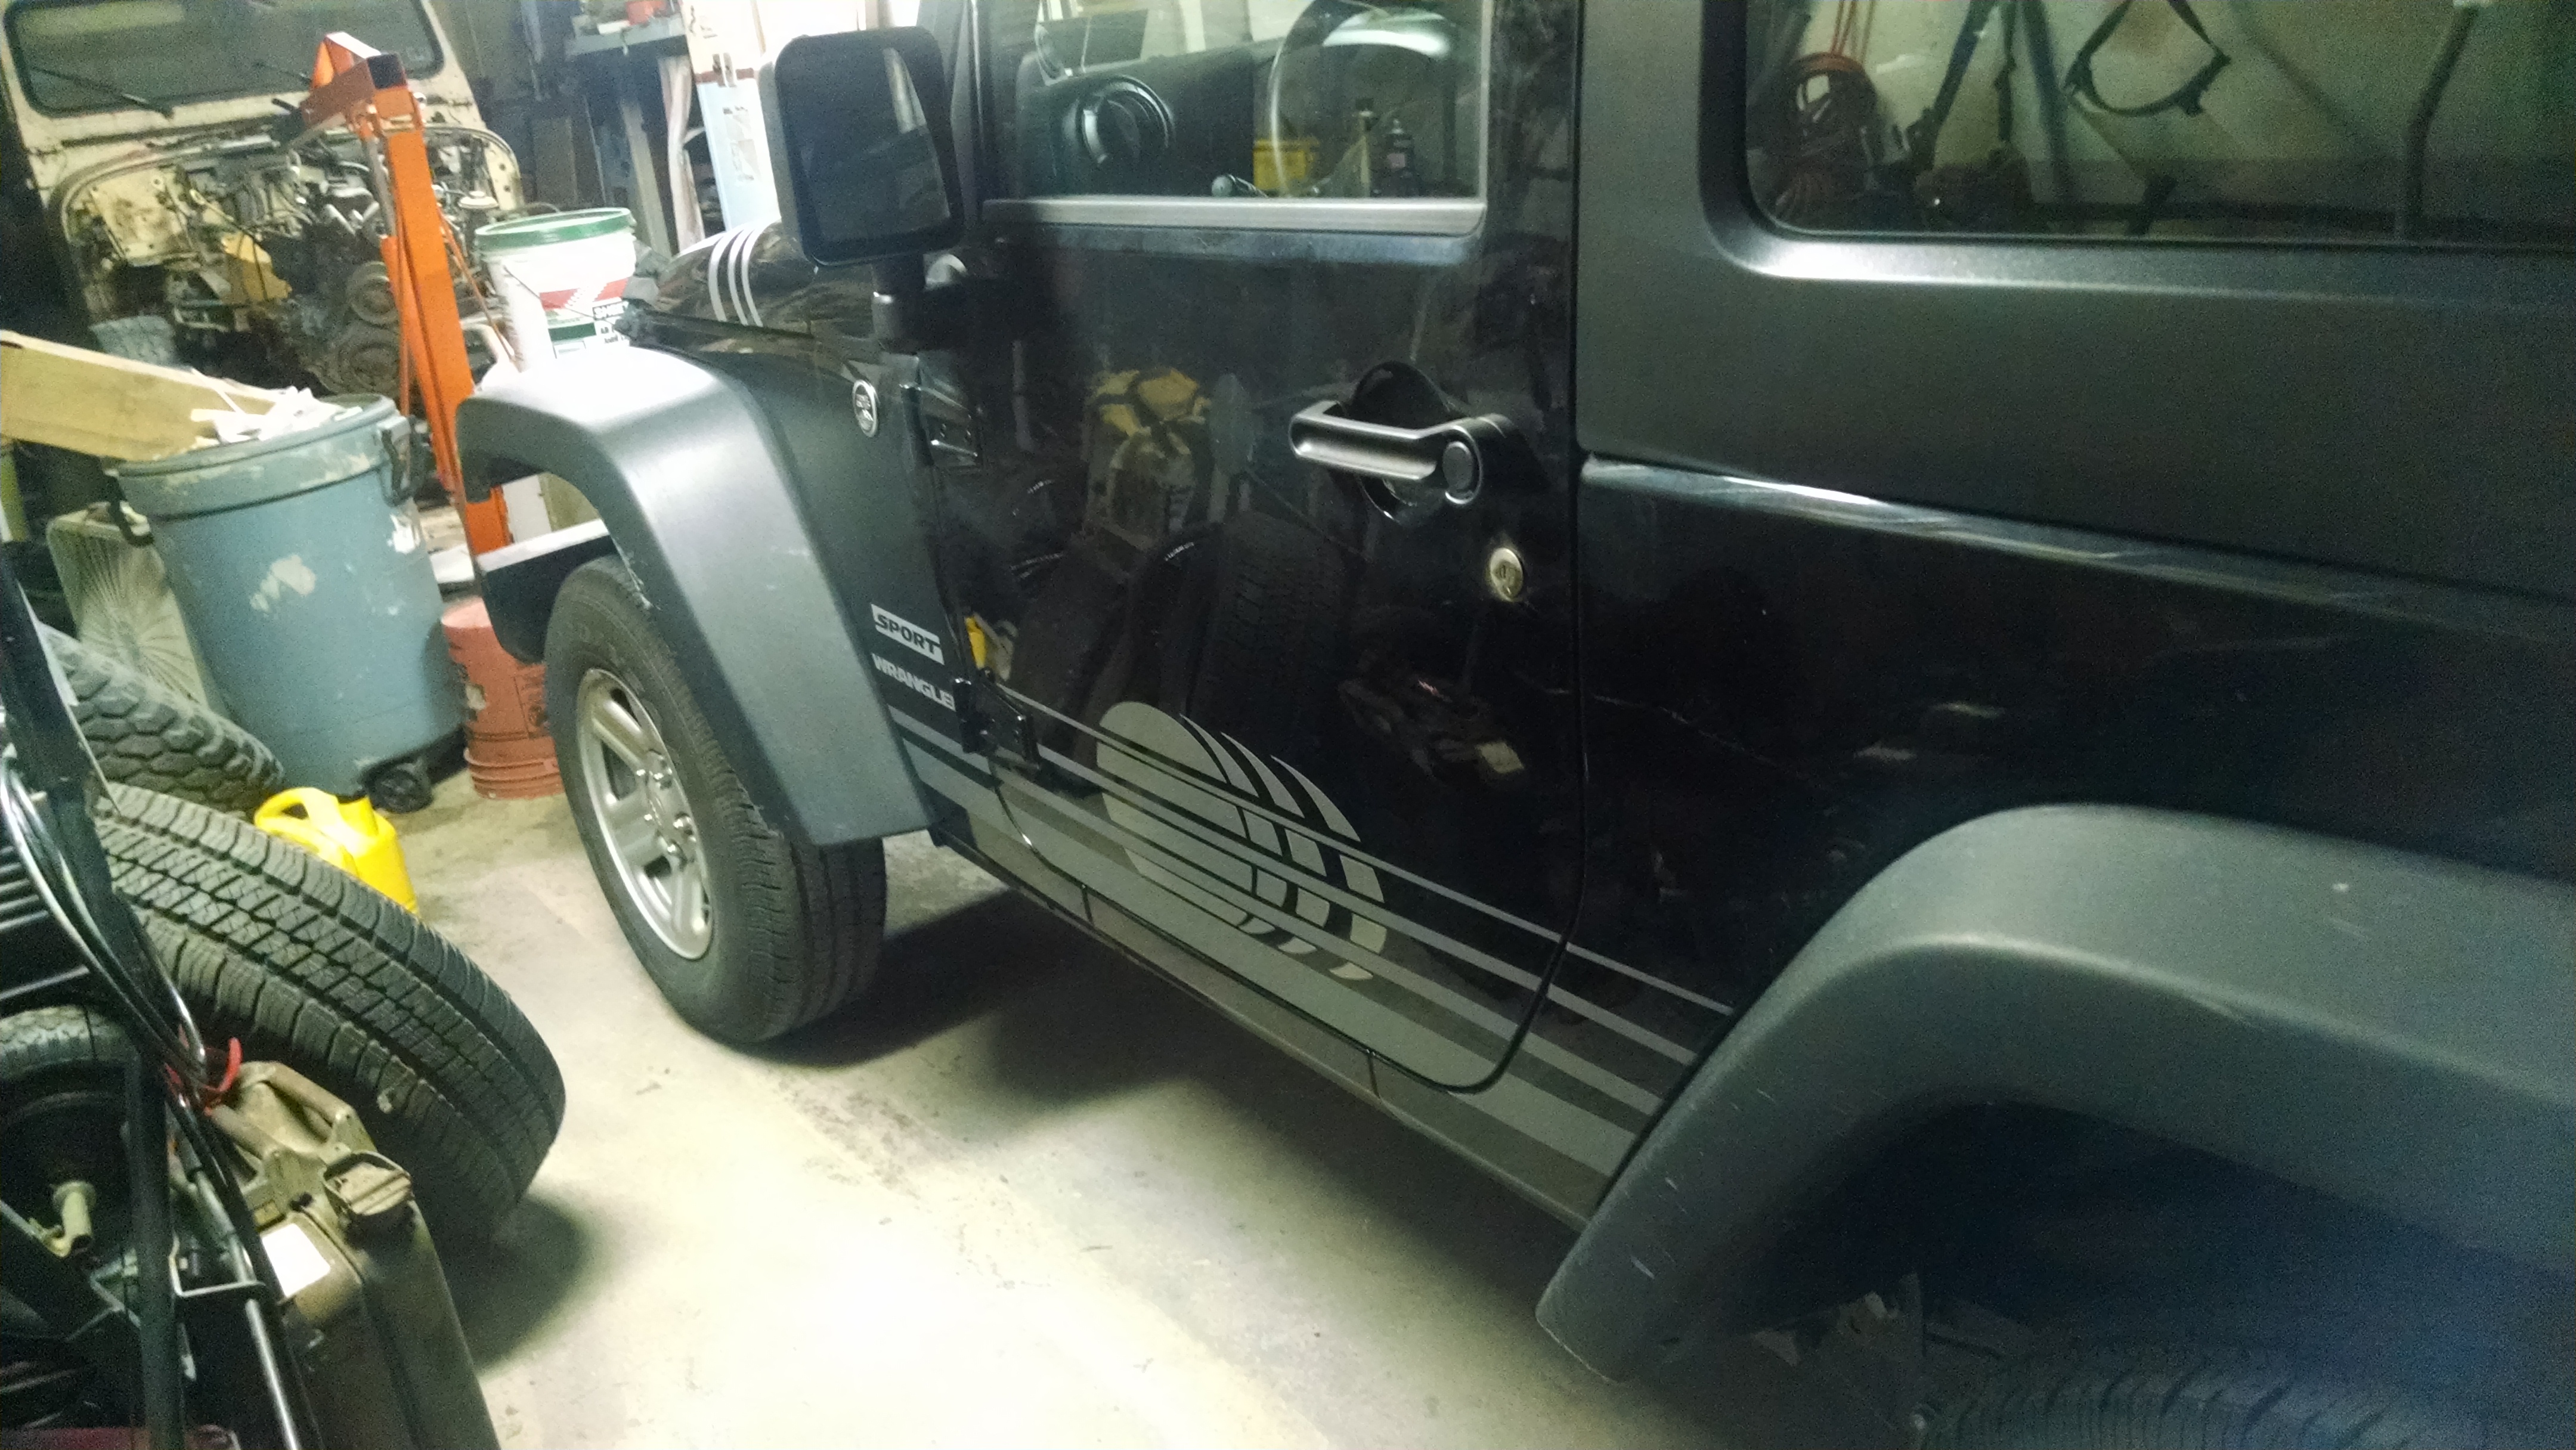
In the end, I’m really pleased with how this turned out. Also, I’m really proud of how it turned out! This was a lot of work, it would have been much better if i had a larger vinyl cutter, but you have to work with what you have. I think this gets me the unique look I was hoping for, and makes my jeep stand out a little more.
In the not so distant future, i’d like to paint the hard top silver (which was part of my reasoning for making the sun’s silver). We’ll see how that goes.
Thanks for reading!