
Like many TJ owners, I found the task of mounting my Cobra 18 WX-ST in my LJ a rather daunting task. The Cobra 18 is a full size CB, not one of these thin units you can get today. I’ve owned it for 20 years or so, and its a great unit. It’s stood up to running in my YJ, JK, and now LJ. I see no reason to replace it, but it’s sort of a behemoth. Sure, you can get one of those slim units, or the Cobra unit that’s all built into the mic. Honestly though. I like my CB, I have no interest in replacing it. I ended up mounting it on the section of the dash below the steering wheel. That space is relatively un-used, and easy to remove so I could get my mounting bolts through it and secured. This was ok, but it was difficult to see while I was operating the vehicle, and even though I’m a short guy, it did hit my knee from time to time. I saw a post on social media where another LJ owner had moved the HVAC controls in his dash down to the center console in front of his shifter, then moved his stereo to the opening left behind, and finally mounted his CB where the radio was.
I thought I’d give it a shot, but instead of moving the radio, I thought putting the CB where the HVAC controls were, would be just fine. I asked him if he’d considered this, and he said that the depth of his CB, and the lack of depth of his radio (he has one of those slim units, with no CD player), made this the best option for him. I also have a slim head unit in my Jeep, but I still didn’t want to move the radio down, and remained more interested in getting the CB in the slot that the HVAC controls were in.
I decided to mimmic his HVAC control setup. Which looks like this:

His name is Mike. Mike has a much more evolved sense of crafstmanship than I do. His setup is an example of how it should look. Mine turned out OK, but mine suits my needs, and I’m happy with it. Check out that 4wd shfter knob… 😀
A guy I knew from the Jeepaholics Anonymous days, who was a pretty good metal worker, once told me. “If you can build it from cardboard, you can build it out of metal”. So I set out trying to build an enclosure for the HVAC box out of cardboard. My goal wasn’t to build one out of metal though. I had this sheet of heat formable plastic laying around from another project. I wanted to build from that, because I thought it would be easy to work with. It turns out that this wasnt all that necessary. In fact, building the enclosure the way I did ended up making it MORE DIFFUCULT to fit the box down on the console.
Here’s the first incarnation of my cardboard prototype.


And I even went so far as to build it out of my heat form plastic.

I finished that up at the end of an evening, and didnt have time to work on the Jeep for a few days. So I posted that around on social media, and Mike basically told me I could do better.. Mike’s a bad influence.
So, The next time I got into the shop, I took some of Mikes advice, and pulled out the center console, and cut out the tray at the front most section of the console. I wasn’t using it anyway, so I wasnt losing much. It took me some time to figure out how to remove the shifter handle on the automatic transmission. Turns out, just pull up, really hard.

This is mikes fault.

I also removed the tabs from the control box, which really moved me into the realm of comittment..

Cutting the tabs off, allowed me to mount the box using much less material, to the console, rather than to the bottom of the dash like I was planning to do.

I used a dremel to get things fit just right, and after that, it slid right into the space I cleared out in the console. Once i had it in there, I had to tackle the next big problem. All of the wiring.
So there are four plugs on the back of your HVAC control box. One of the fan control, one for the temperature, and then two for the selection knob. The selection knob has a three wire plug, and a many hose vacuum setup. The vacuum setup concerned me, but what really turned out to be an issue were the wires. The plug on the fan control has five leads, and the plug is too large to re-route. We had to pull it apart, and pull all of the leads out of the plug housing. Then re-route it and put all of the contacts back where they belong. Here are some pictures that might save your butt if you’ve taken it apart and forgot what order the wires went in.


The three wire plug on the selector knob though, is too short to be re-routed. We had to cut the wires and splice in some extra wire to lengthen the connector. We found out after we made our cuts, that one of the wires from the fan plug just jumped over to the selector plug, and didnt need to be lengthened. So pay attention!
Once we moved the wires, we put the console back in, and wired it up.

We turned on the ignition to test things out, and found that none of the air redirection from the selector knob was working. This concerned me… Then we realized. The whole system works via vacuum. When we disconnected the knob, all of the vacuum was lost. I had to start up the engine to get some pressure in the system in order for the selector to work. So remember that before you start tearing things back apart! We were close to doing that.
With the HVAC controls successfully moved, it was time to try to get the CB to fit in the void that was left behind. I mocked up the CB before I’d finished the HVAC control move to see if it was even possible. It looked pretty close, but it seemed like the dash cover plate would need some modification to really fit the cb.

My dremel tool really came in handy while modifying the floor console, so I broke it back out for this task. The CB almost fit through the existing opening, but the corners on the opening for the HVAC control are much rounder than the very angular corners on the CB. I basically had to angle-up the corners in the opening, and then the CB fit right through.


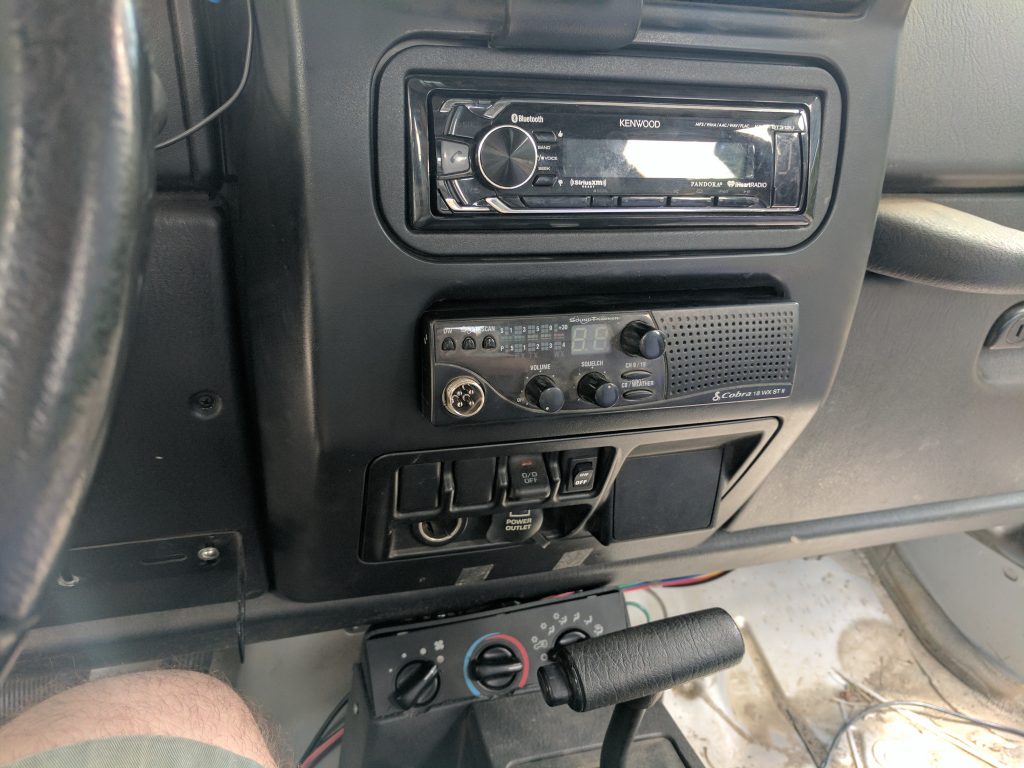
Then came the actual mount. The CB doesnt fit flush with the dash, but thats fine with me. Above the HVAC opening, there’s sort of a shelf. It seperates the HVAC area from the stereo. There are two openings in it, which looked like they might be just the right width to slide my existing CB mounting bracket into. It was snug, but the CB mount, on top of the CB, then slid into this shelf, keeps things relatively secure. I’m going to see how it fares on the trail, and come up with a different solution if needed. I’m pretty certain it’s not going to fall out.
In the end it looks decent, and seems functional. I’m happy with it.
