For some reason, weather it be to save money, or just generally confuse the public, from 1992 to 1995 (maybe higher?) Chrystler decided to make one size gas tank for all YJ’s and simply extend the vent hose further into the tank for those who ordered a tank that was below 20 gallons. So, if you take this entended tube out of the vent hose, you then “Upgrade” your 15 or 18 gallon tank to a 20 (or so) gallon tank. I found out about this little bit of information on the Jeepaholics Anonymous message boards.
- Tools I used:
- Flat-Head screw-driver, Medium Sized
- Flat-Head screw-driver, Small Sized
- Small Vice-Grip Pliers
- Large Vice-Grip Pliers
- Torx Bit: (didnt make note of the size)
- Needle Nose Pliers
- My Gerber Multi-tool
- Small hex-socket (again, forgot the size, something around 1/4)
- Screw-Driver with a 1/4″ drive adapter
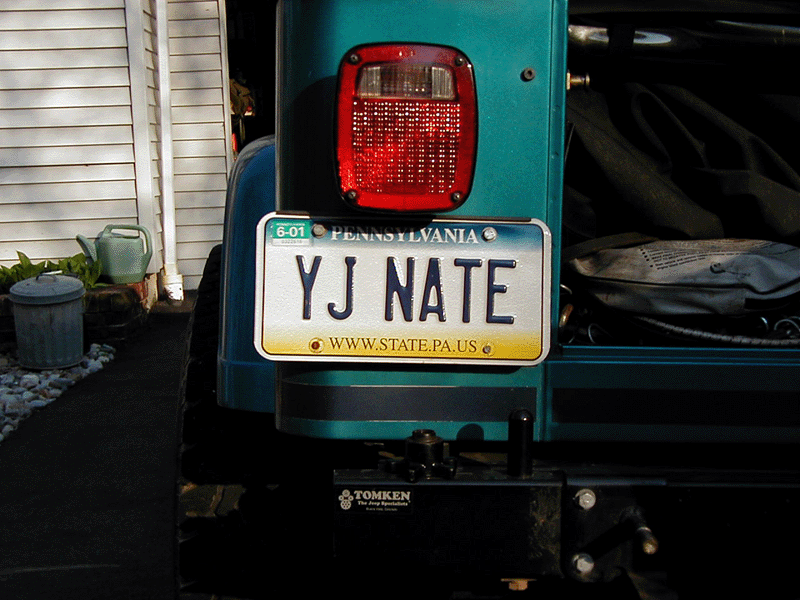
Ok, to get started, here is a picture if the licence plate covering the gas filler before I touched a thing. I removed the plate, then removed the plate holder. Thre are just two torx screws holding that on. This is springloaded to keep the licence plate from flopping around, so what i did was moved the springs off of the actual plate bracket so that just fell down. Then I removed the two torx screws. Here is how it looks without the plate holder, you can see the holes that the two screws mounted to.
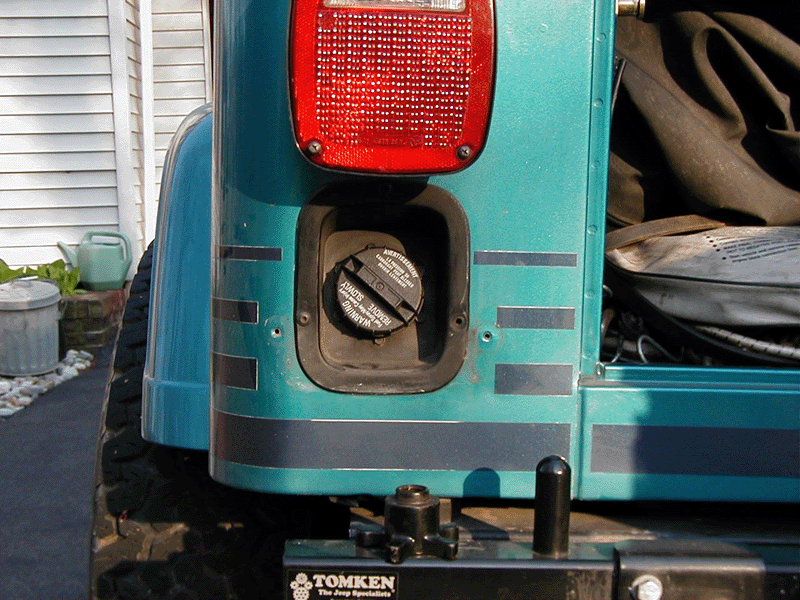
Ok, next I just took off the filler cap, if I need to explain how to do that, you should sell your Jeep right now and buy a Tracker! After removing the filler cap, it exposed six hex-head screws around the filler hole. I just took them out with the hex socket with the adapted screwdriver listed above. Then there are also three torx screws holding the filler cover on, you can see them (and part of the six hex-heads I mentioned) in this picture. once I got that all that taken off, I ended up with something like this. You can see where the six hex-screws were attatched to the filler.
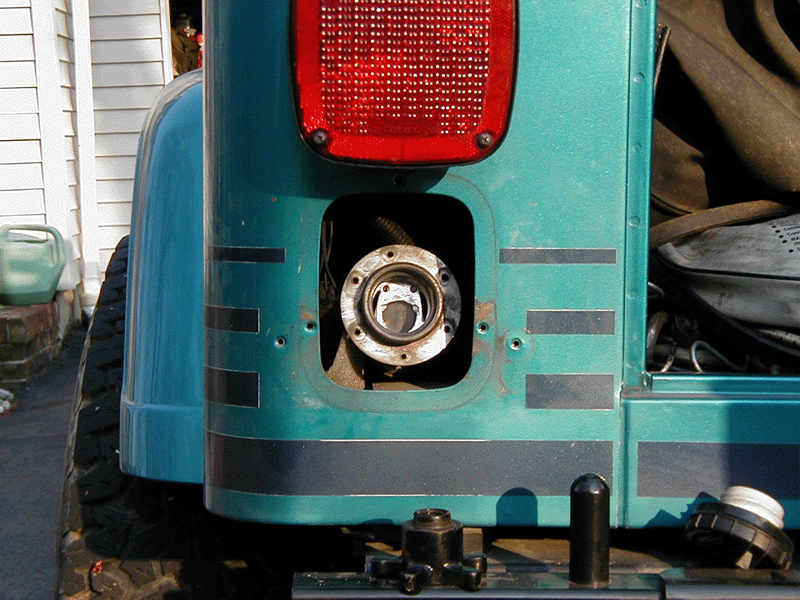
Now you’ve got to get yourself enough room to get to the vent-hole on the gas tank. What I did (and what everyone else seems to recommend) is take the plastic shroud off of the bottom of the body behind the fender. This is done by taking the little plastic rivit’s out from the underside and then just pulling it all out of the way. This should show you two hoses, the ones that are attatched to the gas filler. This is what it should look like. The vent hose that I mentioned at the beginning is the hose with the red writing on it in that picture.
Now that you’ve got some room to work, you need to get the vent hose off of the gas tank. This is a little more complicated than it sounds. I don’t have a picture of it because I couldn’t get the camera in there to get it, but if you’re looking at the back of your jeep from beind, the vent hose connects to the gas tank slightly to the right of the lower right hand side of the hole in the body for the gas tank filler. You cant get a screw driver in there, you cant get a small ratchet in there, and of course its too tight to get lose with your fingers. Heres how I did it. The hoses are held to each piece (the tank, and the filler) with hose clamps (makes sense?). I loosened the clamp on the filler hose, then removed that hose from the filler. This made the rest of the assembly a little more moveable. I got the filler hose out of the way just by pusing it back. then I pushed the filler, still attatched to the vent hose back out of the way too. Then from under the jeep i got a small wrench on the hex-head of the hose clamp on the vent hose. Managed to get it loose enough to loosen it more with my figers. Pulled the vent hose, along witht he filler off of the tank. It’s harder than it sounds, believe me!
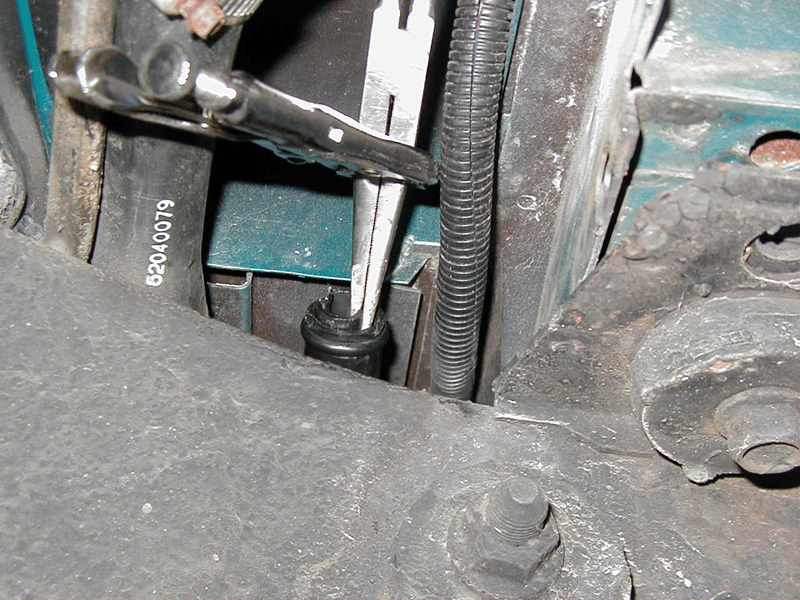
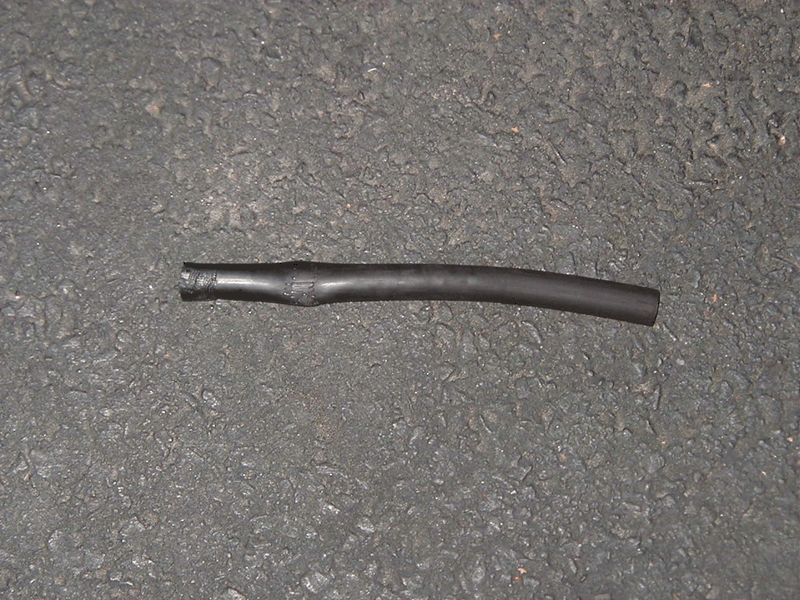
ok, now that youve got the hose off, you can look into the vent hole in the gas tank and see a second tube inside of the vent hole. It’s hard to see, and its recessed a little, try shining a flashlight into the hole if you can’t see it. See it? Well, you’ve got to get that tube out. I tool the small screwdriver I mentioned in the tools list and jammed it between the side of the filler hole and the tube. I then just pried it a little until I thought i could get a pair of needlenose pliers in there. First I tried grabbing onto it with my Multi-Tool (Gerbers version of the Leatherman), That didn’t work, the teeth arent quite jagged enough. So I headed down into the cellar, found myself a Huge pair of needles. Tried it with them, still, I couldn’t quite get a hold of this tube. Thinking to self: “Self, if you had a pair of needle nose pliers, that were like a pair of vice-grips, you could get this thing out no-sweat”. So I sat there staring at my toolbox thinking………… I took the needles, put them back into position, and then clamped a pair of vice-grips onto the pliers! Just as good right? Here’s my brilliance in 256 colors. Well, that worked, I managed to get it out far enough that the pliers were hitting off the inside of the body. Then I took off the needles and clamped some larger vice-grips on there, then i put a large screw-driver through the vice-grips to act as a handle and PULLLLLLED. Eventually I managed to get it out without mangling my hands too bad. Here is a picture of the tube after I got it out of there. Now all i had to do was put it all back together, you took notes on how you took it apart right?
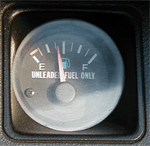
I was at about 1/4 tank when I did all of this. The guage at the top of this page is a pic I took of my guage before I started. After I finished I went down to the gas station and put a little over 15 gal. of gas in! The tank wouldnt take that empty before! The only problem with this mod is that the sending unit in the tank is still only made for a 15 gallon tank, so when you fill up your guage will be slightly above full, and not pass full until youve used a little more than 5 gallons. I suppose you could go get a new sending unit from Chrystler, but then this wouldn’t be a free mod would it?
This mod took about: 2 hours (I’m a slow worker)
Damage Report: 1 Gash on my thumb from something inside my fender