If you’ve been paying attention (to the rest of the site). You know that I own a 1992 Jeep YJ. What you probably dont know is that I’ve been nursing a failing transmission since somewhere around December of 2004. Jeep sold the 4.0L YJ from 1989 until the end of its production in 1995 with an AX-15 (they also sold the AX-15 with the TJ from 1997 until 2000). The AX-15 also comes in a few other vehicles, 1/2 ton pickups, and other light duty applications. Even some sedans if I recall correctly. The problem with MY AX-15 (and this is a common problem with the AX-15) is that the synchro’s are failing. Whenever i try to shift between gears, I am met with some resistance, and usually a bit of grinding. This can usually be avoided by double-clutching, which has helped me to keep this transmission operational for almost a year now. However recently its gotten much worse, to the point where i have trouble just shifting from one gear to the next. I fear that my AX-15’s final days are upon it.
For months now, I’ve been checking boneyards, local jeep shops, and internet forums for a replacement for my AX-15. I’ve decided to go with an NV3550, for reasons which I will elaborate on in just a bit. It seems that these are a rare commodity! My local guy says he’s never even seen one!
Most write-up’s like this one go into details on what transmissions are available, and what the author decided on, and why, and all sorts of pro’s an con’s. Well I dont claim to be a transmission expert so I will NOT explore every option. I will however explain the options I had available to me, and why I chose what I did.
First a bit of history. When I bought this YJ, in May of 2001, it was in very nice condition. Low mileage (for a 1992 anyway, 54K!) and it ran pretty nice. Not to mention the condition of the body and paint. Anyway, in December of that year the AX-15 went from working well, to shot, in the course of 2 weeks or so. So I thought about selling it and getting a NEW Jeep, but that wasnt financially possible at the time. I ended up borrowing the cash for a rebuilt AX-15, and labor to install it at the company garage from my parents. In a week or so I picked my baby up at the shop with its freshly rebuilt AX-15, and a new clutch. I got in, started it up, and i couldnt get it into 1st gear. Something’s not right there. So I walked right back into the shop and told them, I cant shift this into 1st, FIX IT! Well hey didn’t, they told me that the internal slave cyl on my trans is hard to bleed, and that there was probably just a little air in the lines, and that it would settle and work well. If not bring it back in and theyll re-bleed it (wrong) again.
So in the course of the next few weeks it did seem to get better, and I was semi-pleased with it. I still had problems every now and then getting into 1st gear from a standstill though, but it was so uncommon by then that I didnt bother to take it back to the shop. So fast forward to December (or so) of 2004. About 3 years from when I had the re-built AX-15 installed. To this point I’d never been exceptionally pleased with the performance of my AX-15, but it was too late to get any kind of warantee out of it. One day I’m driving my jeep and I feel the slightest little grind as the gears mesh shifting from 4th down to 3rd. I knew exactly what it was, but I didn’t want to admit it. Over the next few days I continue feeling the same little grind when shifting from 4th down to 3rd. So i accept the fact that this trans is failing, and start to baby it. Double clutching when i downshift from 4th to 3rd. Slowly but surely it gets worse, next it begins to grind when downshifting into 2nd, then when upshifting into 4th at high rpm’s. Finally what convinced me that “it was time” was when at idle, out of gear, I began to hear a rattling/grinding noise from the trans. That started around the beginning of August in 2005.
So, if you havent guessed, I dont put a lot of faith in the AX-15, and I’ve vowed never to install one in any vehicle again. Thus leaving me a few options for a replacement this time around. Which are as follows:
AX-15 (Not a chance!)
NV4500
NV3550
NV3500
The NV4500 is a heavy duty 5-speed 3/4 ton transmission. Its physically larger than the AX-15, and longer. Depending on what donor you get this trans out of, it varys in gearing. Both flavors however feature a very low 1st gear, and a very sturdy construction. This transmission is VERY desireable for a Jeep swap. However, it is a more involved, and much more expensive project. The end result is great, but I have a limited budget to work with.
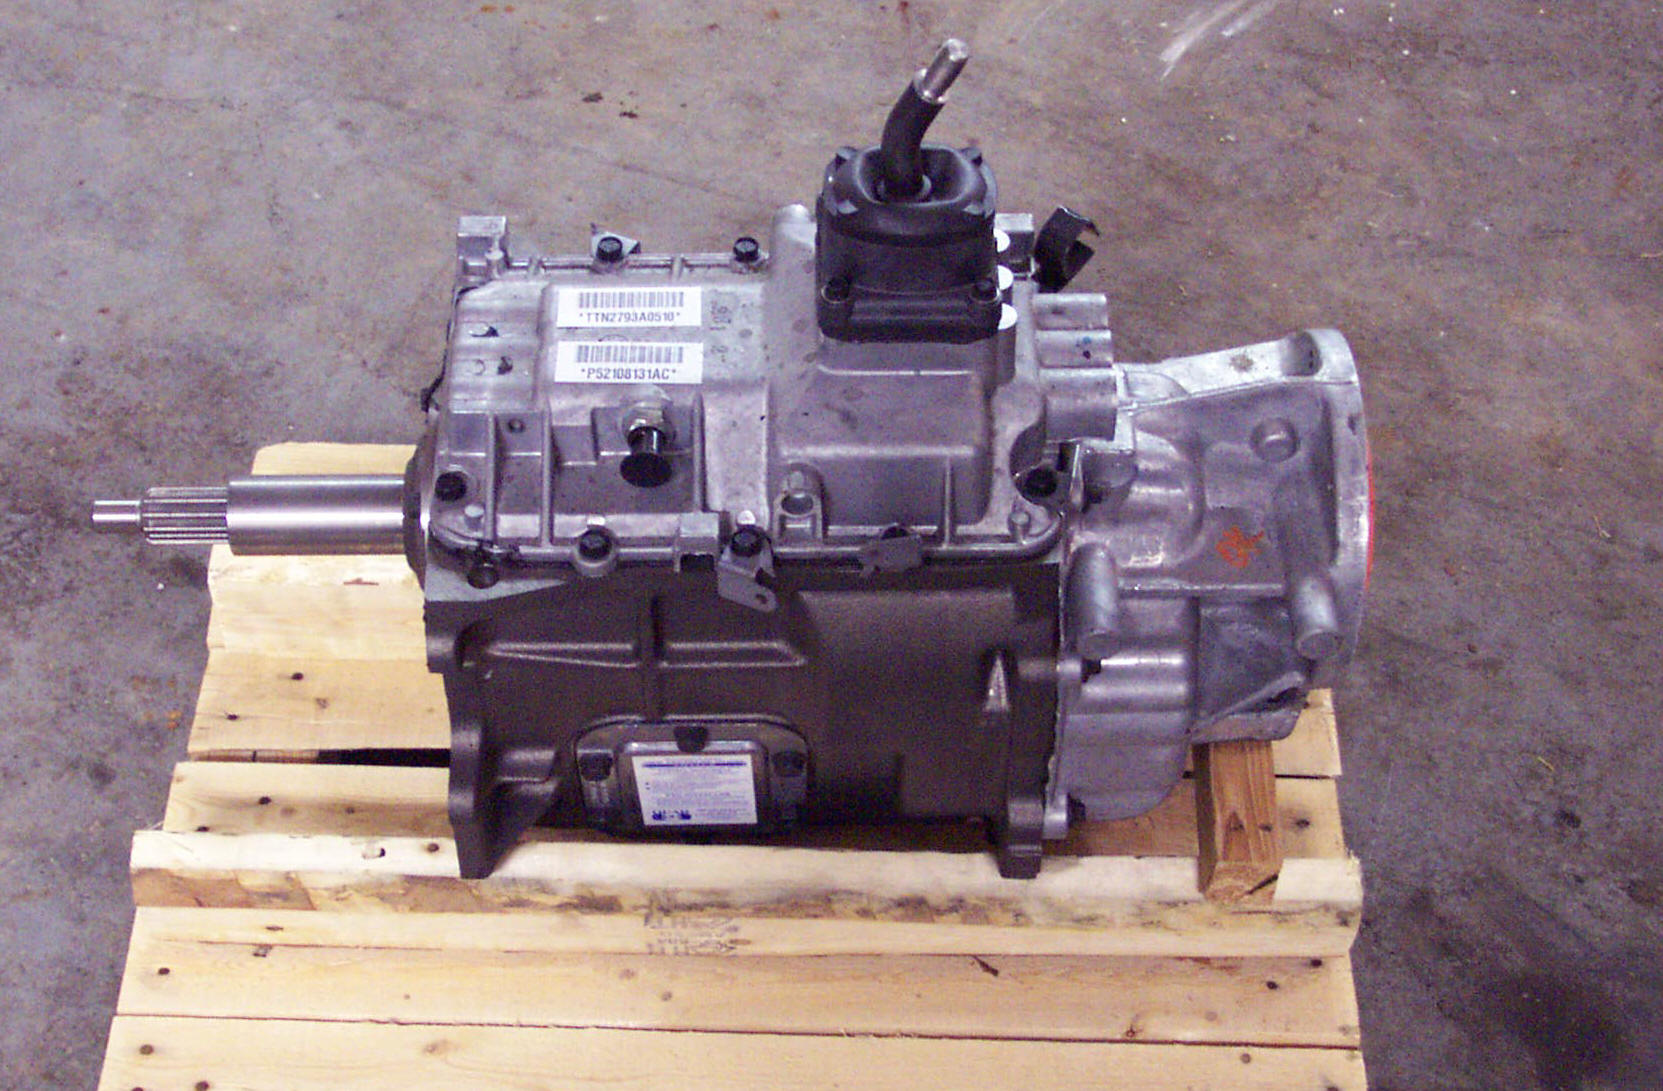
The NV3550 is manufactured by the same company that makes the 4500, it is a lighter duty transmission, with dimensions almost identical to the AX-15, which is’nt surprising, because this transmission was designed as a replacement for the AX-15 when Jeep stopped using them in 2001. Jeep TJ’s with the 4.0 and a 5-speed manual from 2001 to 2005 came with the NV3550 stock. This makes it an excellent swap for a YJ with a 4.0! You get a sturdier transmission, at an affordable price, and its almost a direct bolt in replacement. It’s got the right input shaft to accept the 4.0, the correct bolt pattern for a YJ or TJ 4.0 bellhousing, and the correct output shaft and bolt pattern for the NP231J. Because the dimensions are so similar to the AX-15 it will fit between the existing skid plate and body, and you wont need to change driveshafts. If you have an older YJ (1992 or older) with a 4.0 you’ll also need a bellhousing that supports an external slave cyl. You should be able to scavange one off of any 1993+ wrangler that came with a manual trans and a 4.0.
NV3500
The NV3500 is a variant of the 3550, from what I can tell the 3550 is a modified 3500. I could be wrong however. It has the same gear ratios as the 3550, and the same dimensions, the only difference is that the bellhousing is integrated, and I dont know if this will bolt up to a Jeep engine. There are probably adapters available if it wont. These were sold in 1/2 ton dodge pickups.
What I chose and Why:
Well, the AX-15 rebuild was out of the question. The 4500 was too expensive of a swap, and had a possibility of too many complications. The 3500 may have worked, but I wasnt sure about the bellhousing. Plus I couldnt find one in my pricerange. So, I was left with the 3550, which I was leaning tward from the beginning.
I sort of got pushed into starting this swap early. My AX-15 was on it’s way out, and I wasn’t comfortable driving it anymore. I’m not sure if the trans failing on the Highway would have damaged anything else, but I didnt want to take the chance. So I dropped the YJ off at my parents place, and picked up the keys to my dad’s XJ. At this point I didn’t have an NV3550 yet, but I did have what i thought was a solid deal pending on a trans in Ohio.
Since I didnt have a trans yet, and I had another vehicle to drive, I decided to take my time taking everything apart. I have a tendancy of getting frustrated when i’m rushed. So I knew giving myself plenty of time would be the best way to go about things.
I worked on this a few hours a day before work for almost a month! I spent a lot of time waiting for a second set of hands. A friend of mine, Jay, had done this sort of work before so when it came to actually removing and installing the trans, I waited for him.
So, on to the technical part!
I started by disconnecting my driveshafts, draining the fluids from the trans and tcase, and started working on taking the skidpan off. This is where I ran into my first problem, which I expected. See, 14 years ago when my jeep was made, Jeep used these threaded frame inserts that are notorious for rusting off, and making it rather difficult to remove your T-case skid. I knew that one of these inserts on my drivers side was shot, and i expected to have to deal with that. Well as it turns out, all of the inserts on the drivers side were shot. So I had to cut those off before I could do anything. I managed to talk Jay into doing most of the work there. 😉
Next Jay and I removed the Transfer Case. This is done by disconnecting the vacuum lines, the speed-o sensor plug, vent tube, tranfer case shifter linkage, and then the 6 nuts that hold the transfer case to the trans. These are 9/16 nuts, and on the AX-15 you wont be able to get a socket in there. We found that using a box end wrench, with an offset head worked really well. Once the nuts are off, you should be able to slide the transfer case rearward, and it will just slide off of the splined output of the trans. This is pretty heavy, so its helpful to have a second person to give you a hand here.
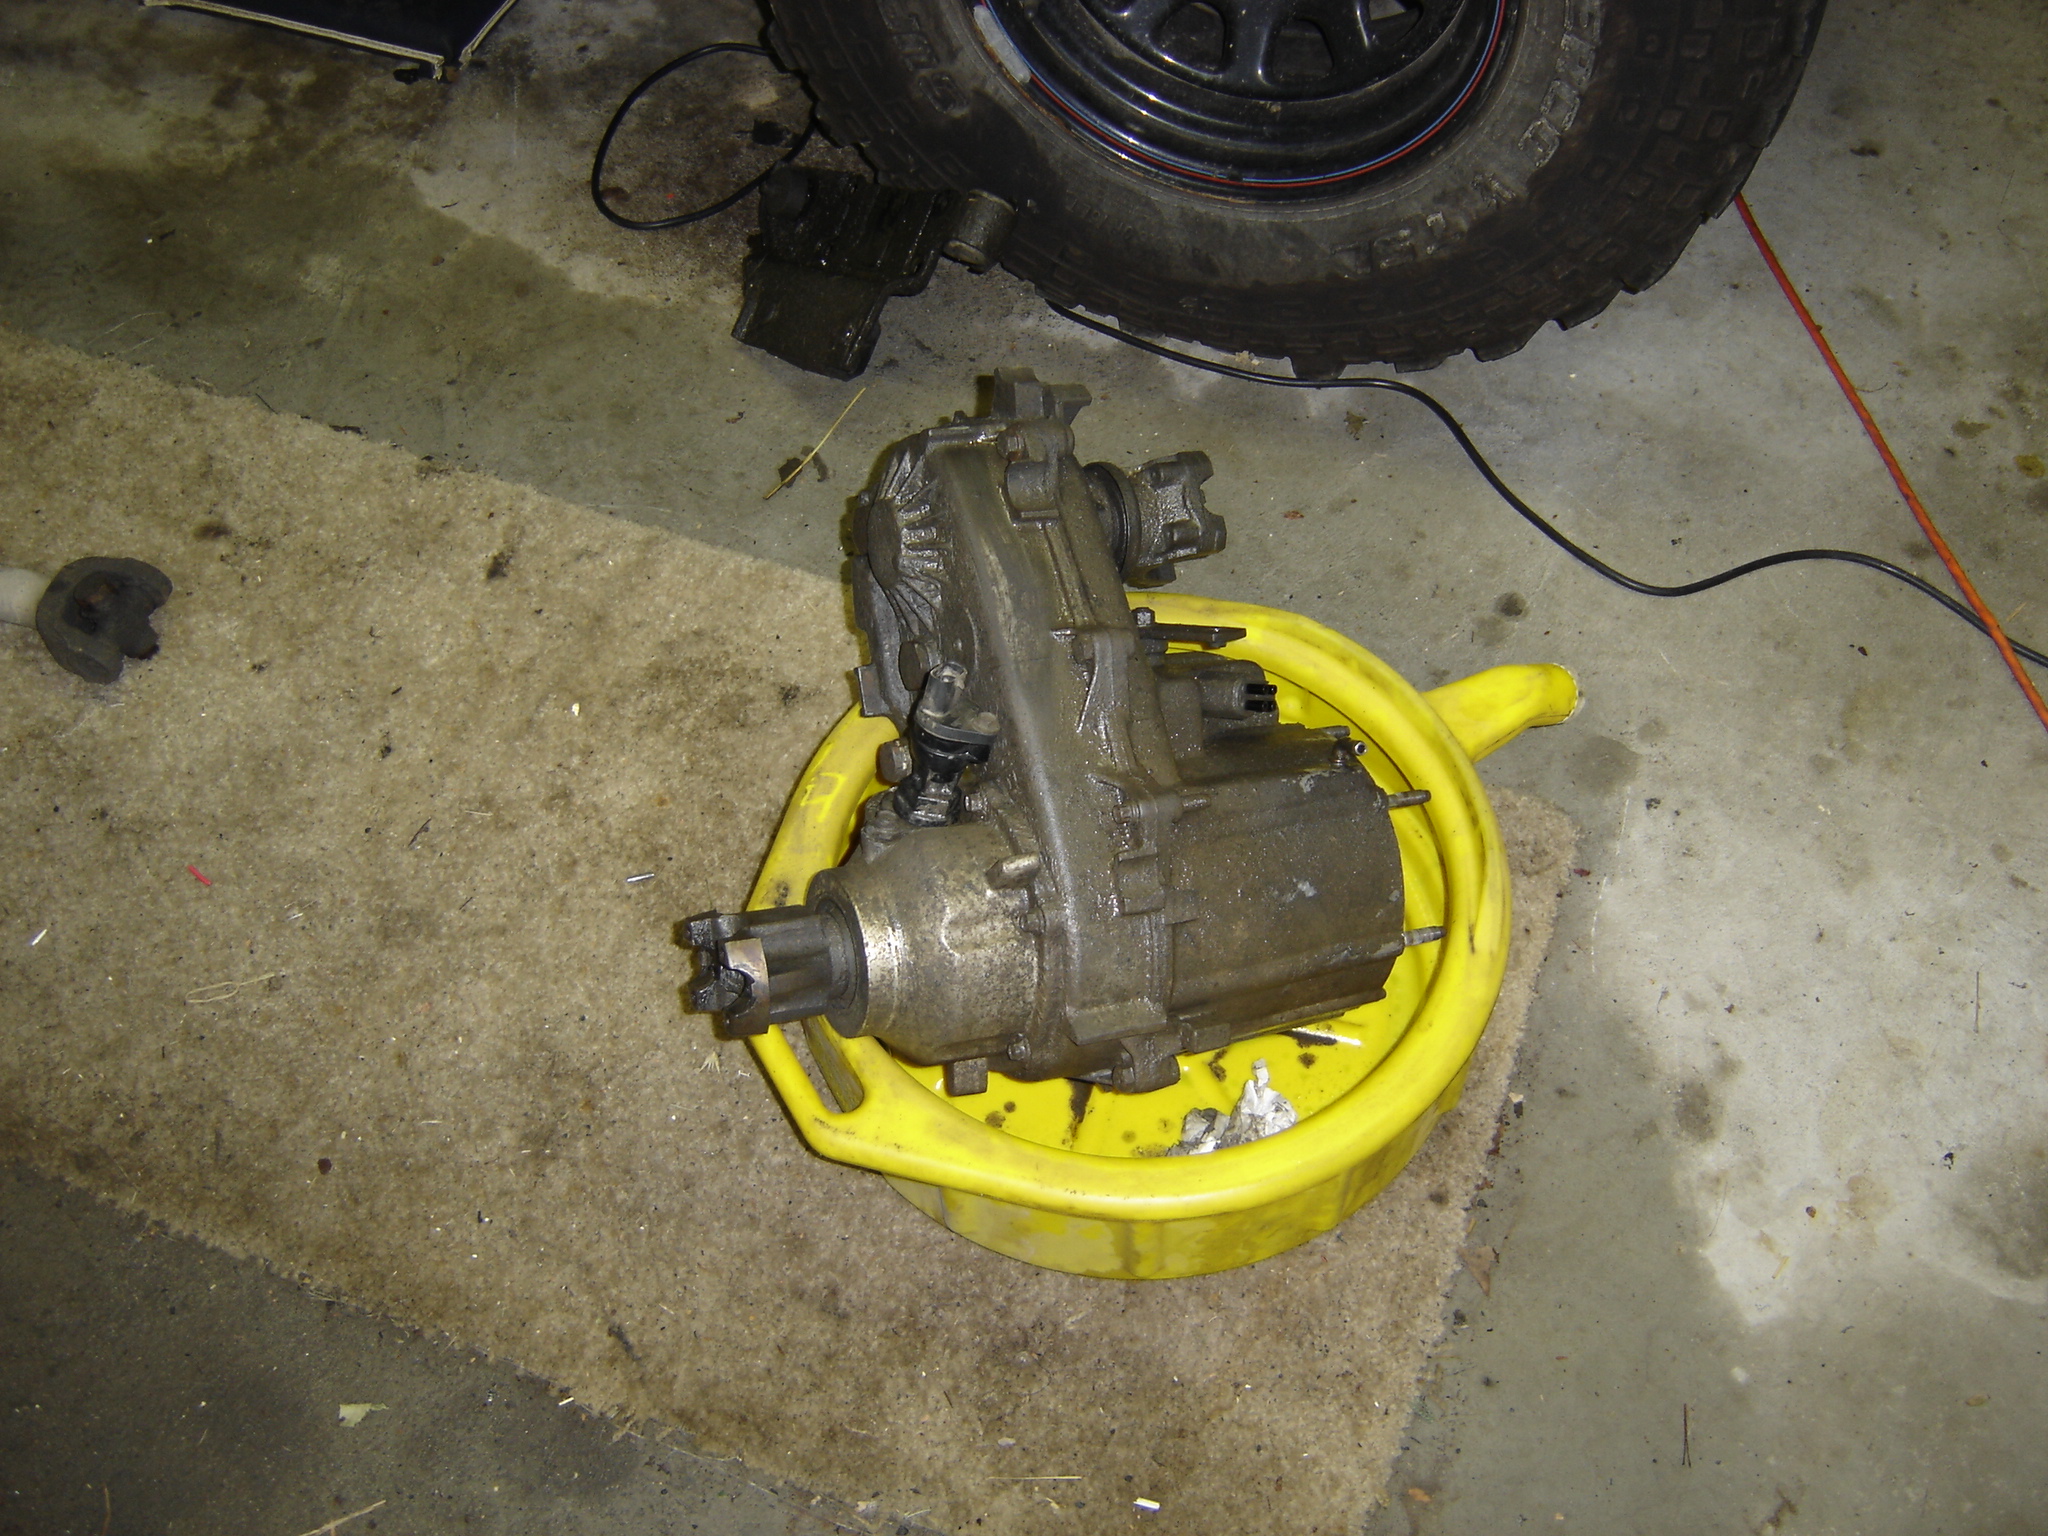
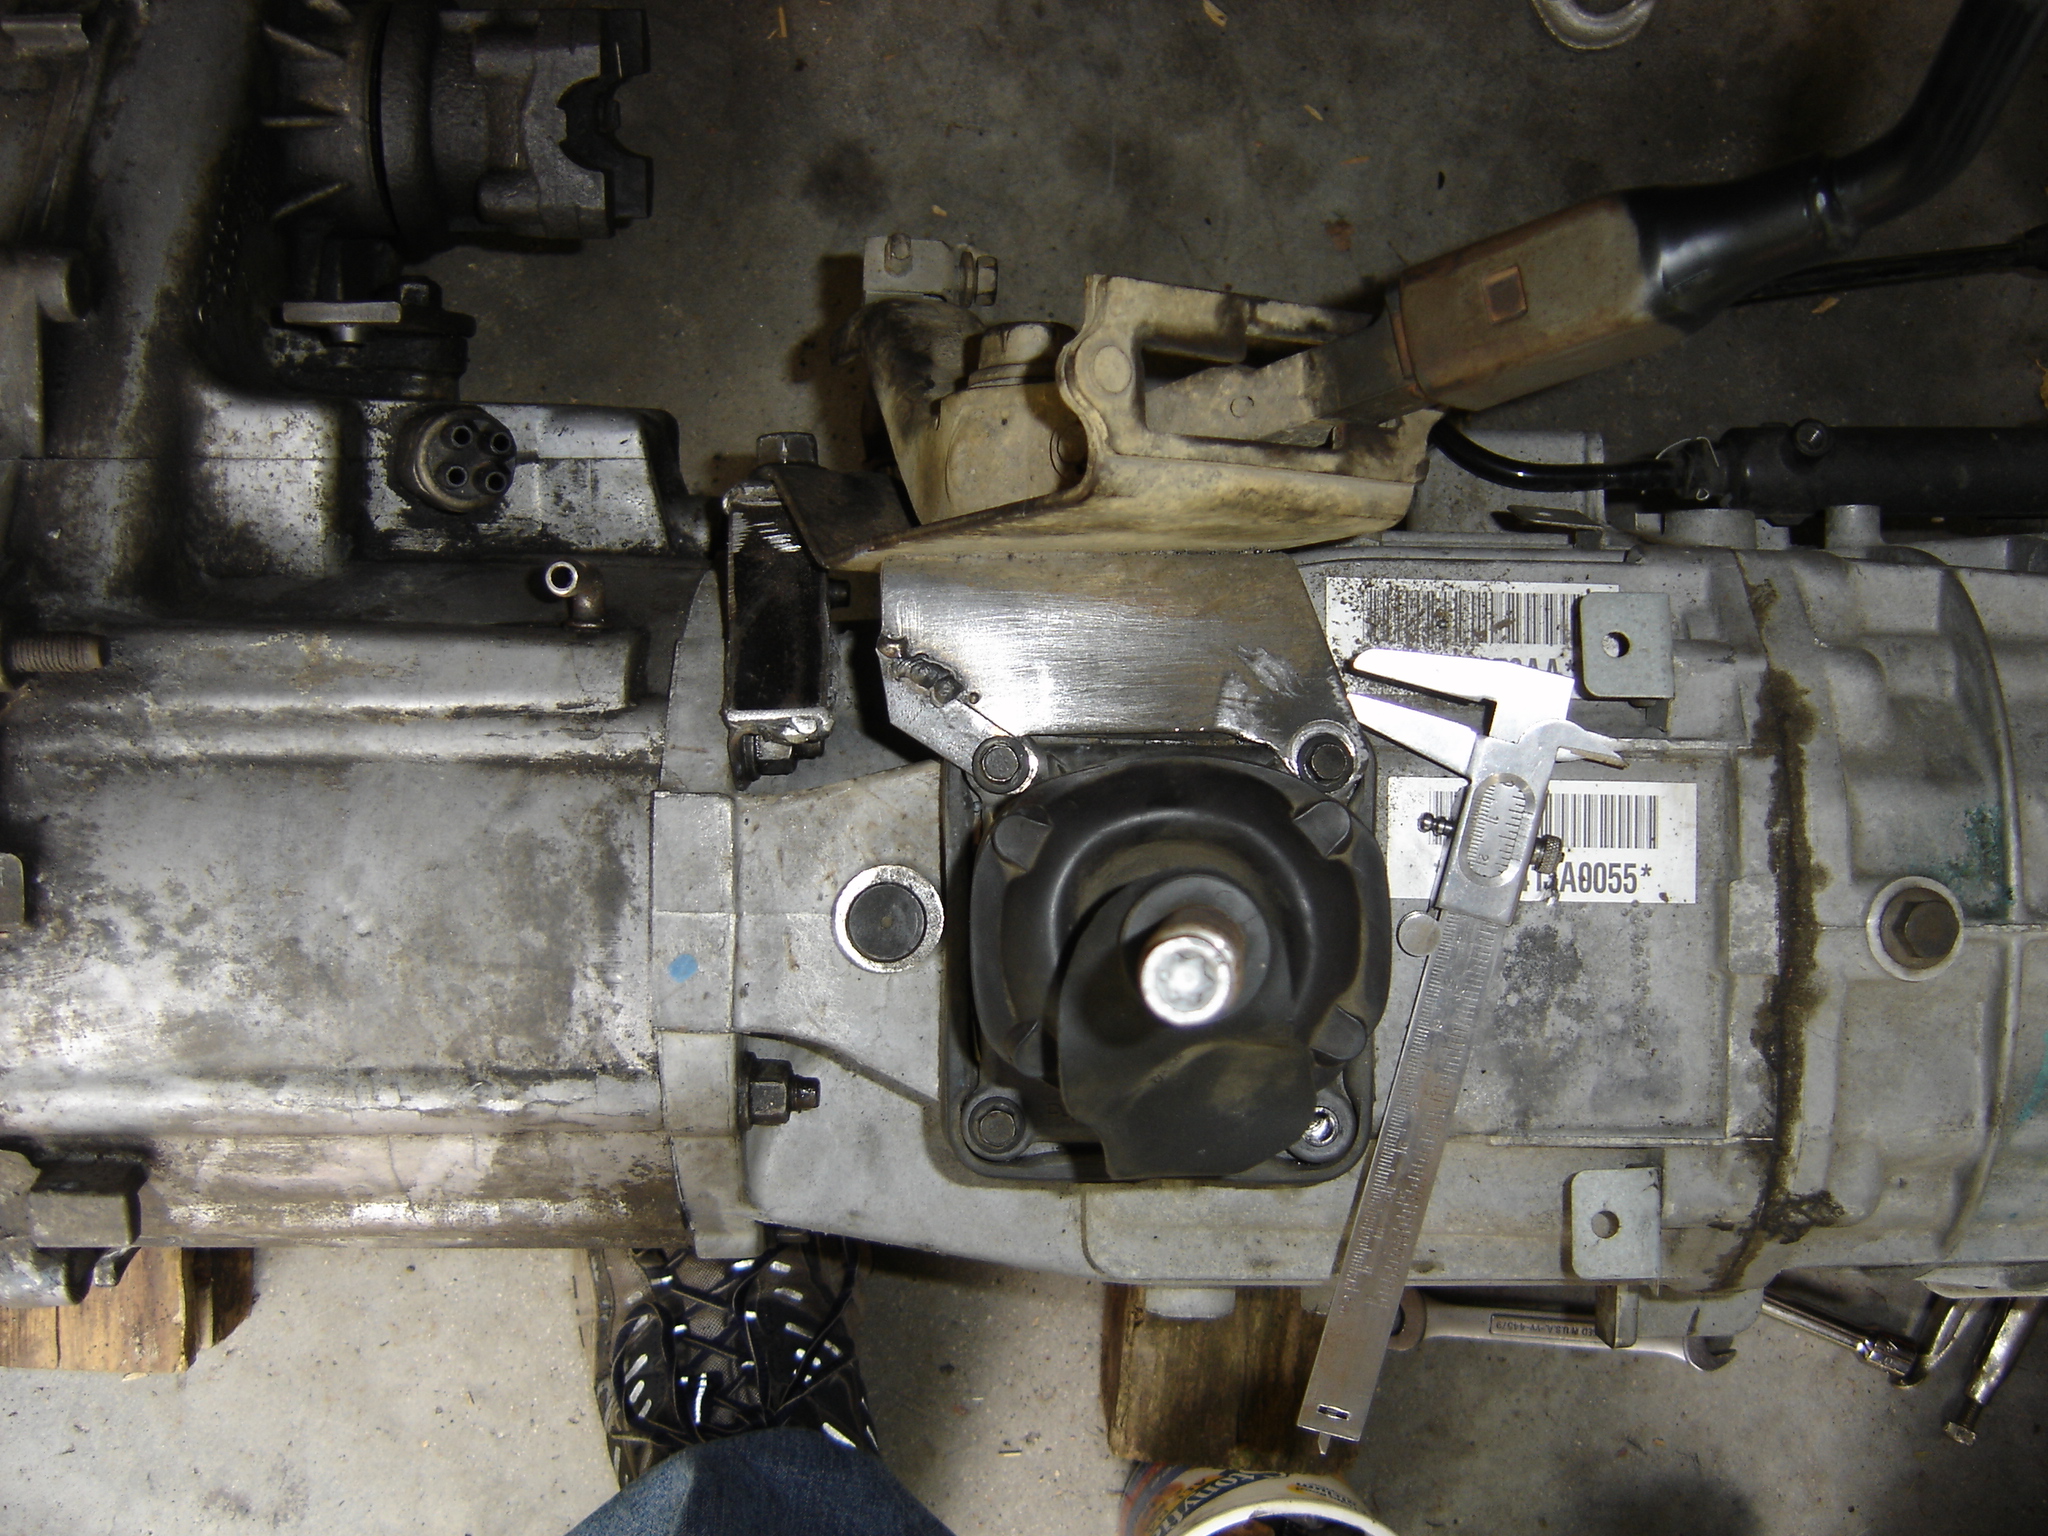
Here’s my nasty NP231J:
Next we worked on the transmission shifter, and transfer case shifter. These are pretty easy to remove, there are 4 bolts that hold the shift tower in place, remove those. Along with those you’ll remove the bolts that hold the tabs of the transfer case shifter in place. Next remove the bolt that runs through lower mounting tab of the shifter bracket that’s threaded into the AX-15. Then just pull it all out of place.
That night I came home to find out that the guy in Ohio that was going to sell me the NV3550 sold it out from under me locally. How nice of him! So how I have my jeep half disassembled and I dont have a replacement trans. Great! Luckily I recalled Ebay e-mailing me about an NV3550 up for auction that was ending soon. So I hopped on that.
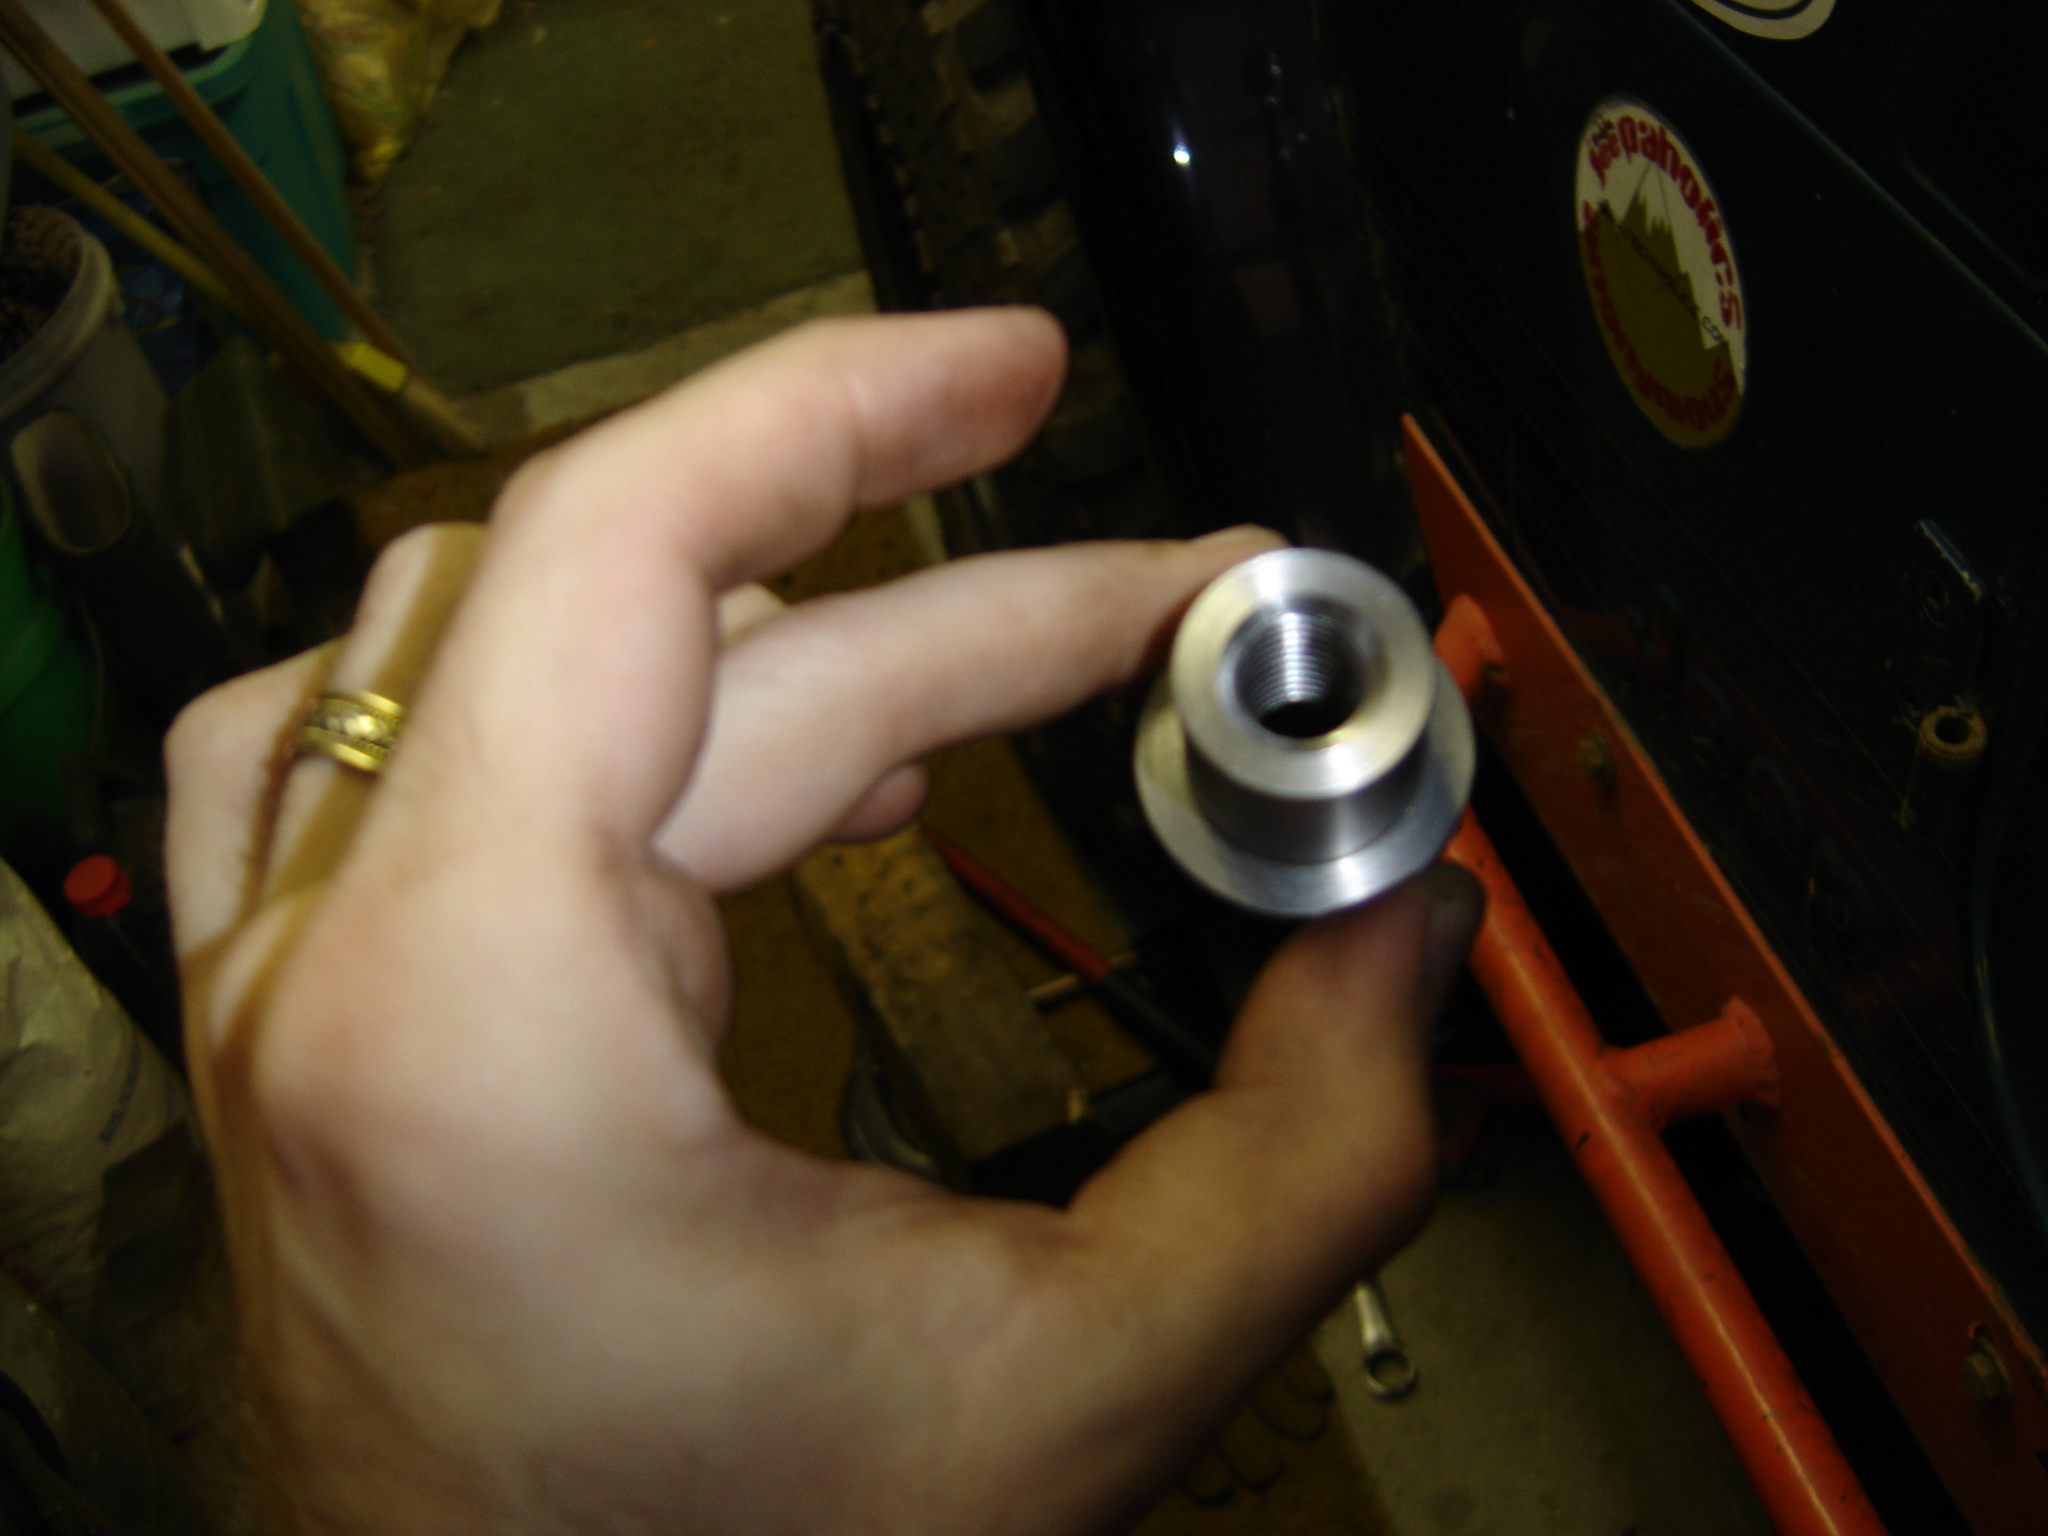
Now, at this point, I wasted a LOT of time. I’ll tell you how. I had this brialliant idea that I’d take some steel that I had already, cut it into something like 1″x1″ squares, drill a .5″ hole through them, and weld a rounded nut to the other side of the plate. Then sink that into the frame, and weld the plate to the bottom of the frame. Sounds great on paper, but after spending about 6 hours making these things, i discovered that I wasnt able to weld them well enough to hold. I got one plate welded in place, and while I was working with the second one, it practically fell apart in my hands. I probably could have upped the power ont he welder for better penetration, and made them solid enough, but I just wasnt comfortable with it. So back to the drawing board.
Here’s what i was working with.
It just didnt work out. So I ditched them (after actually making all 6 inserts). I looked around for pre-made 0.5″ threaded inserts, but no one seems to make anything that large. So I drew up what I wanted on paper, and talked to my dad about gettig in touch with a hunting buddy of ours, who happens to work at a machine shop. More on that later.
So in the meantime, I finaly got a deal on a trans. Out of an 02 TJ, with 28K miles on it.
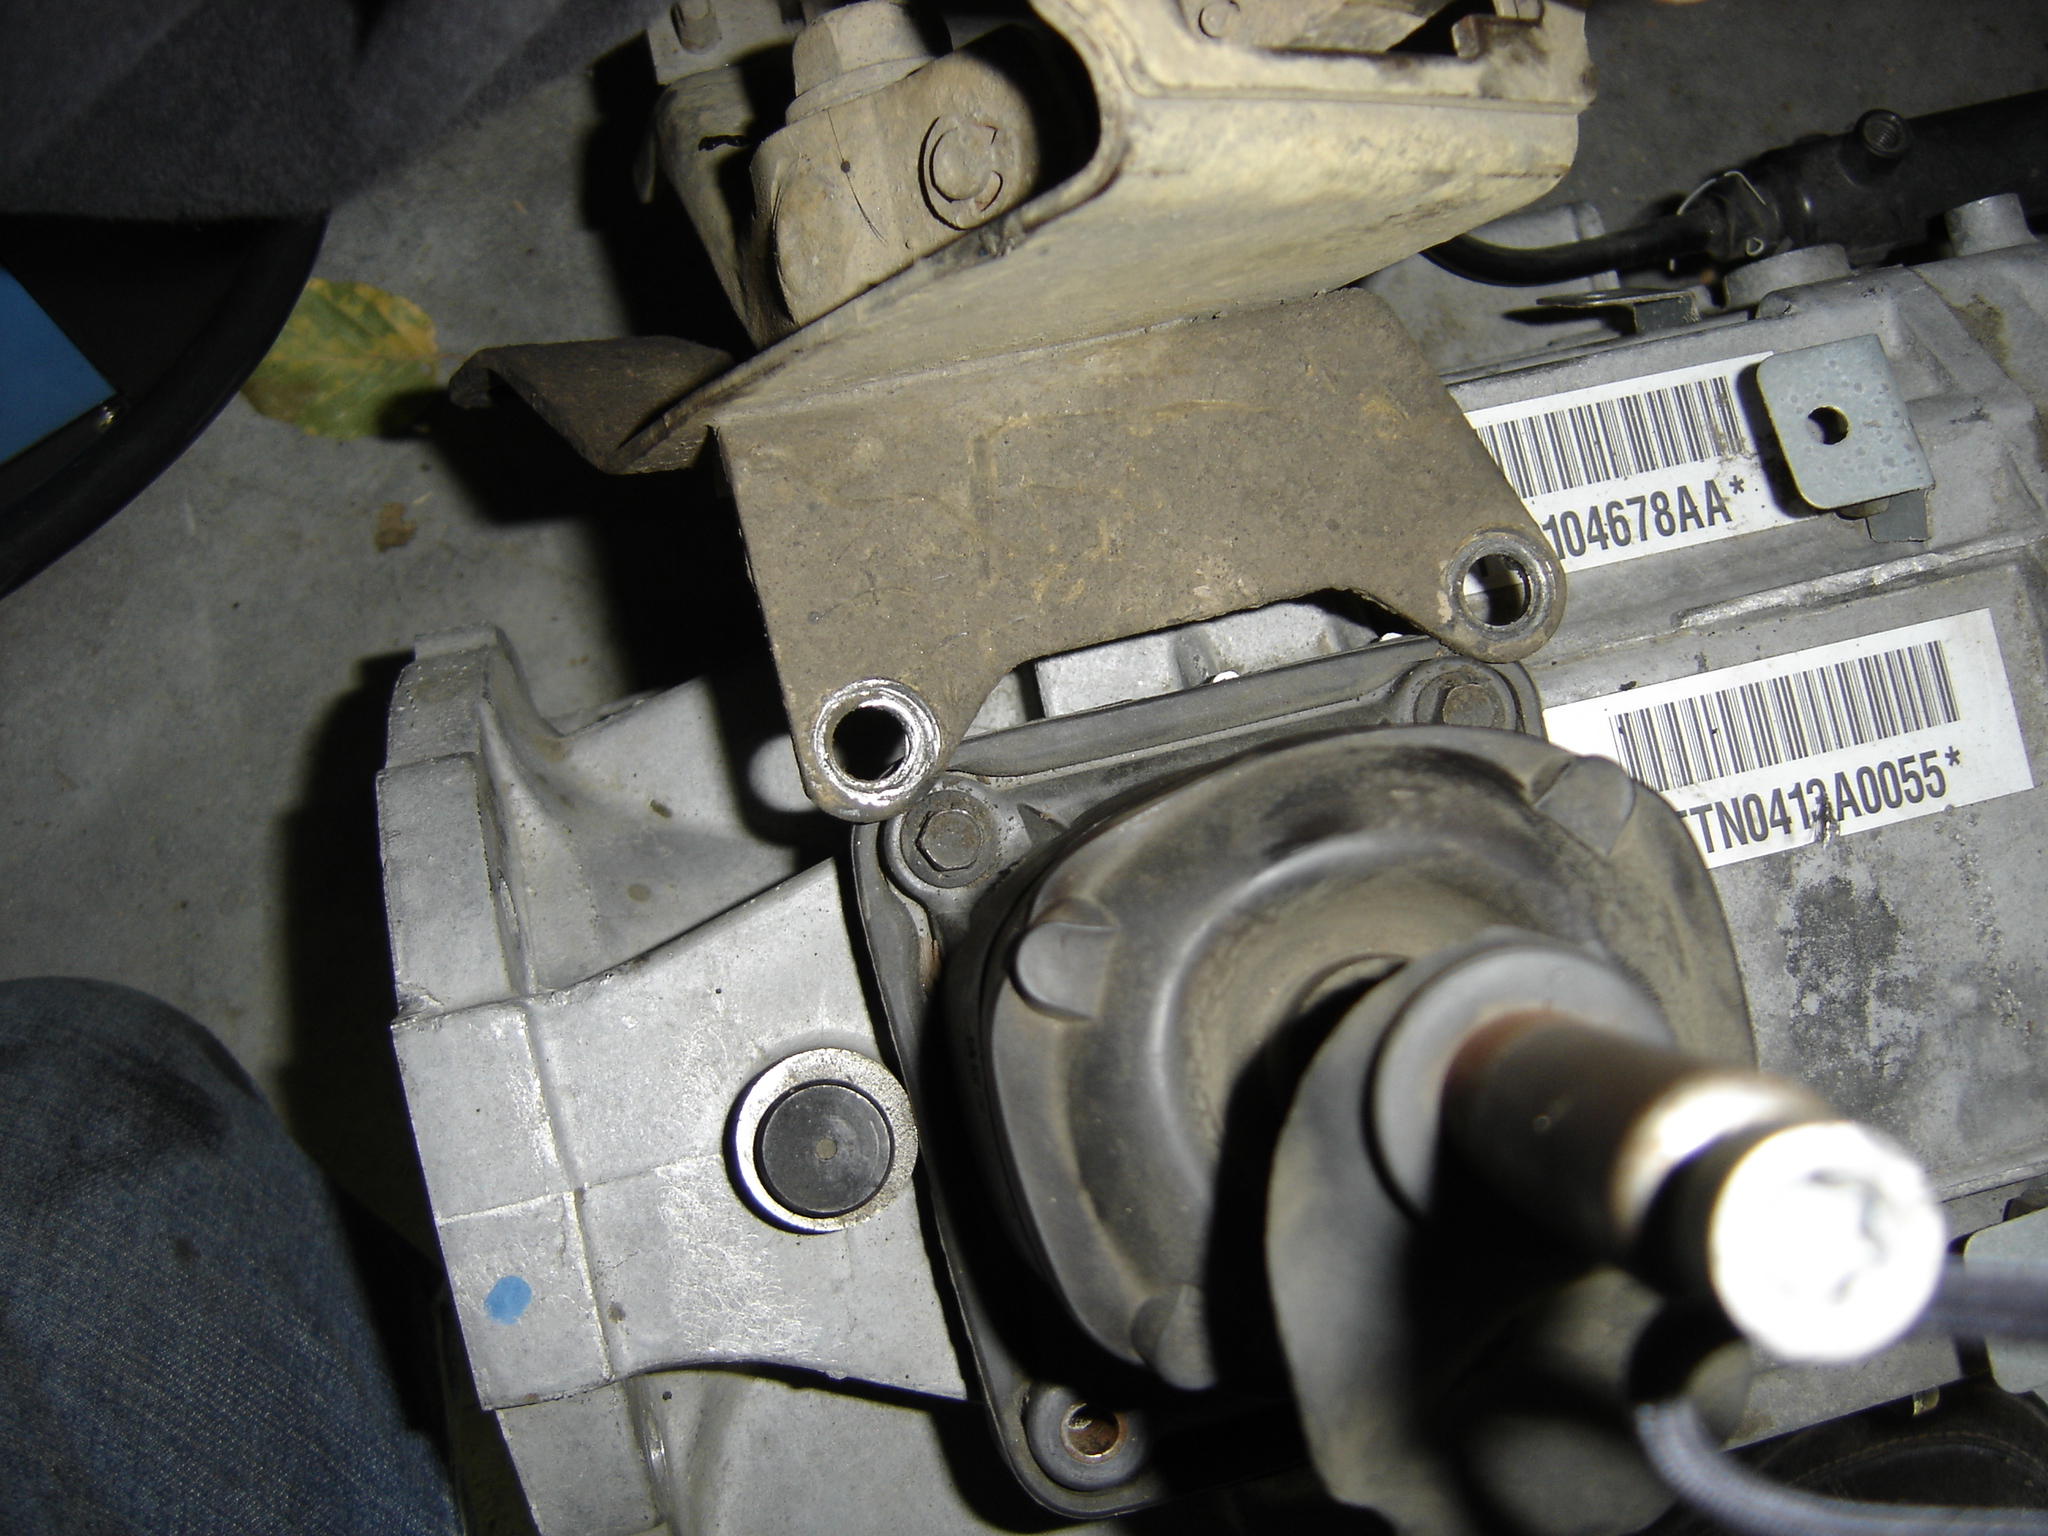
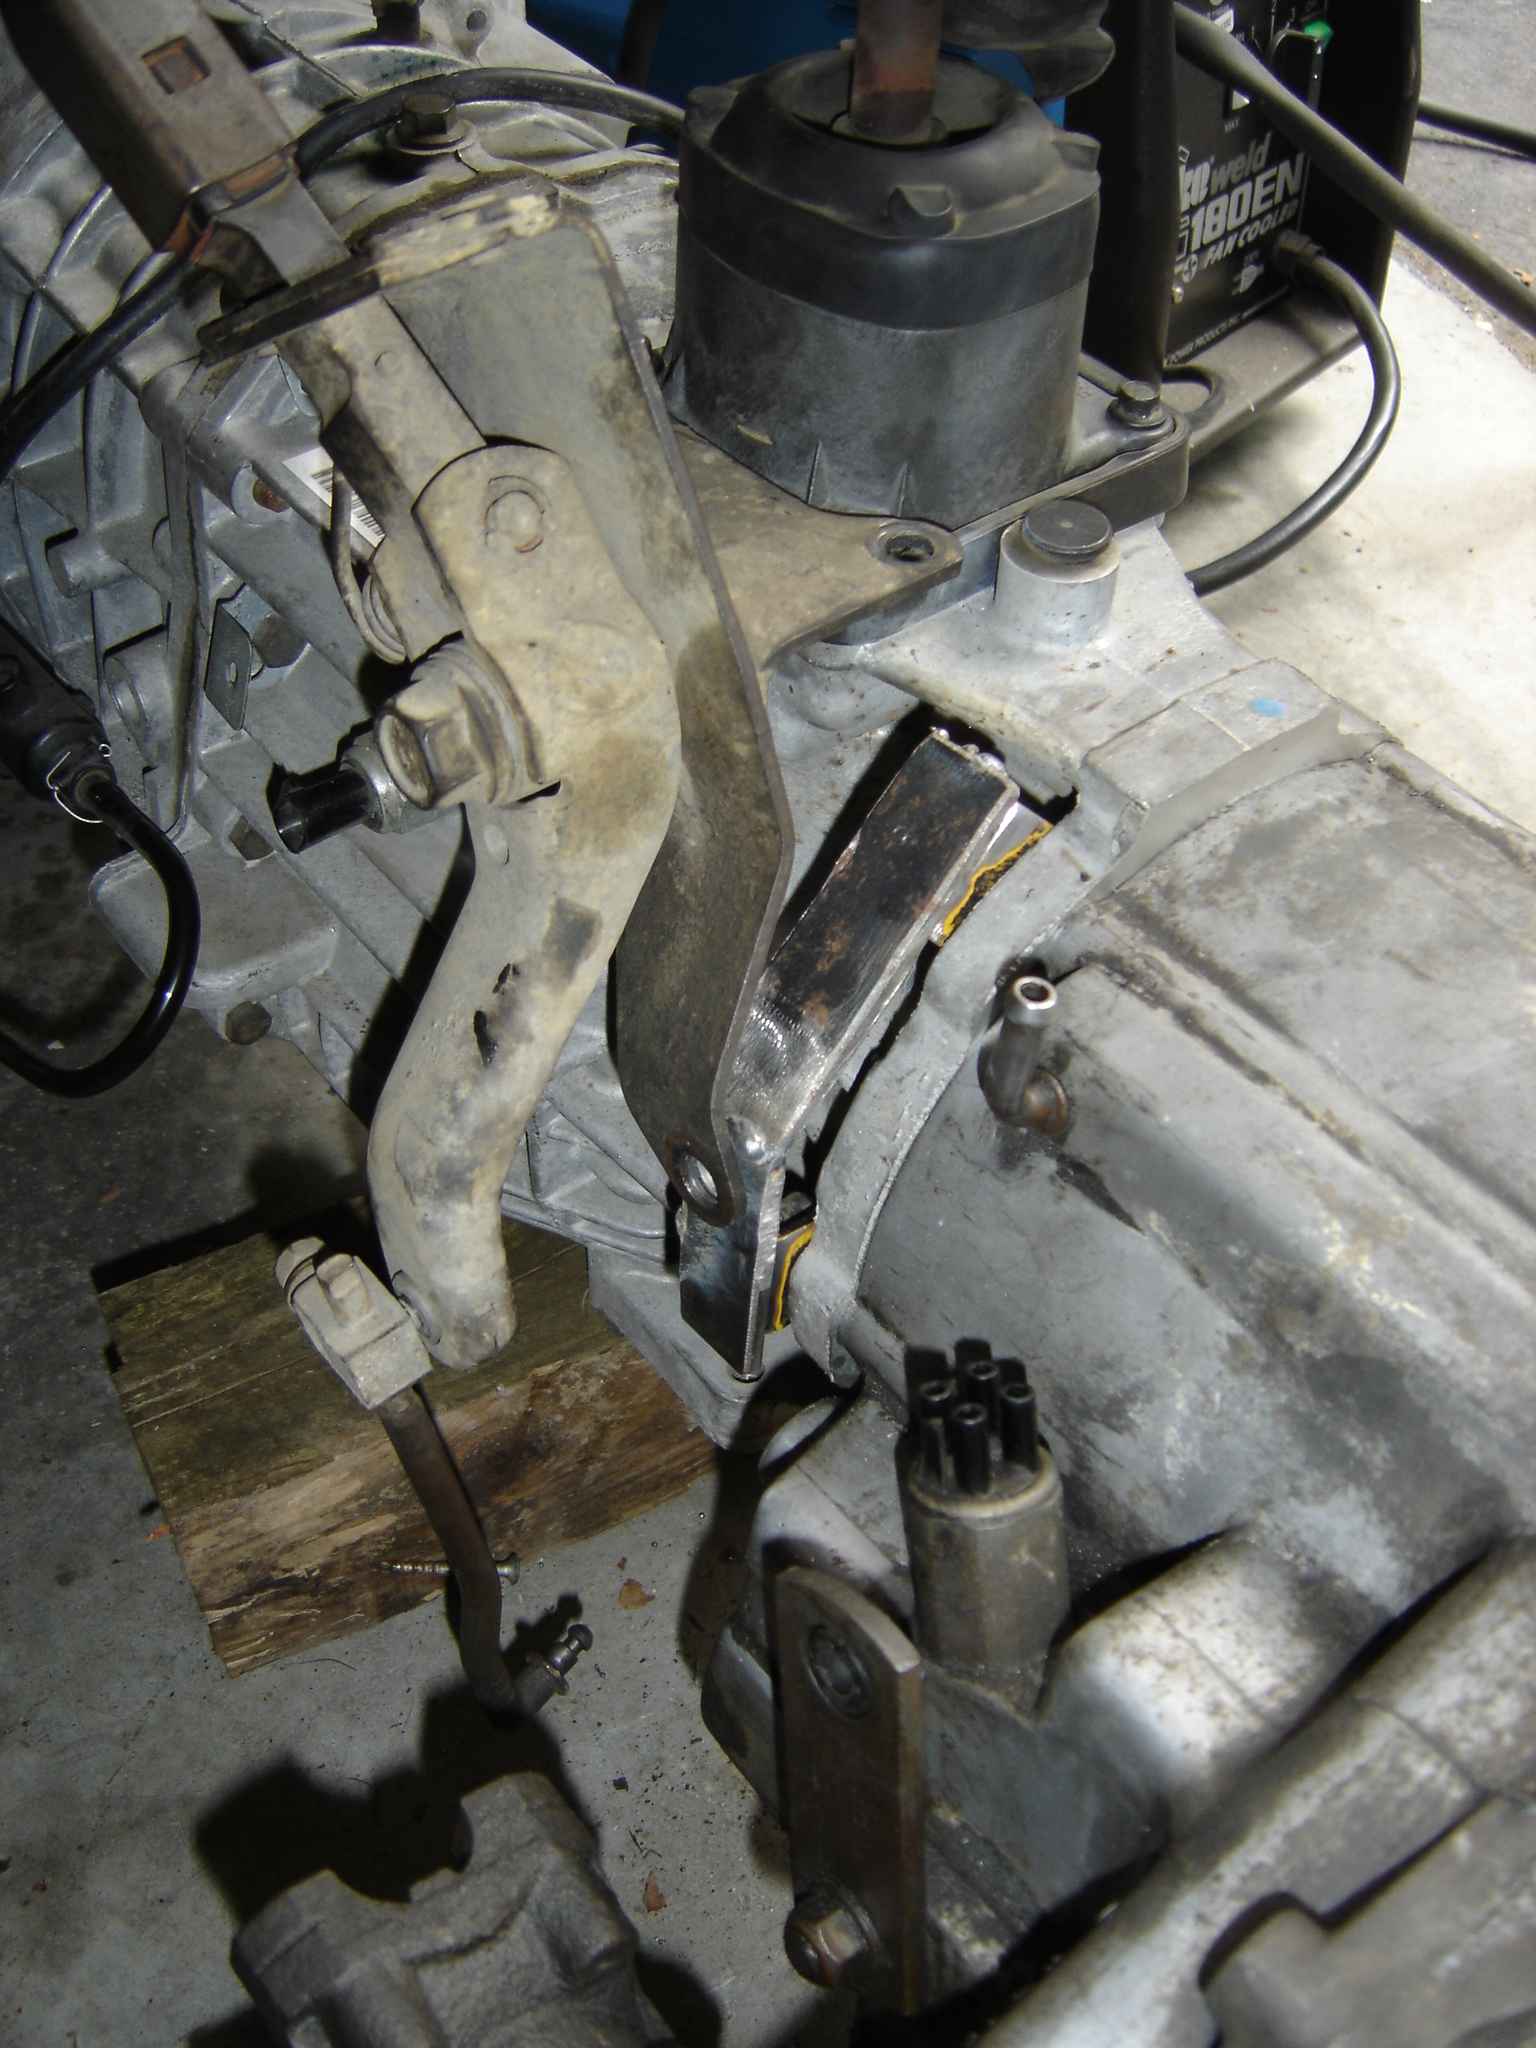
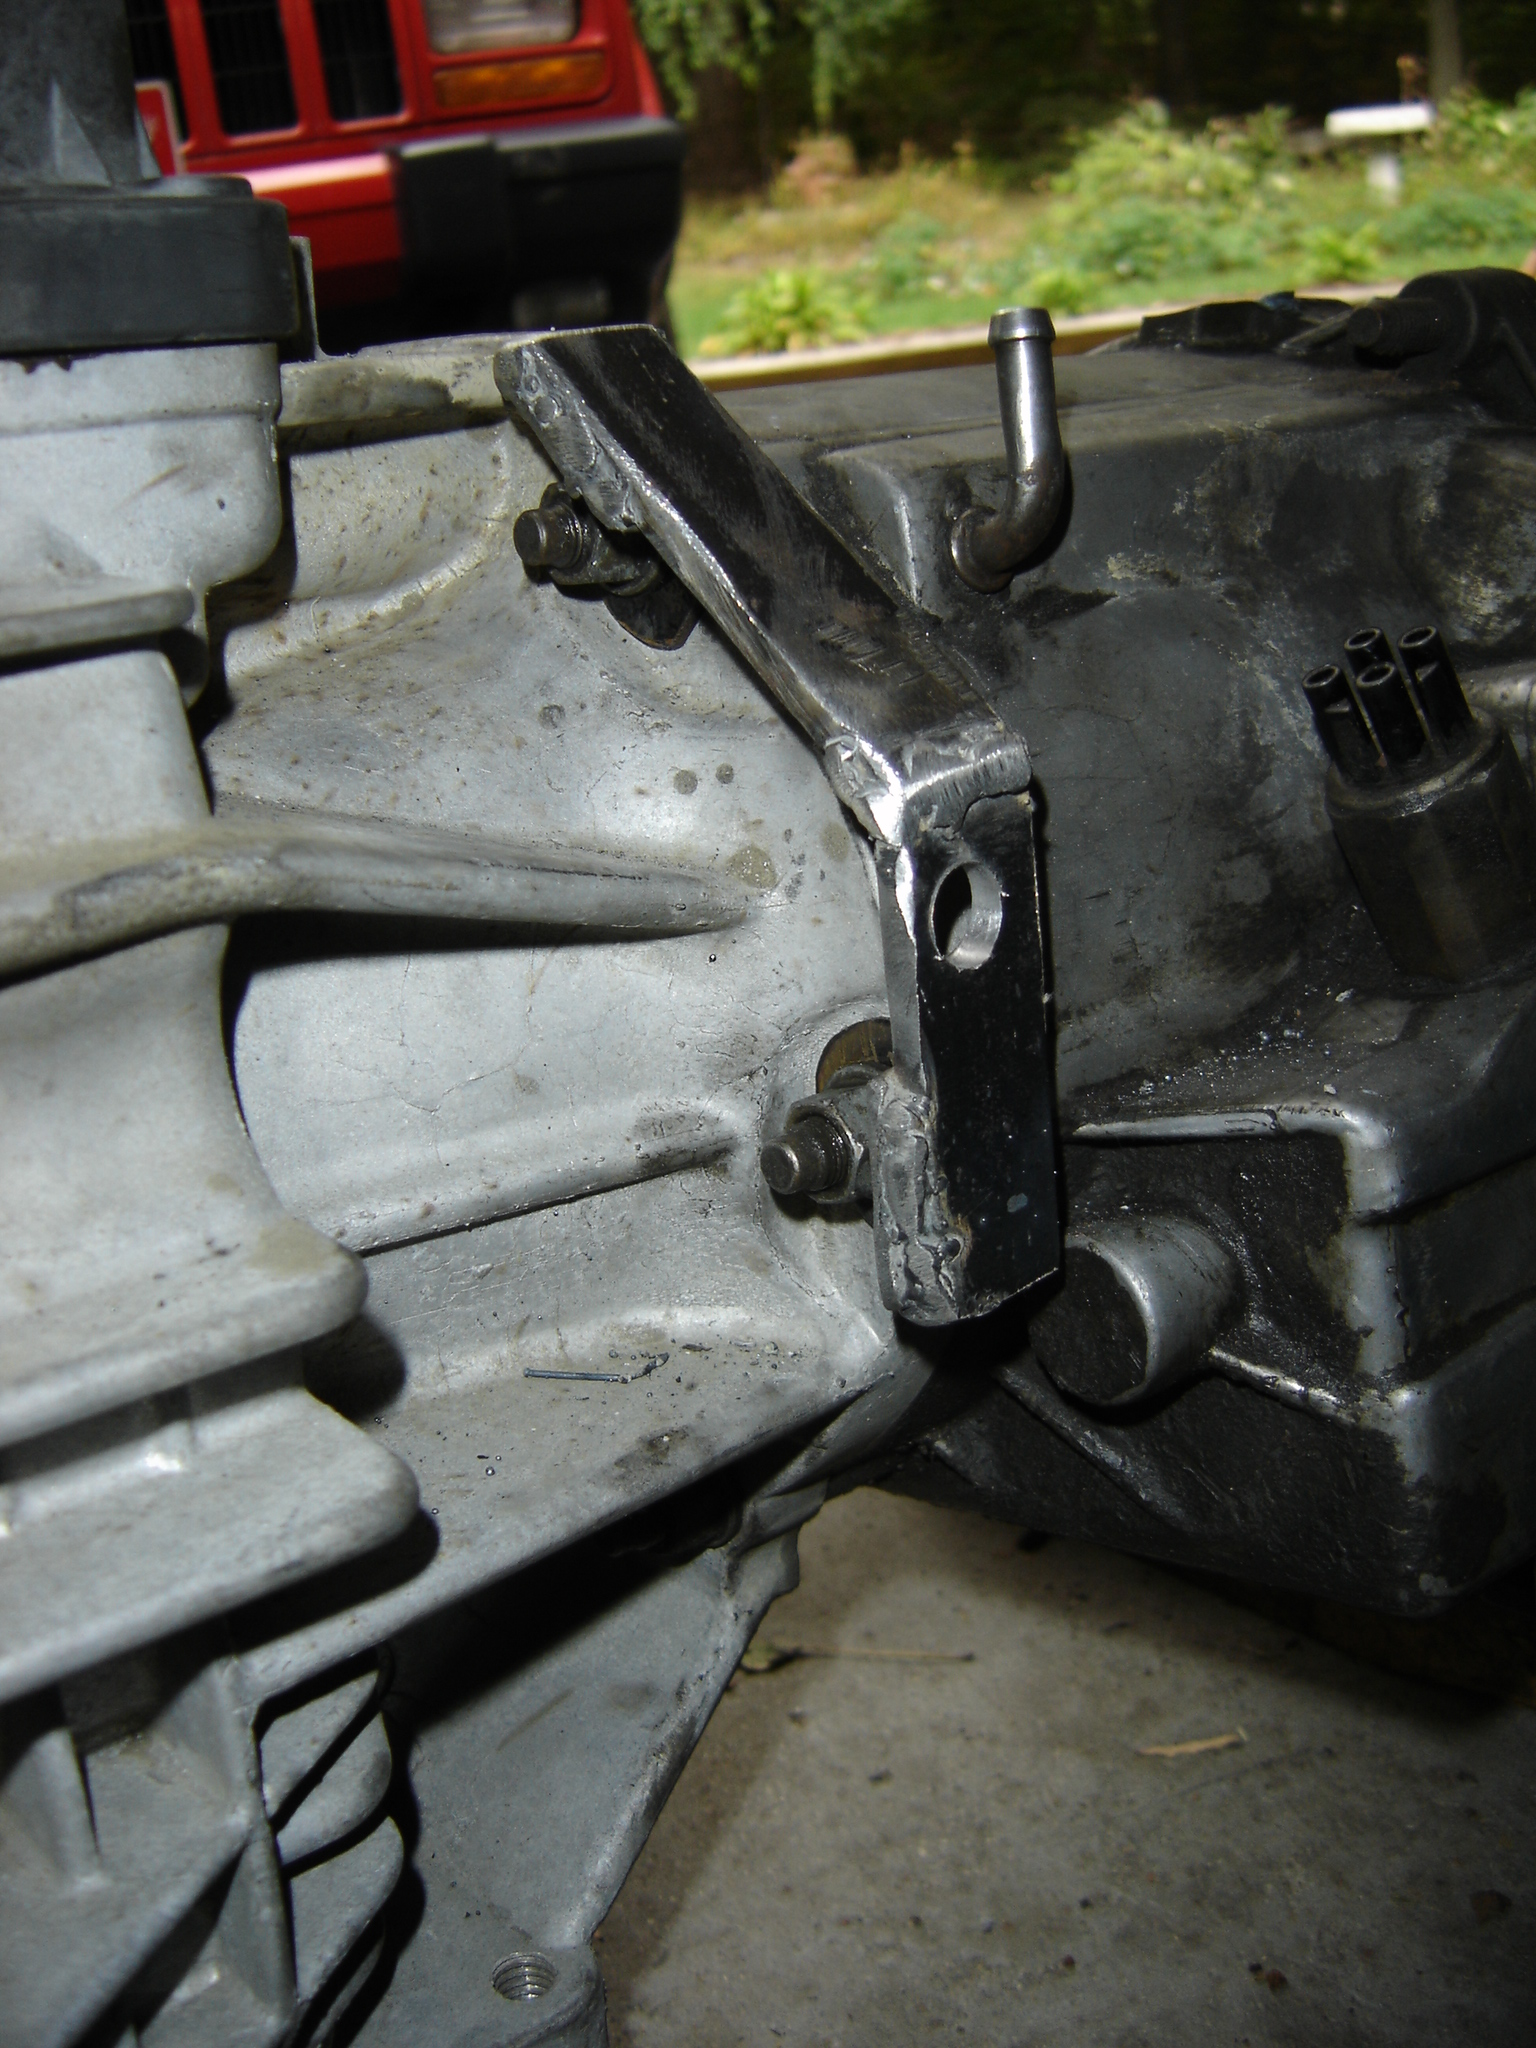
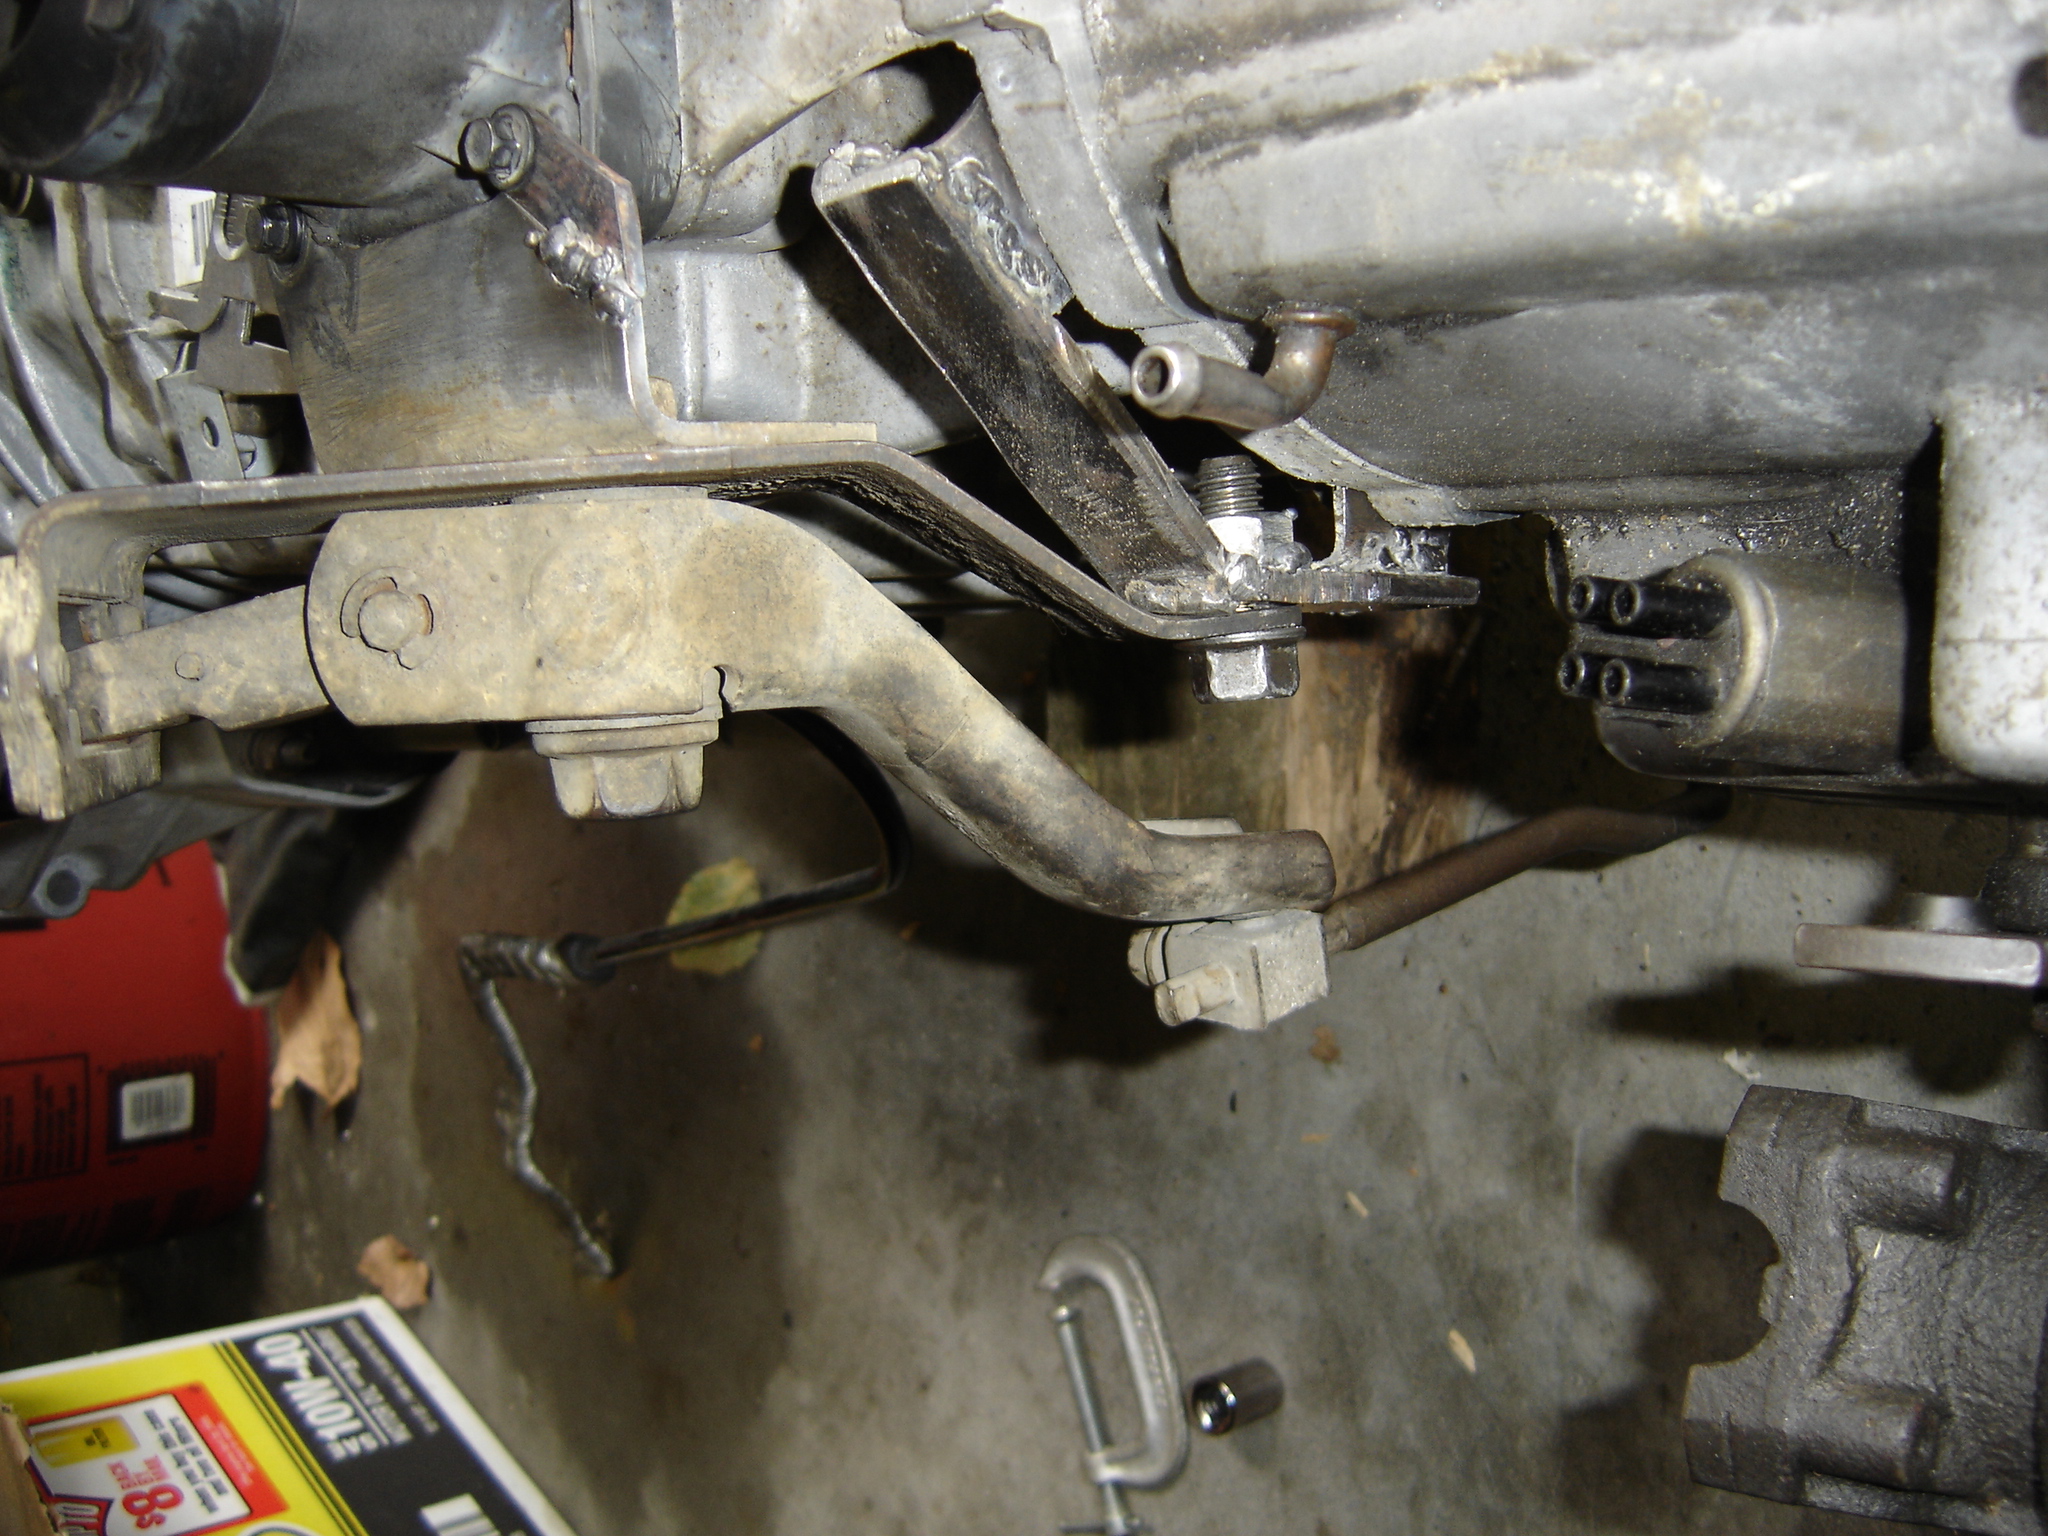
This is where I got to have some fun. Trying out my new welder, and getting some practice at fabrication. The YJ tcase shifter linkage just wasnt made to fit on an NV3550. The mounting holes on the shift tower are closer together than on the AX-15, and there’s no rear mounting point as there is on the AX-15. So I needed to come up with a way to accomidate both of these.
Here’s a shot of the problem at hand.
Now, Advance Adapters makes an adapter for this (go figure) but it’s $40, $40 that I dont want to spend. So I decided to make my own.
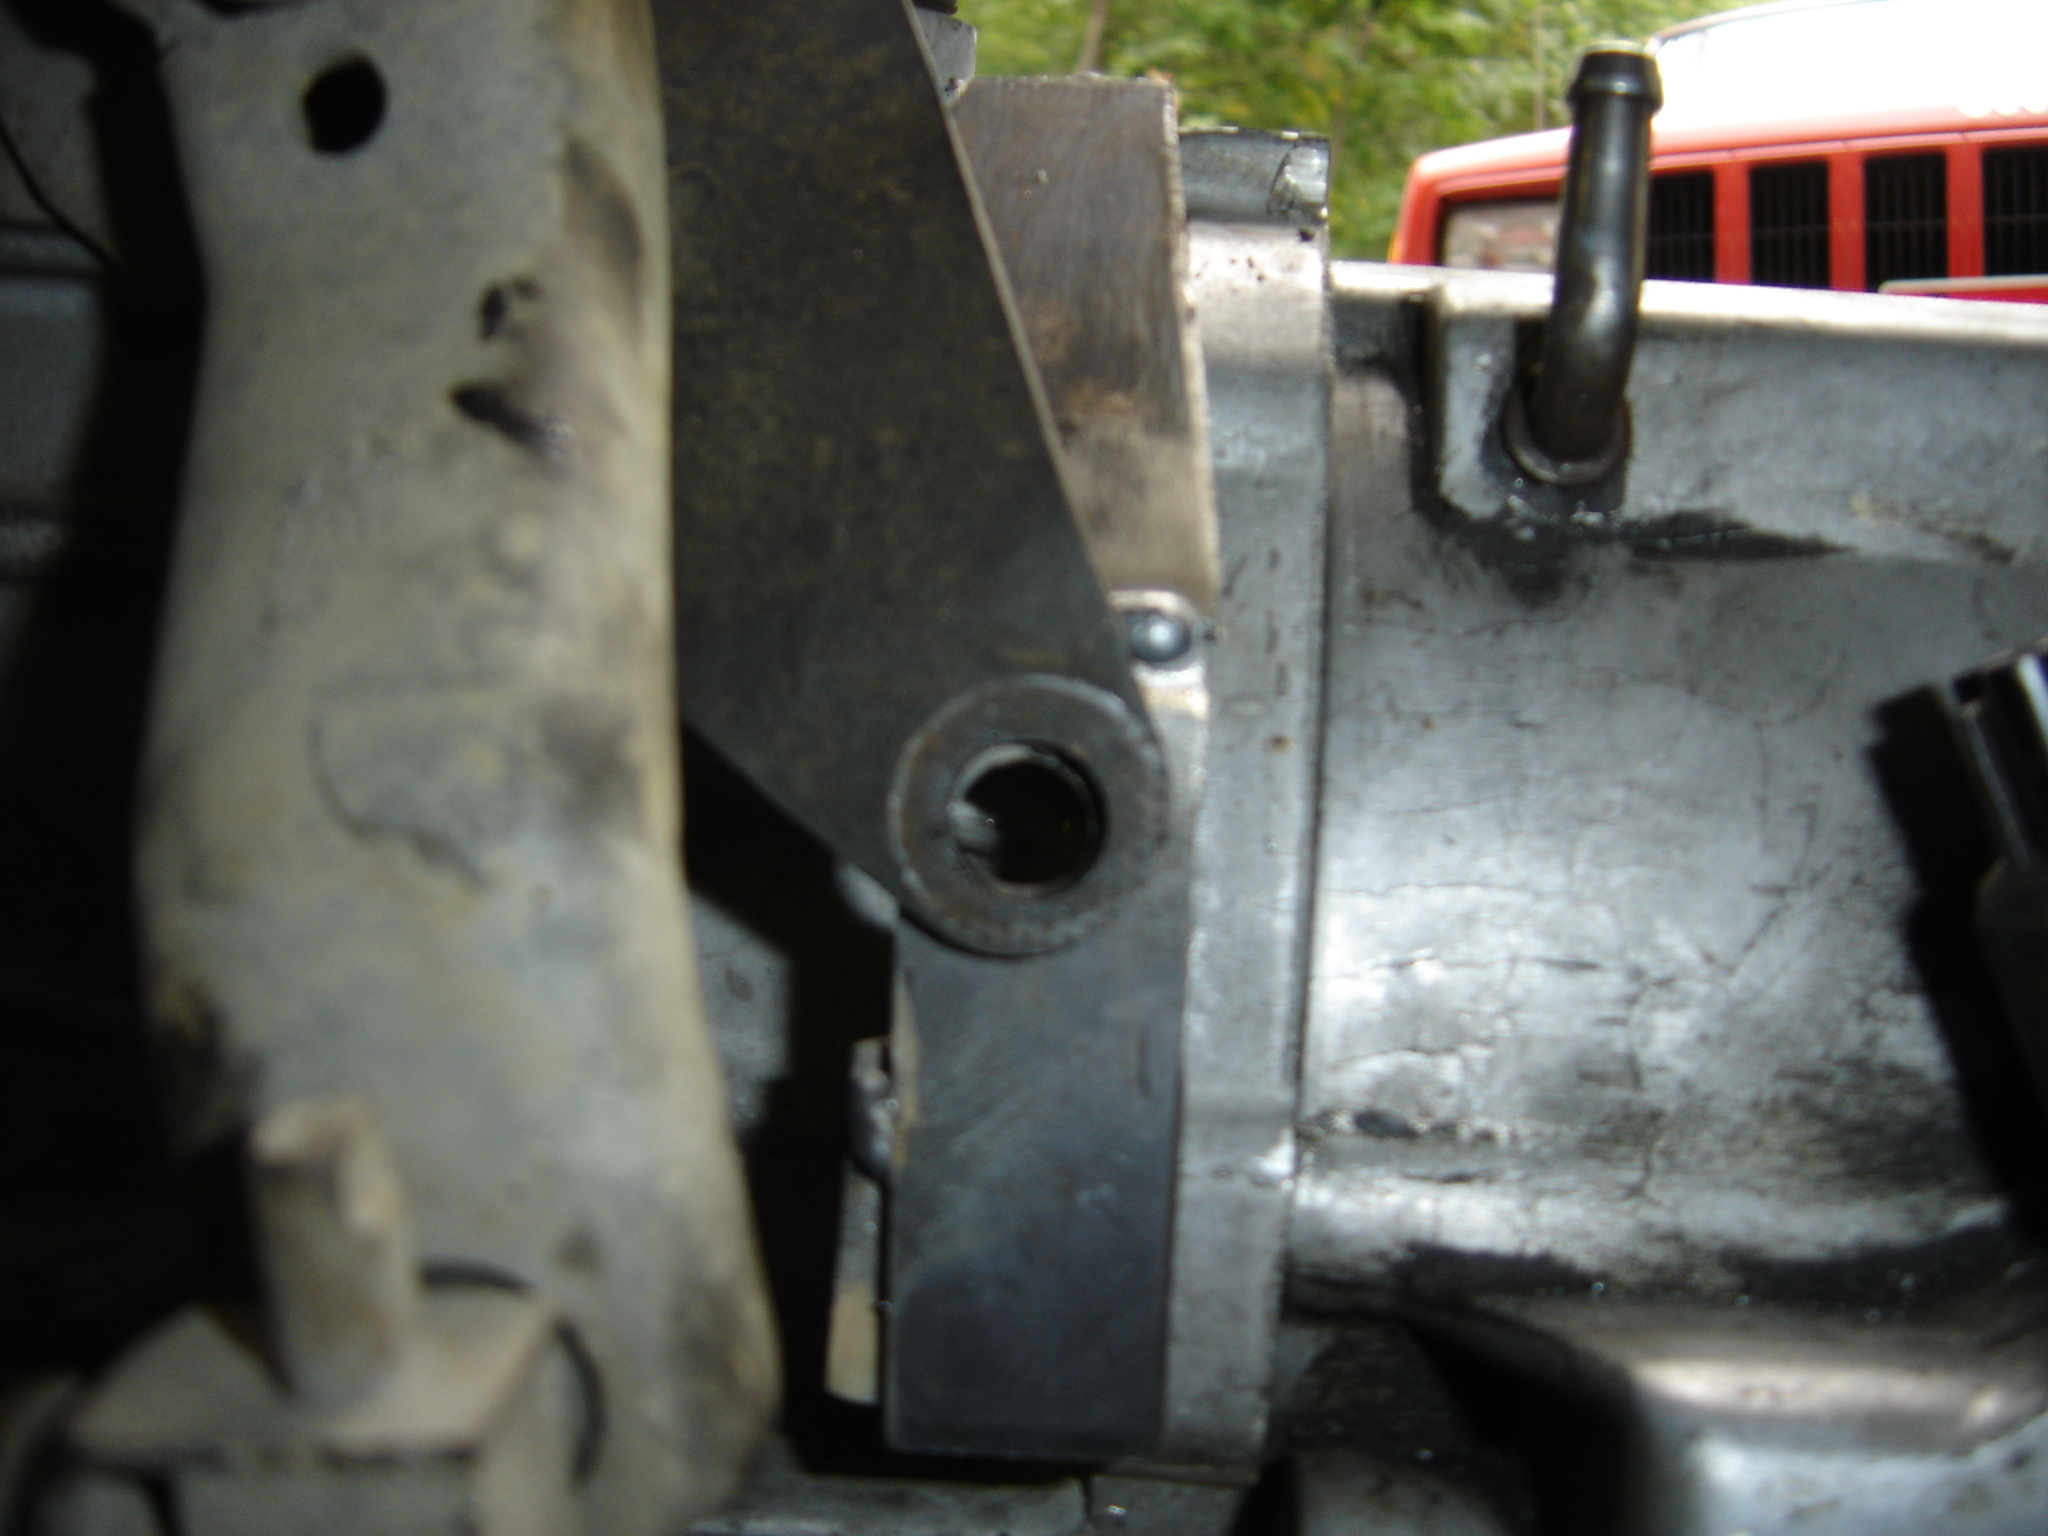
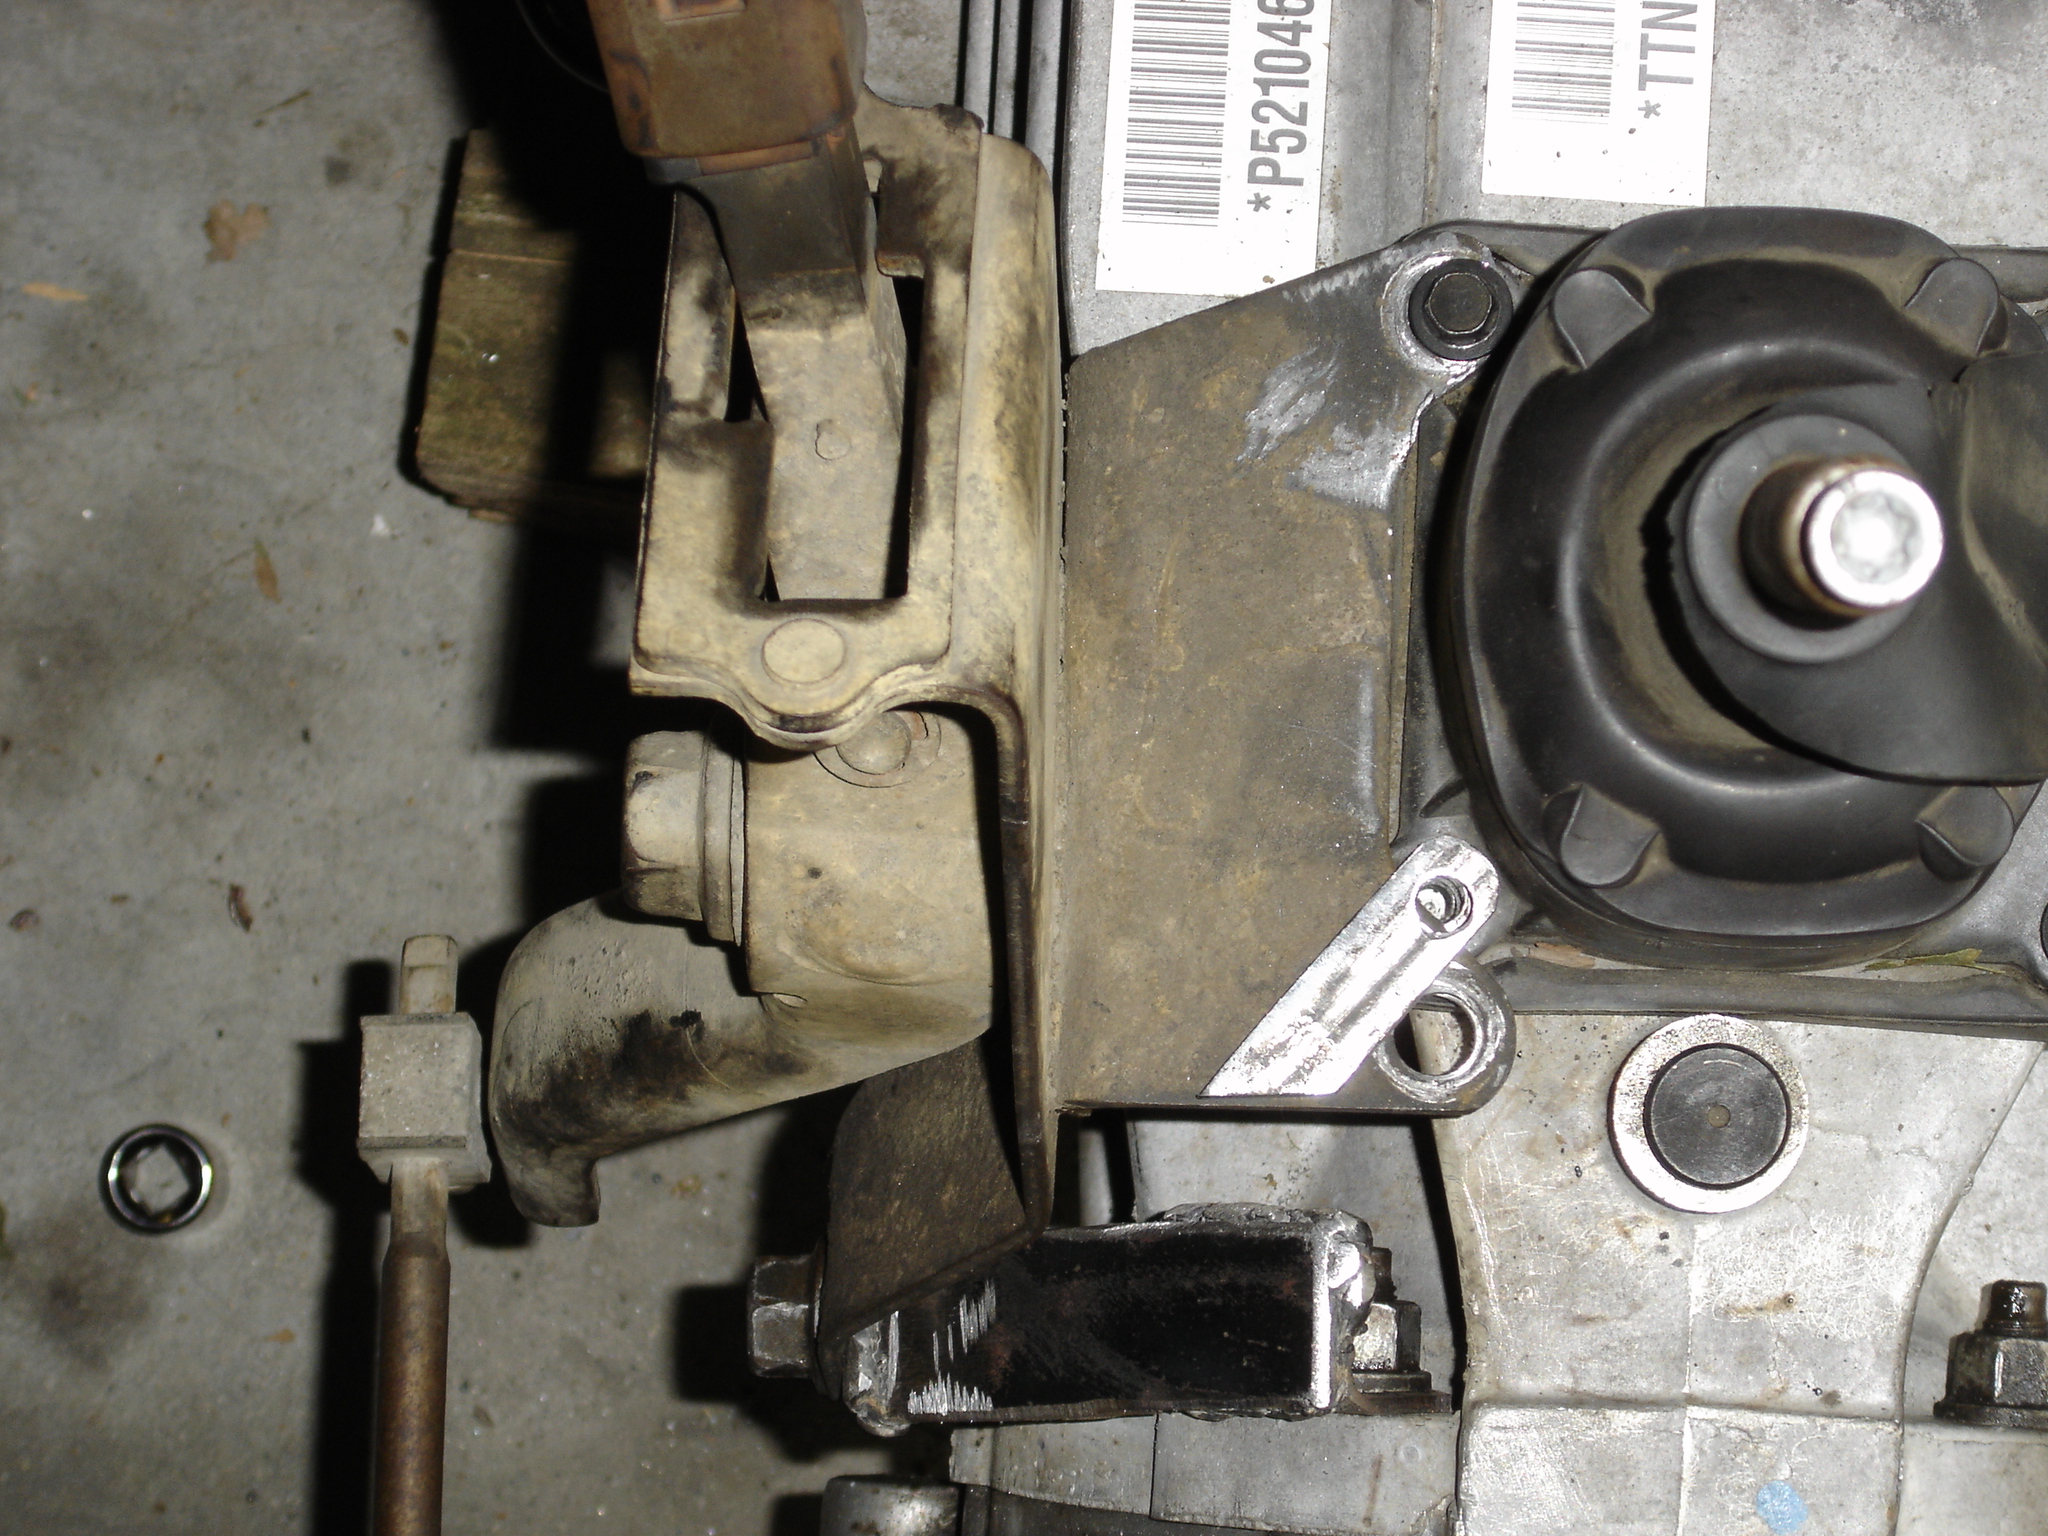
First I ground enough of the metal around the forward most mounting hole on a bench grinder so that it would bolt up to the 3550’s shift tower. Then I made a bracket that bolted to two of the tcase mounting studs, and placed a threaded hole right where it needed to be to mount the rear of the tcase linkage to. After that, I cut the rear shift tower mounting tab off completely, and made a new one out of some scrap steel, and welded that to the shifter linkage. Some pictures to illustrate:
Ground away some of that forward tab.
Once it was mounted, using that one tab, I started working up an idea for a bracket.
Then I tack welded it together:
Lets make sure it all fits
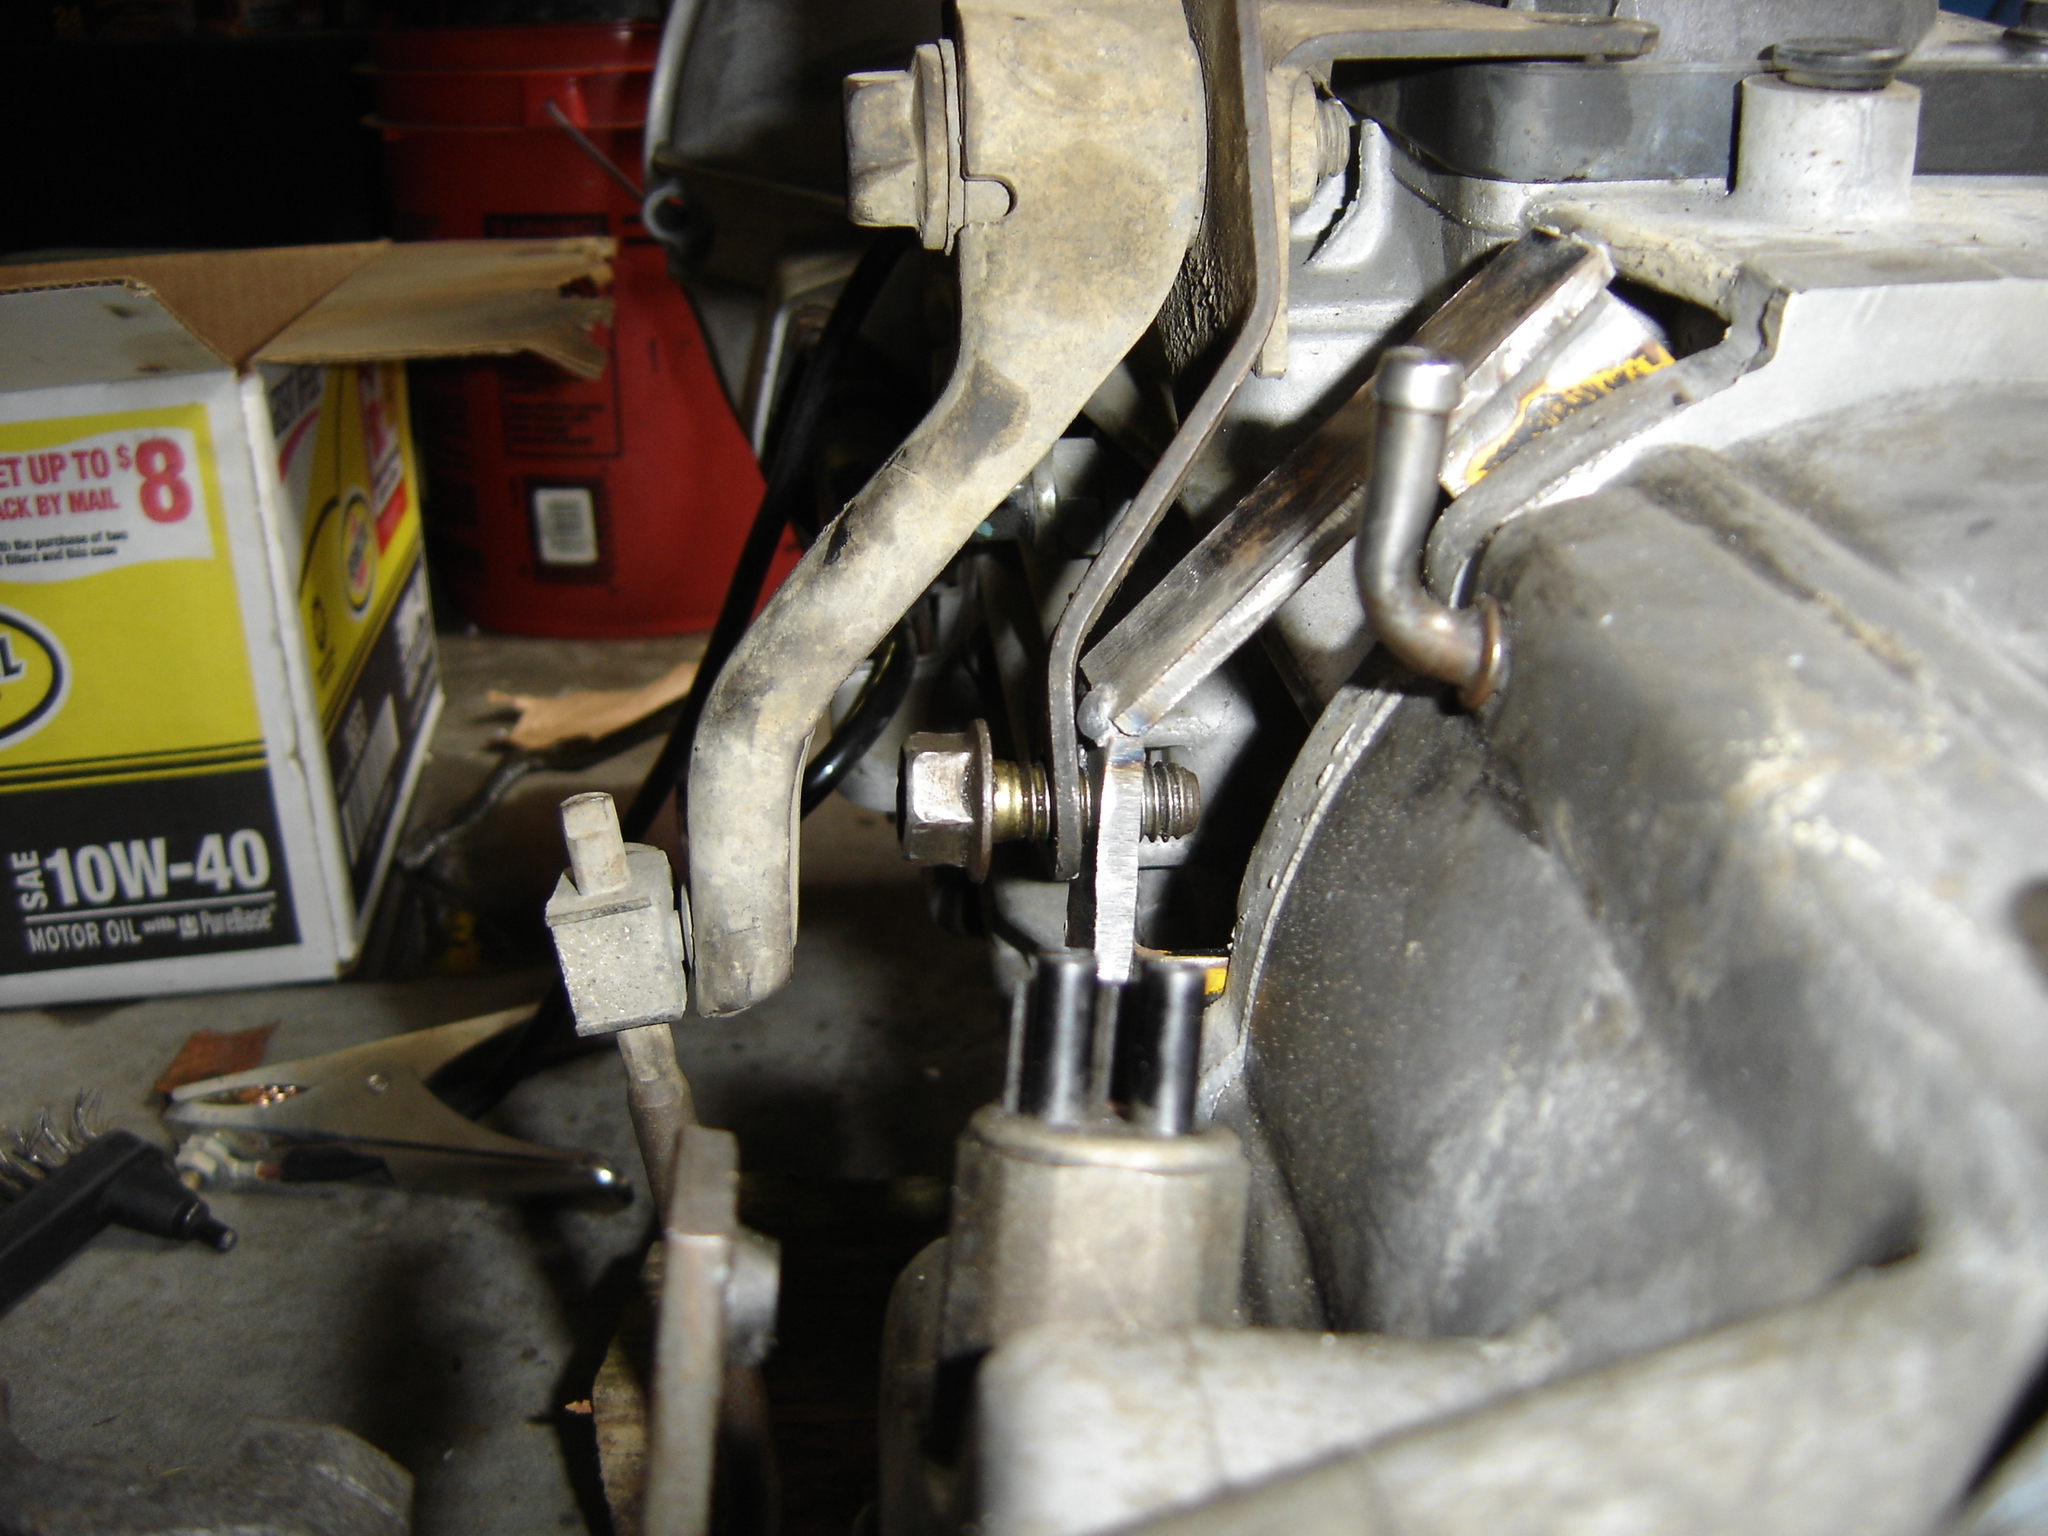
Welded it all up
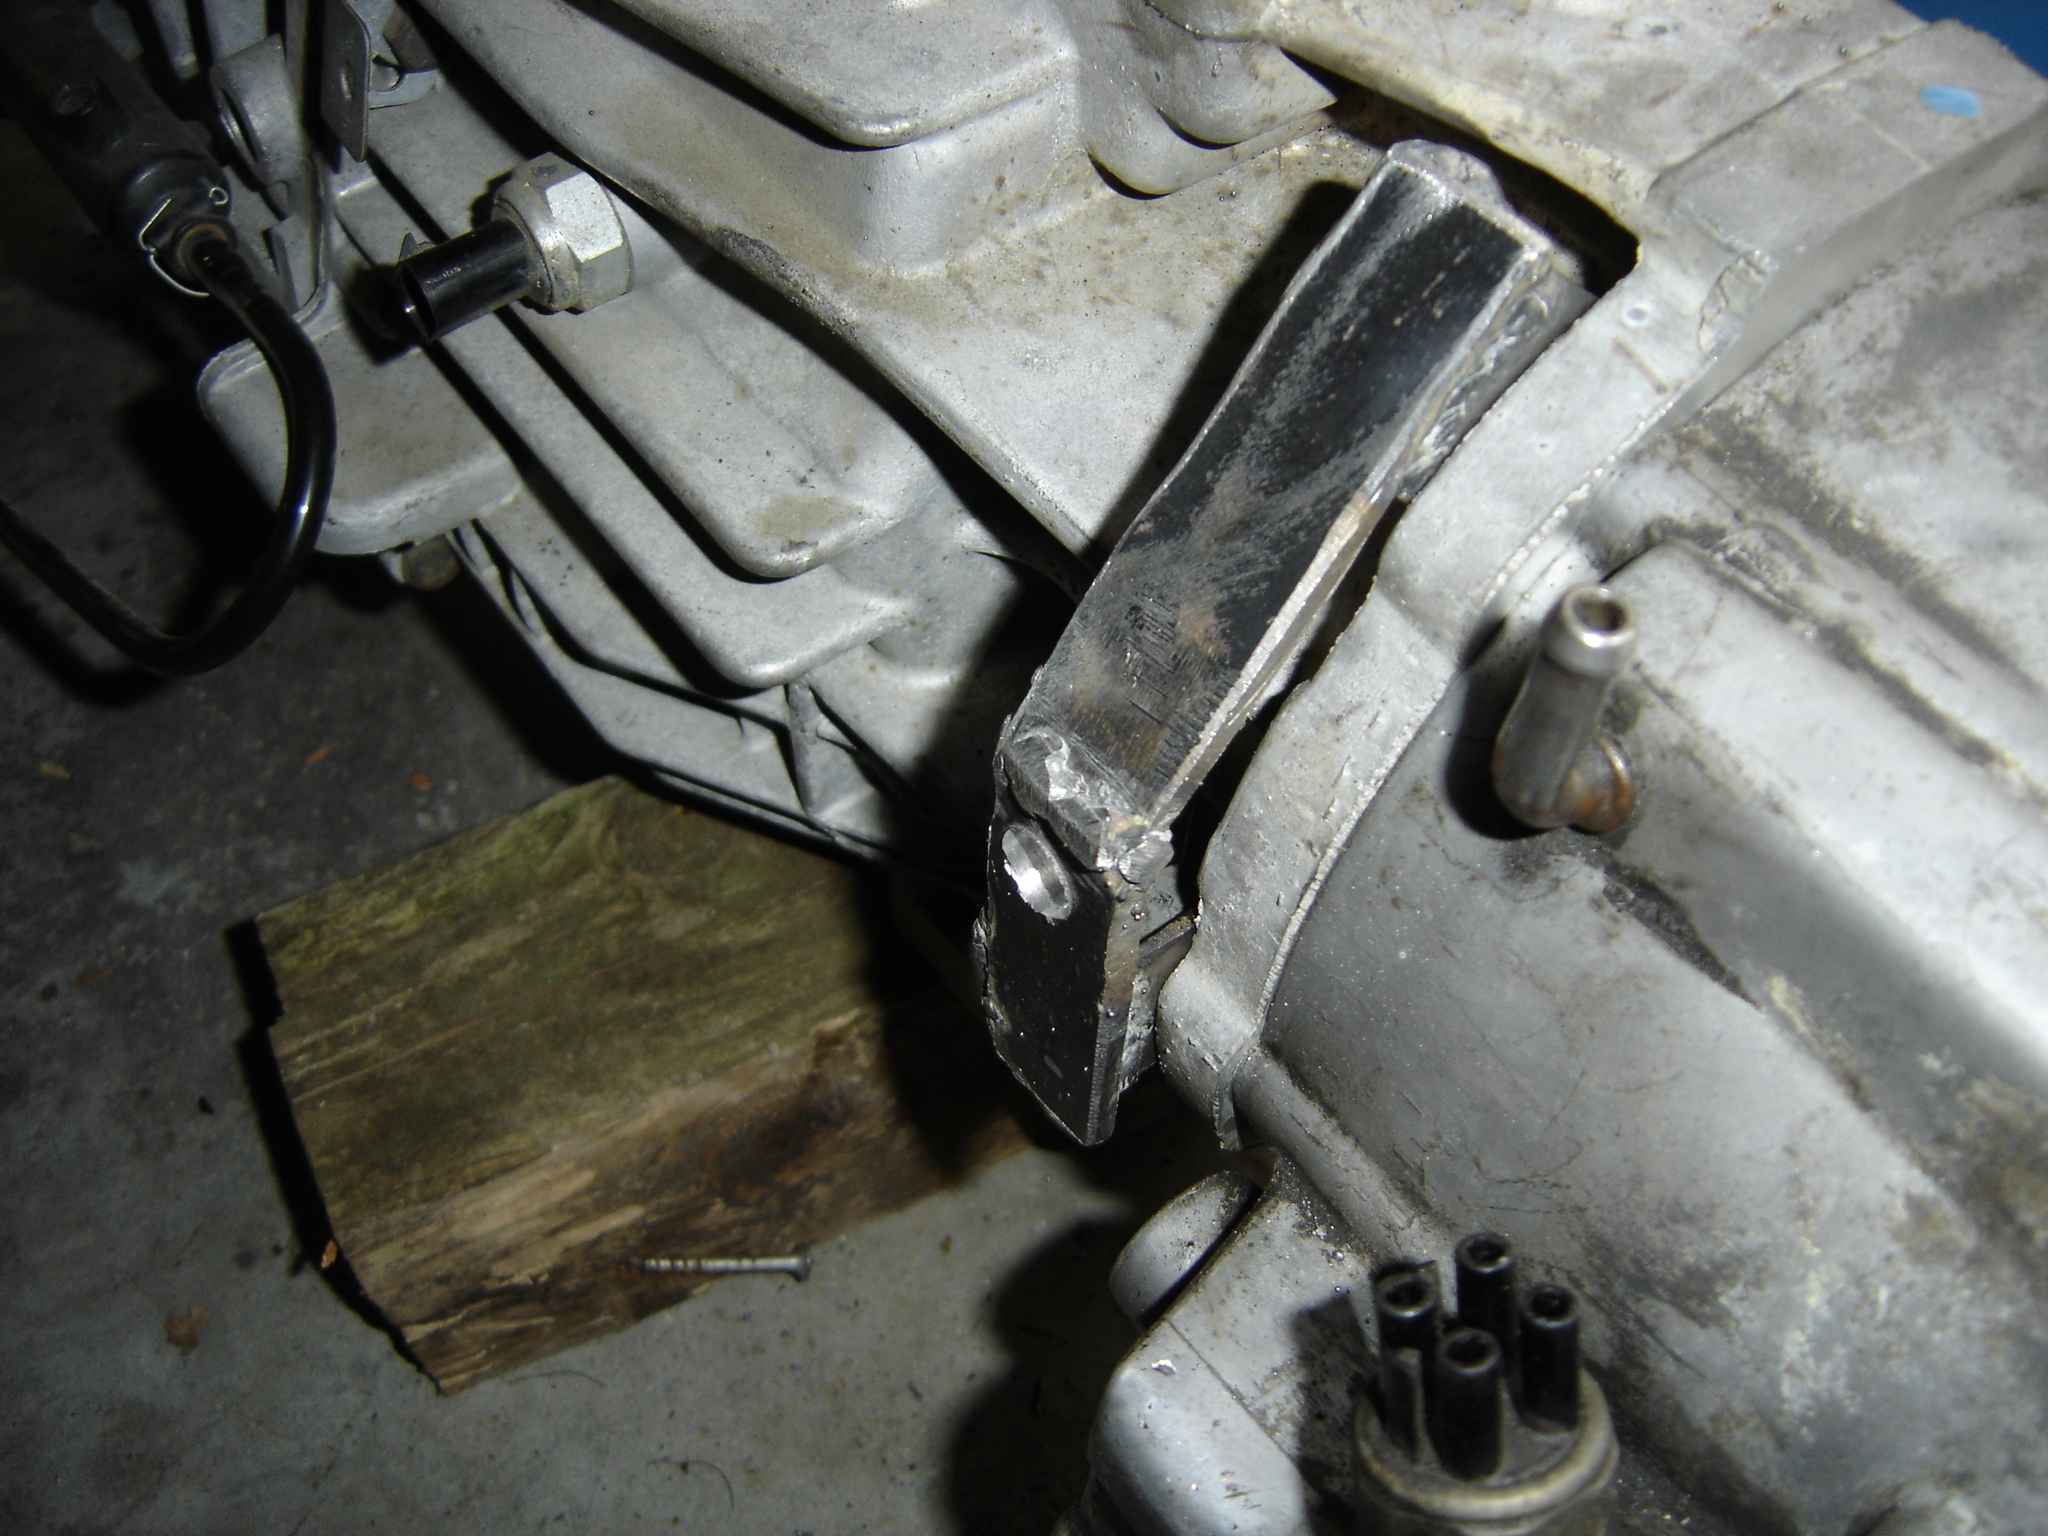
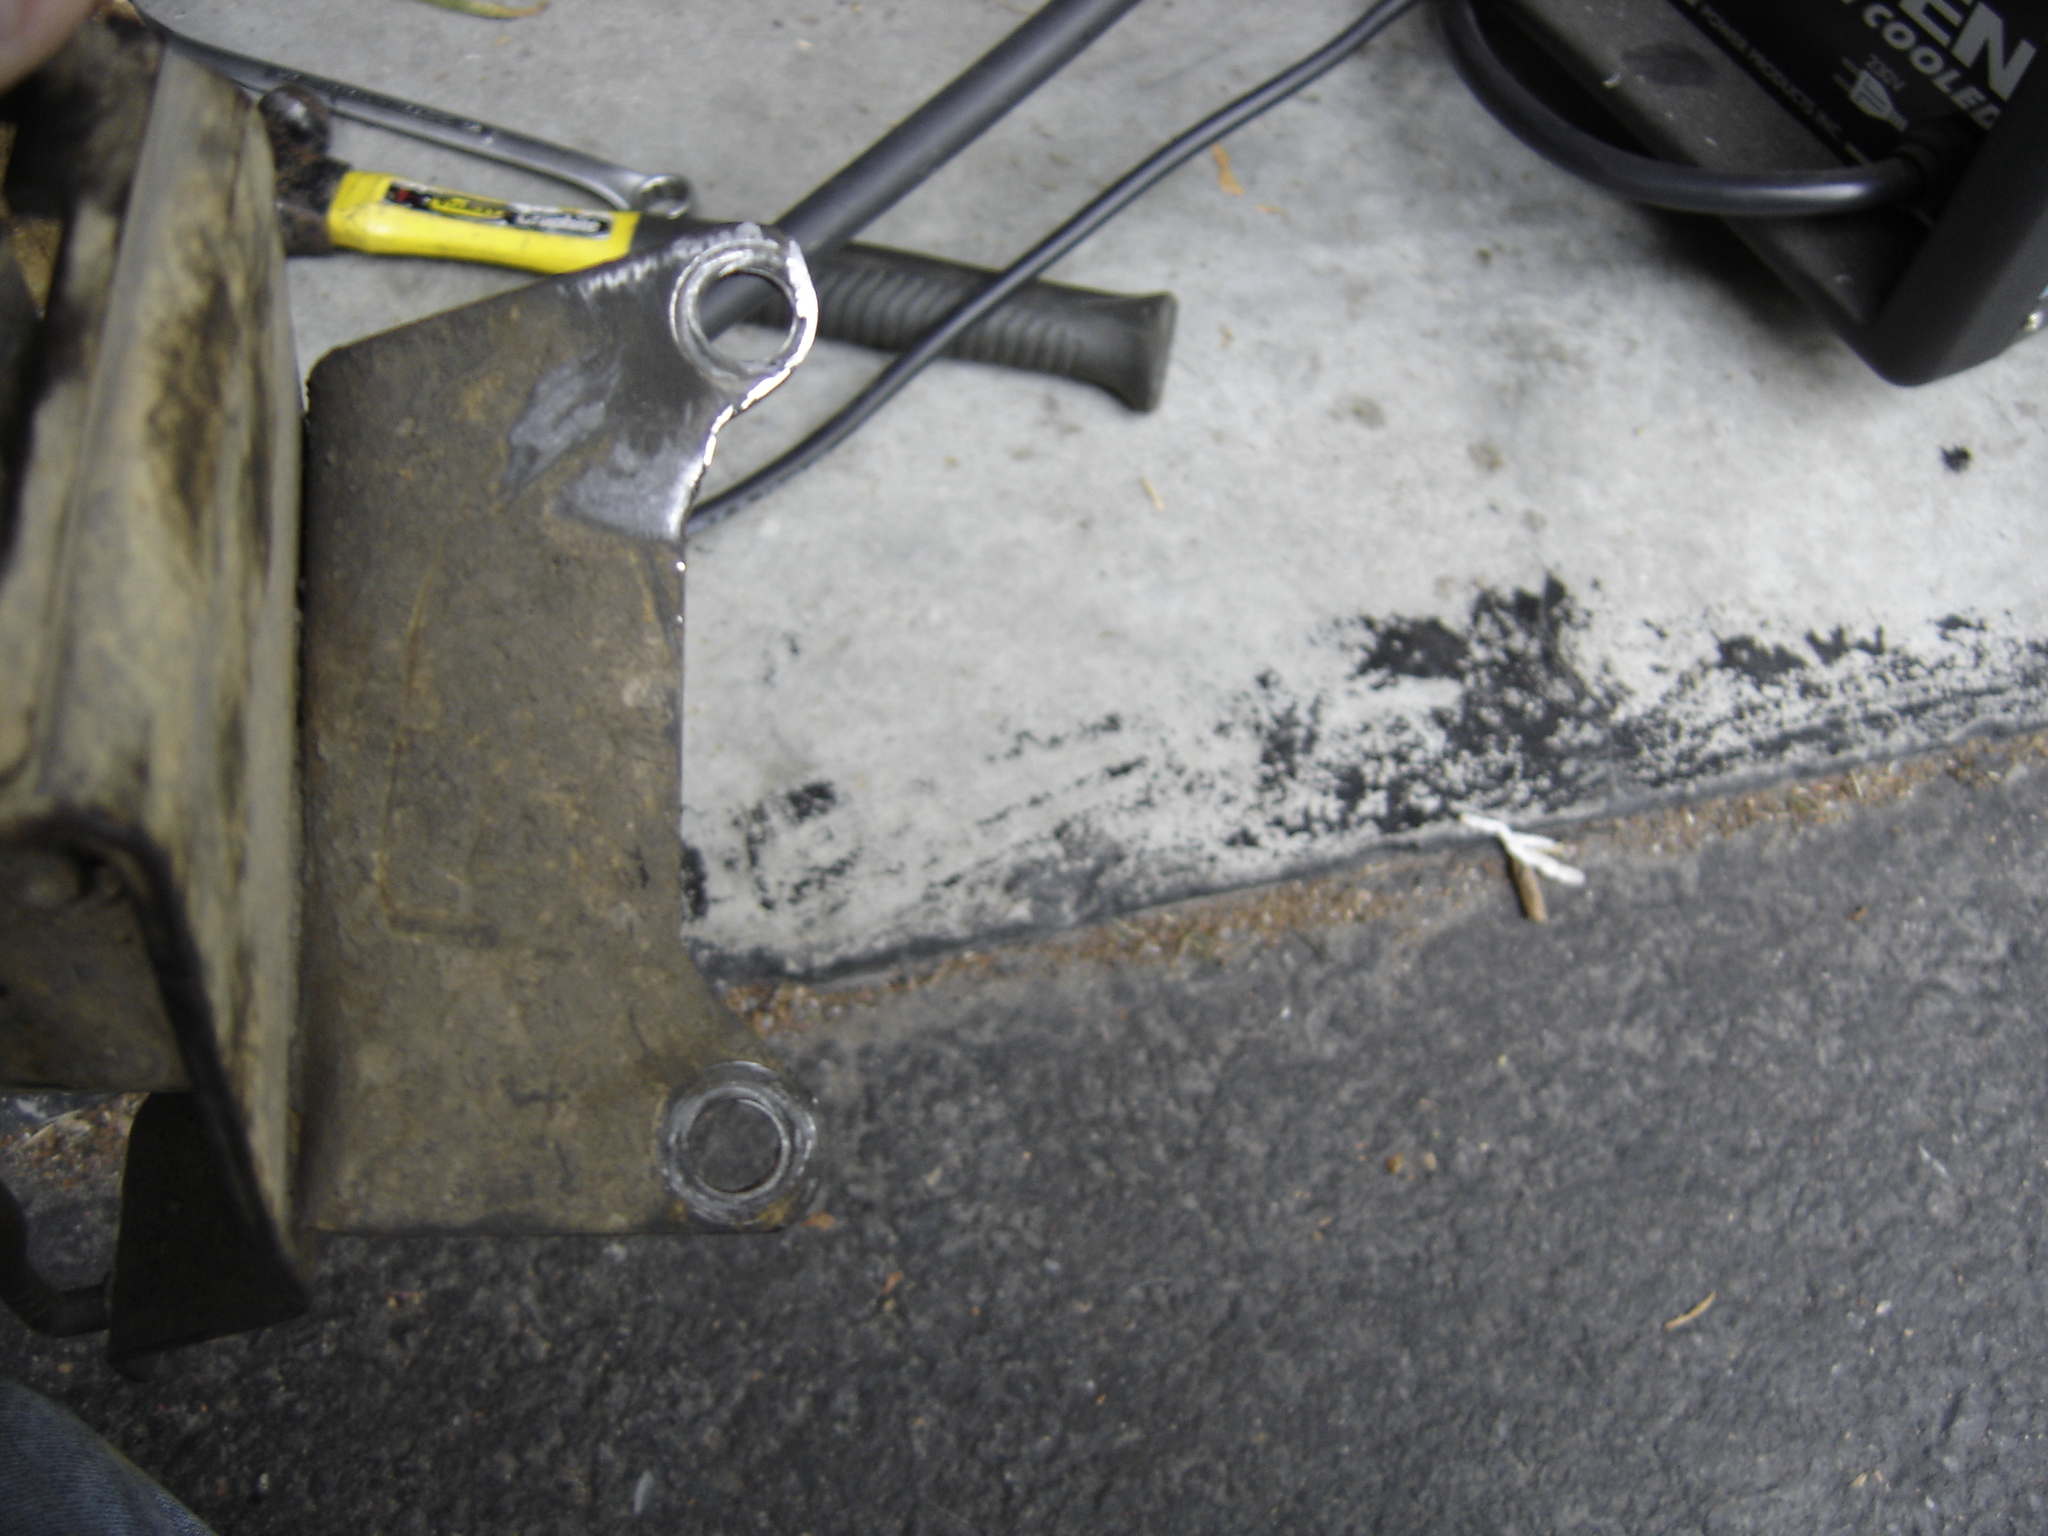
And here’s that tab I made
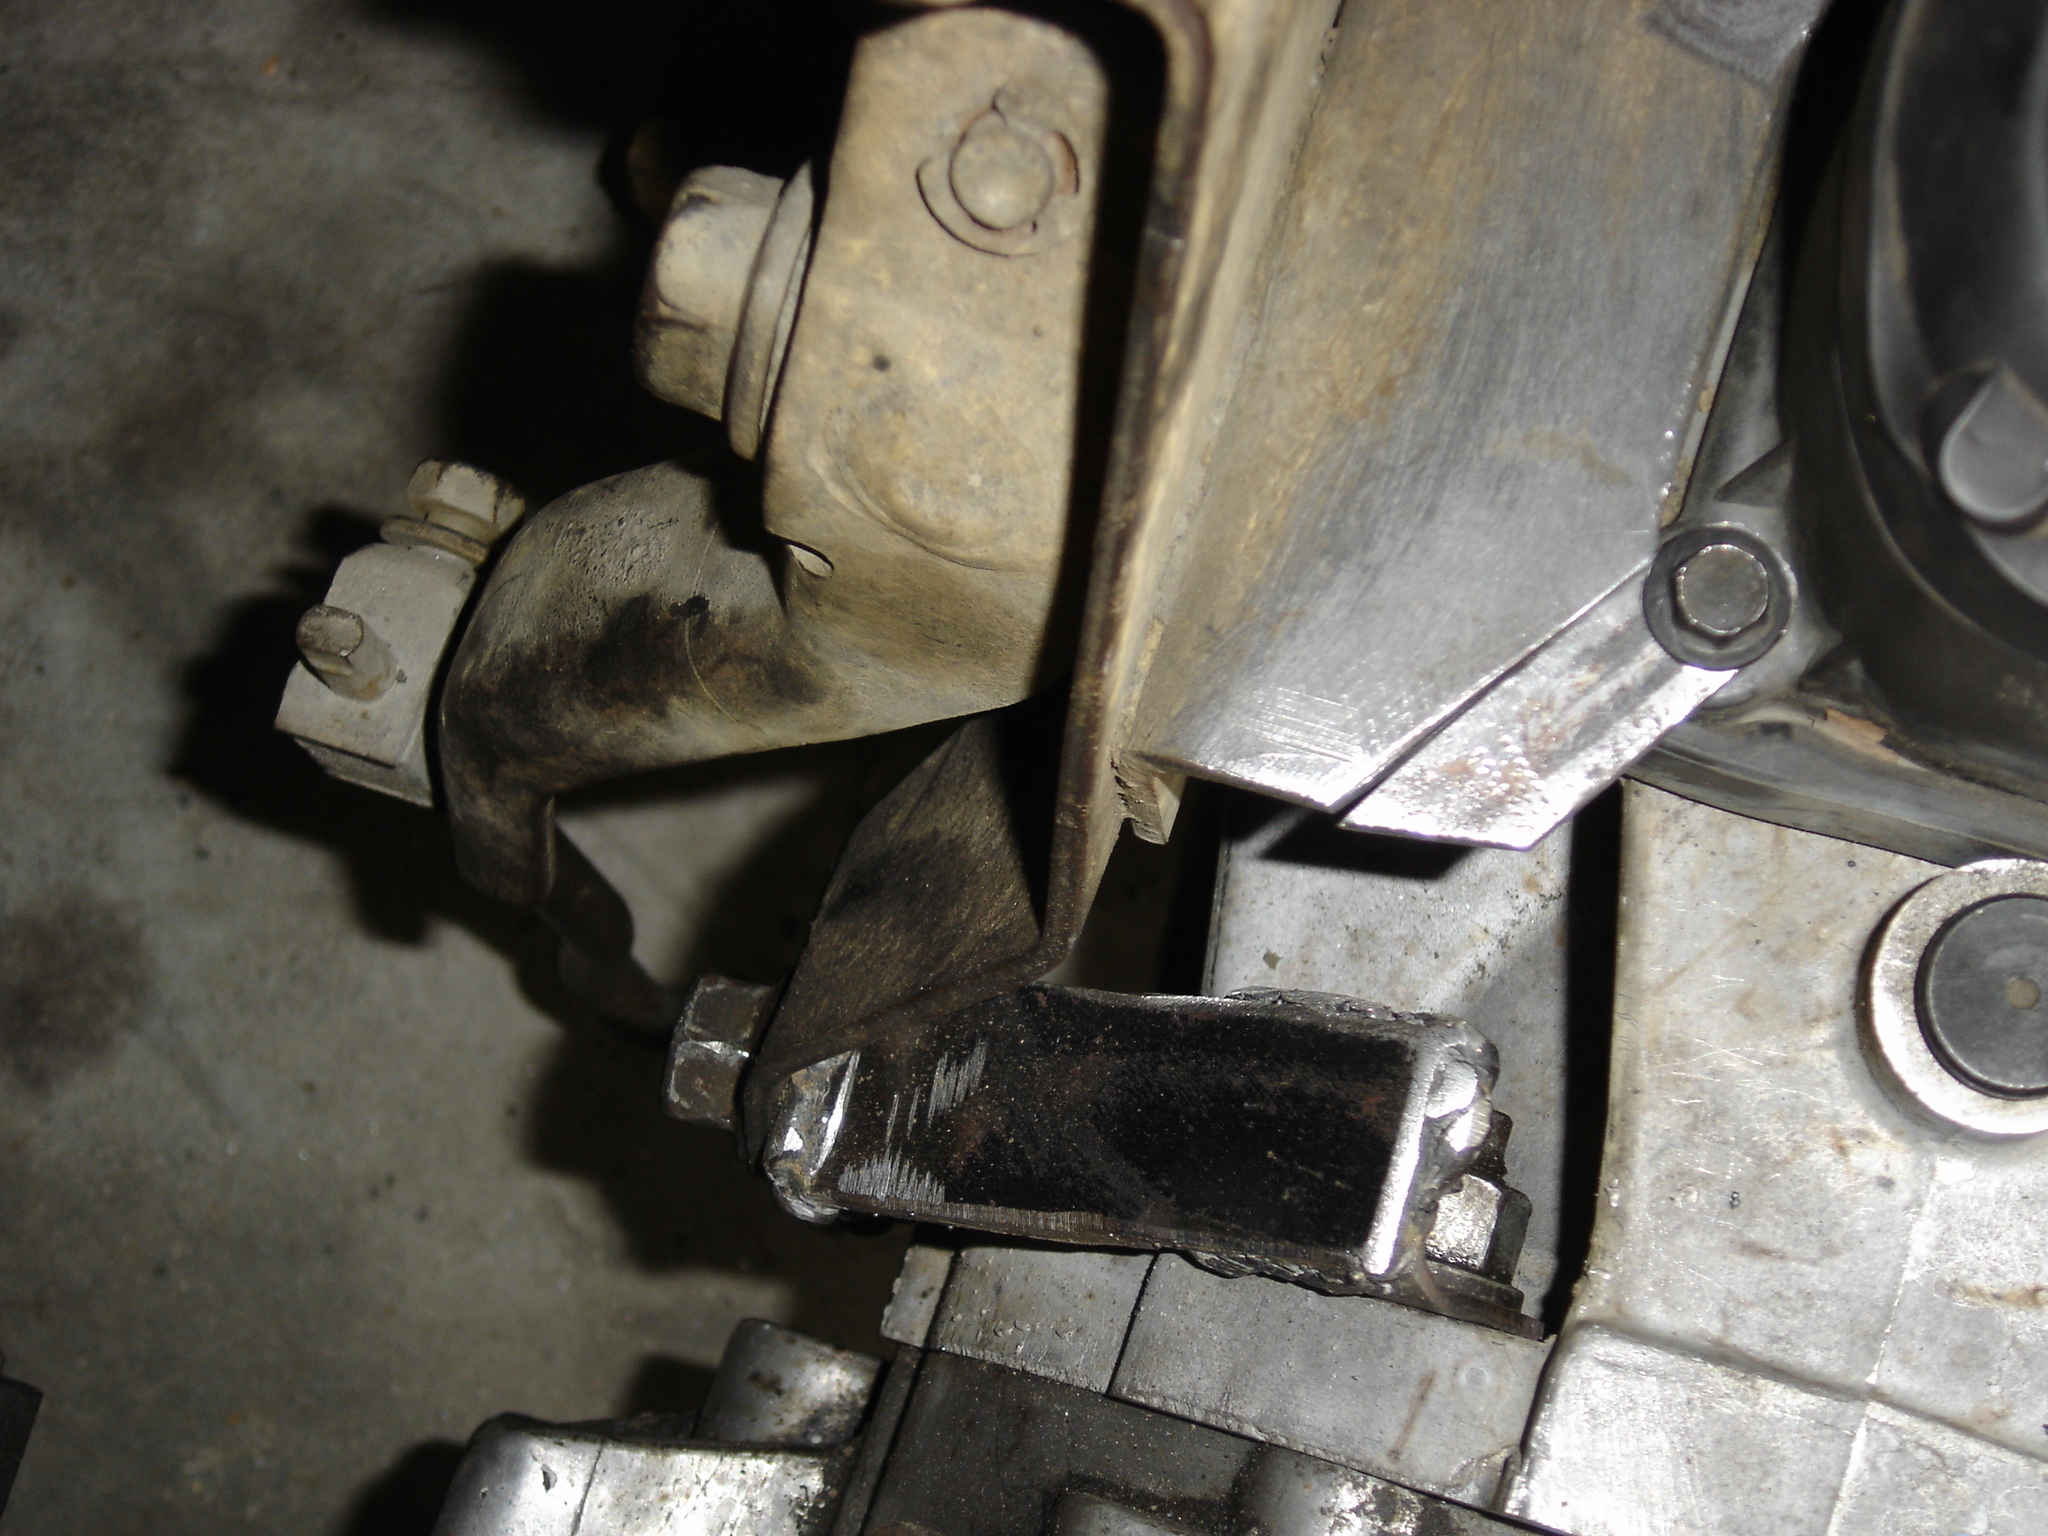
Welded in place
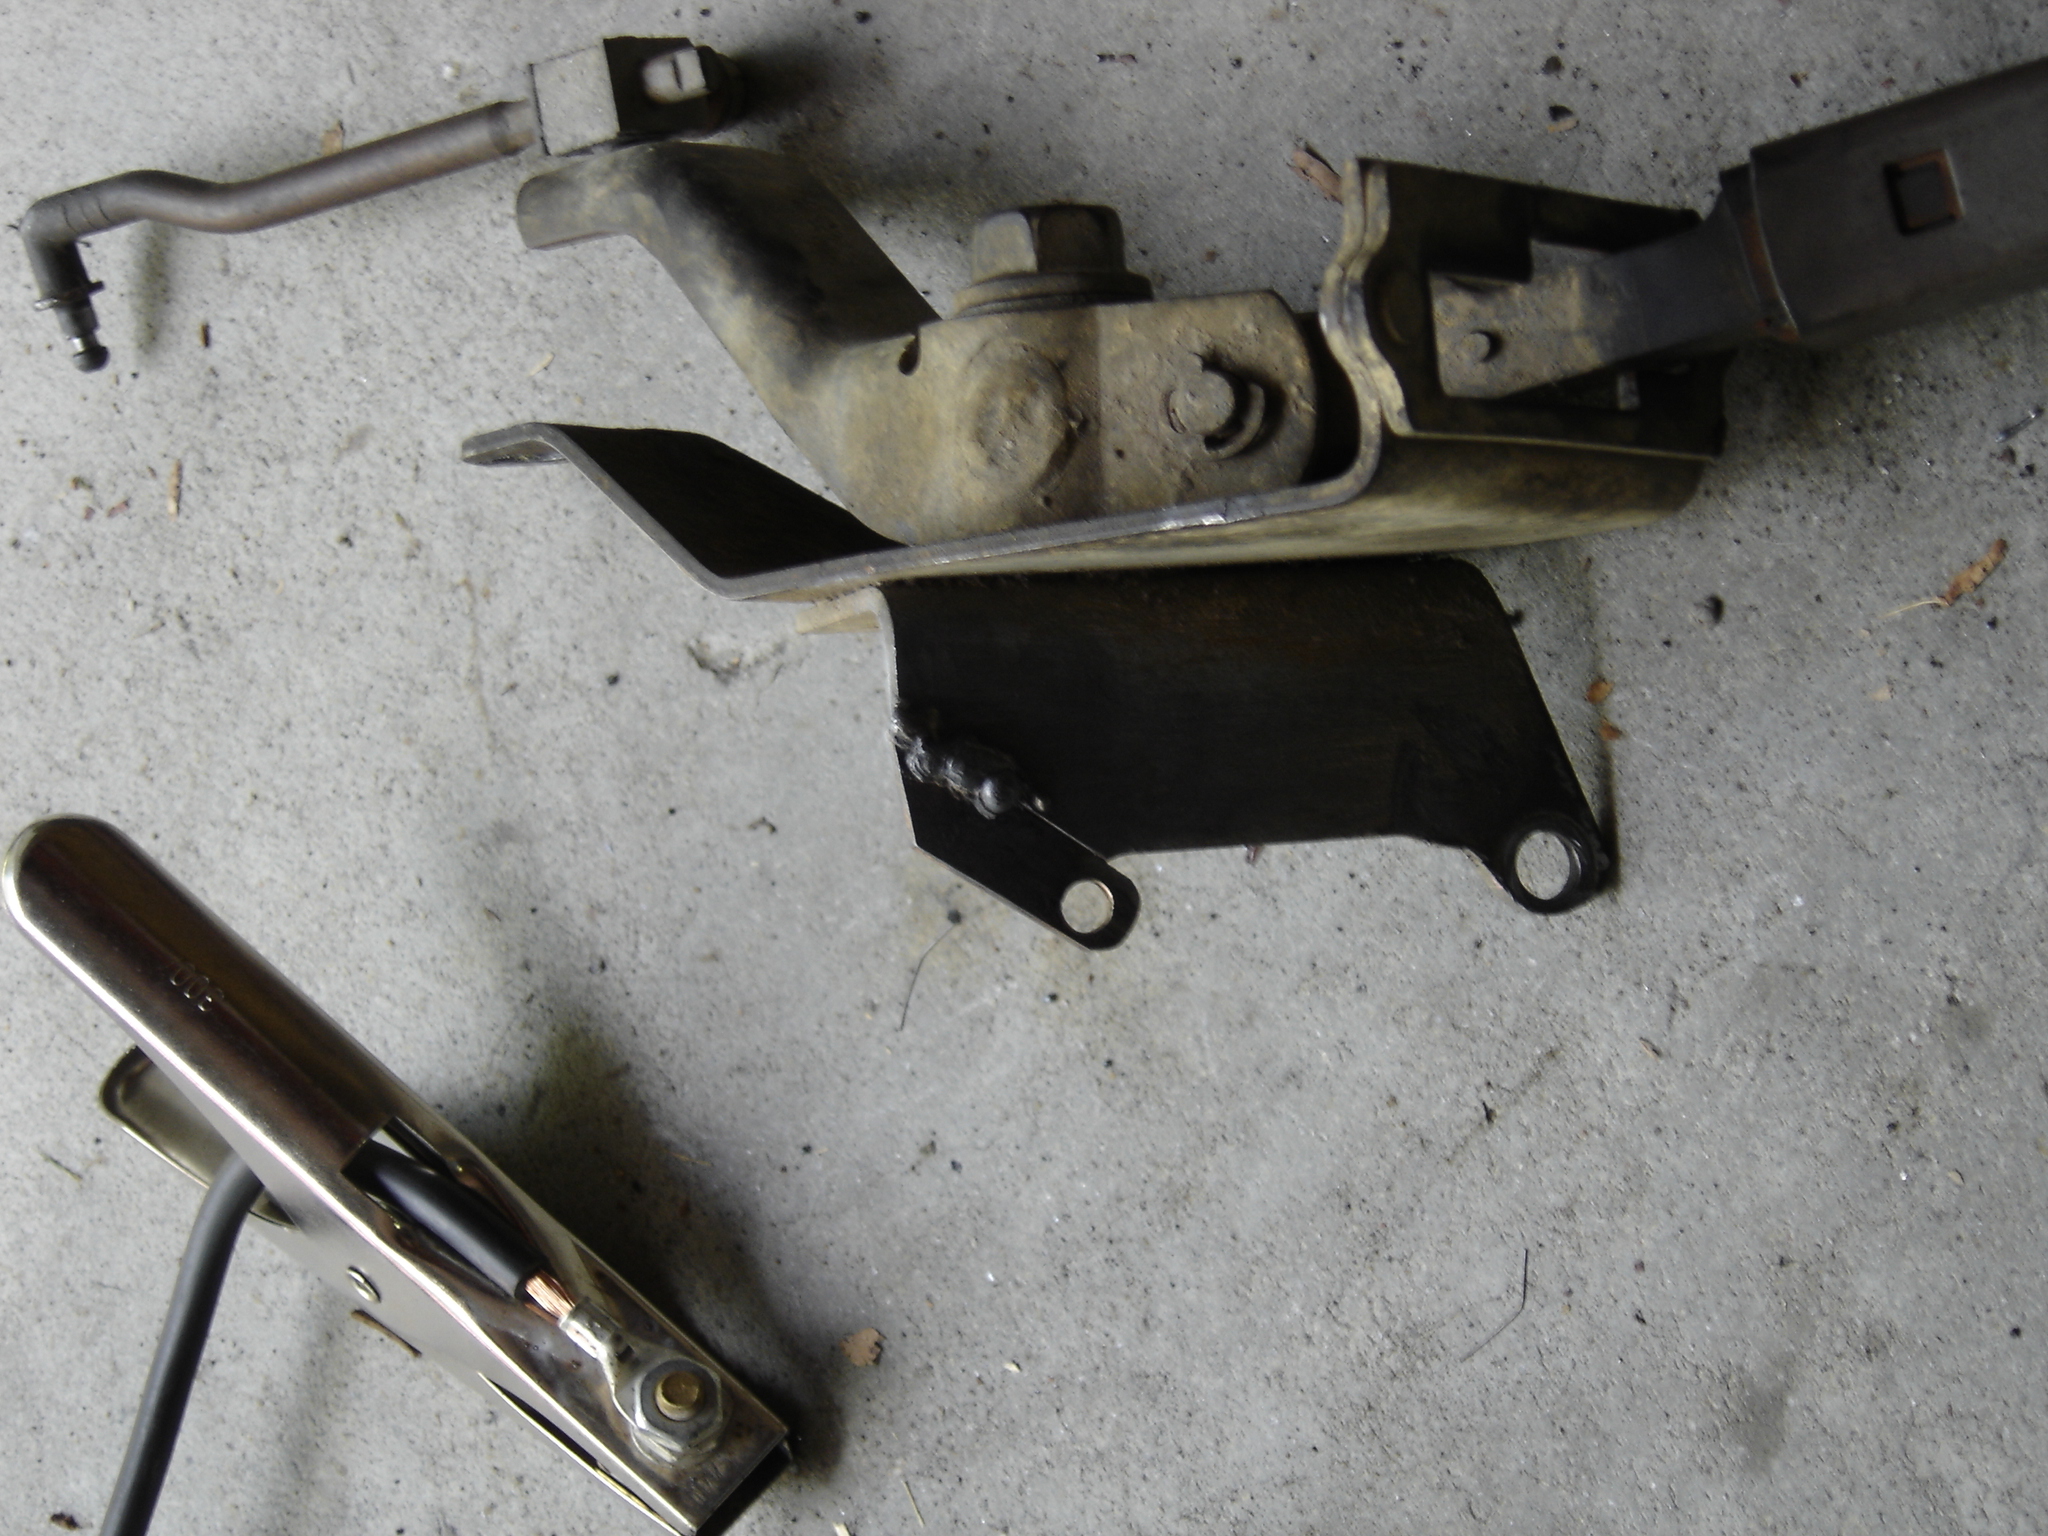
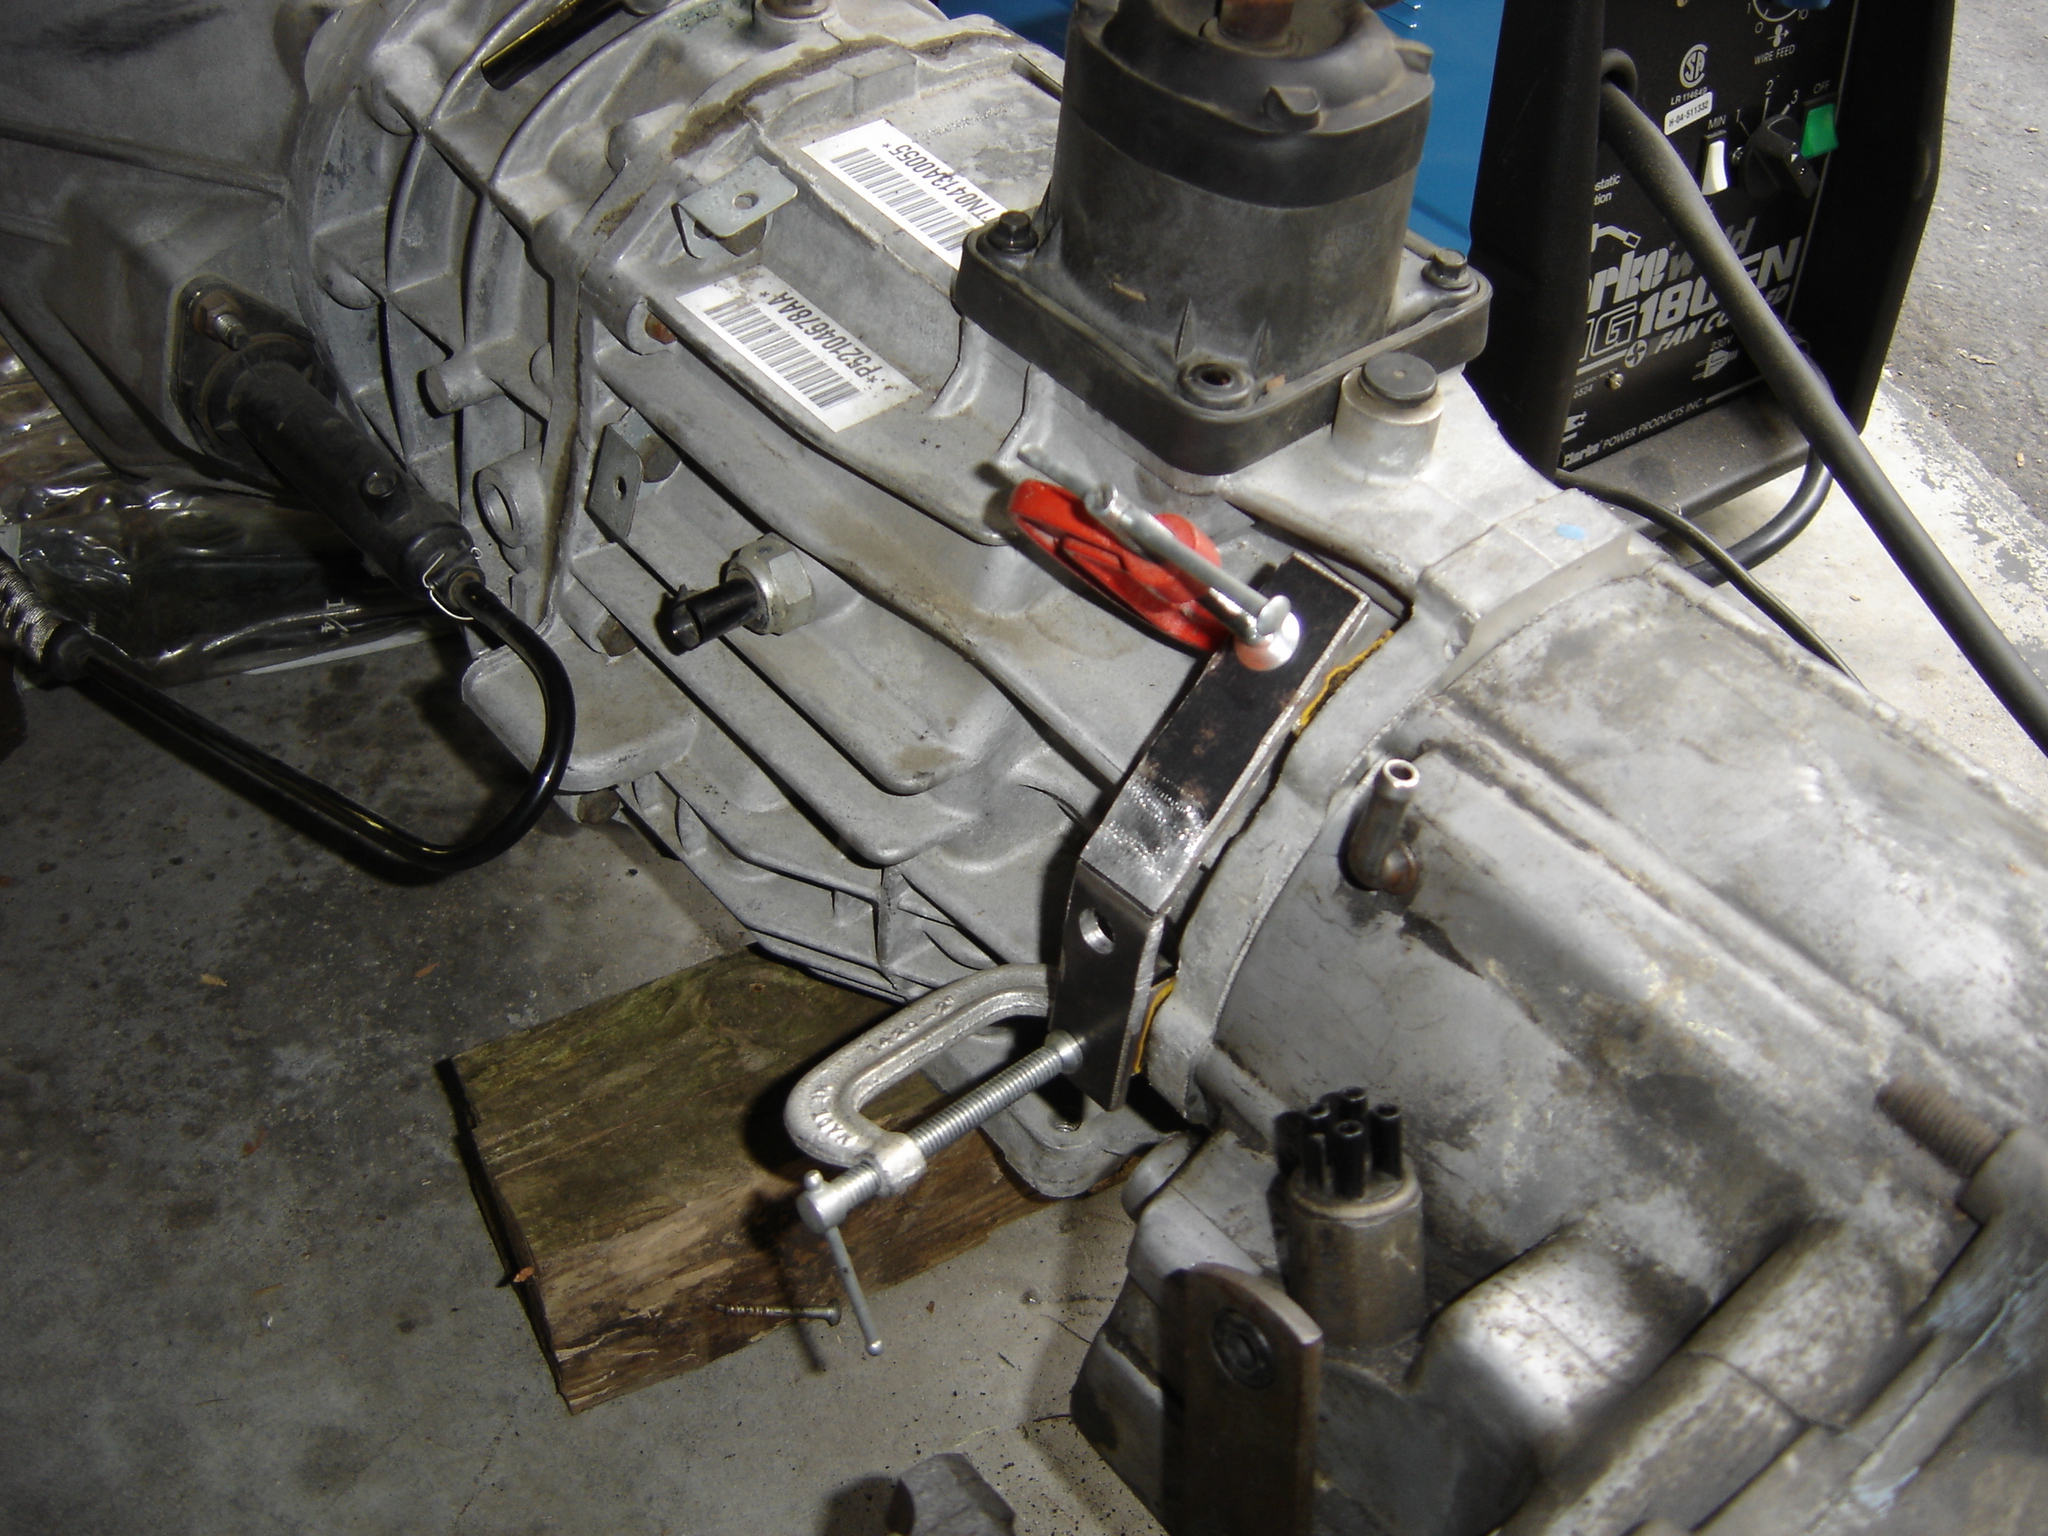
Here we are with everyting in place, and the nut welded to the back of my bracket.
I ended up coating the whole shebang in some brown paint. But later I re-coated it in a more familiar color… Orange.
Next I enlisted the help of Jay again, to remove the AX-15, and get the NV3550 mounted. This deserves some explanation.
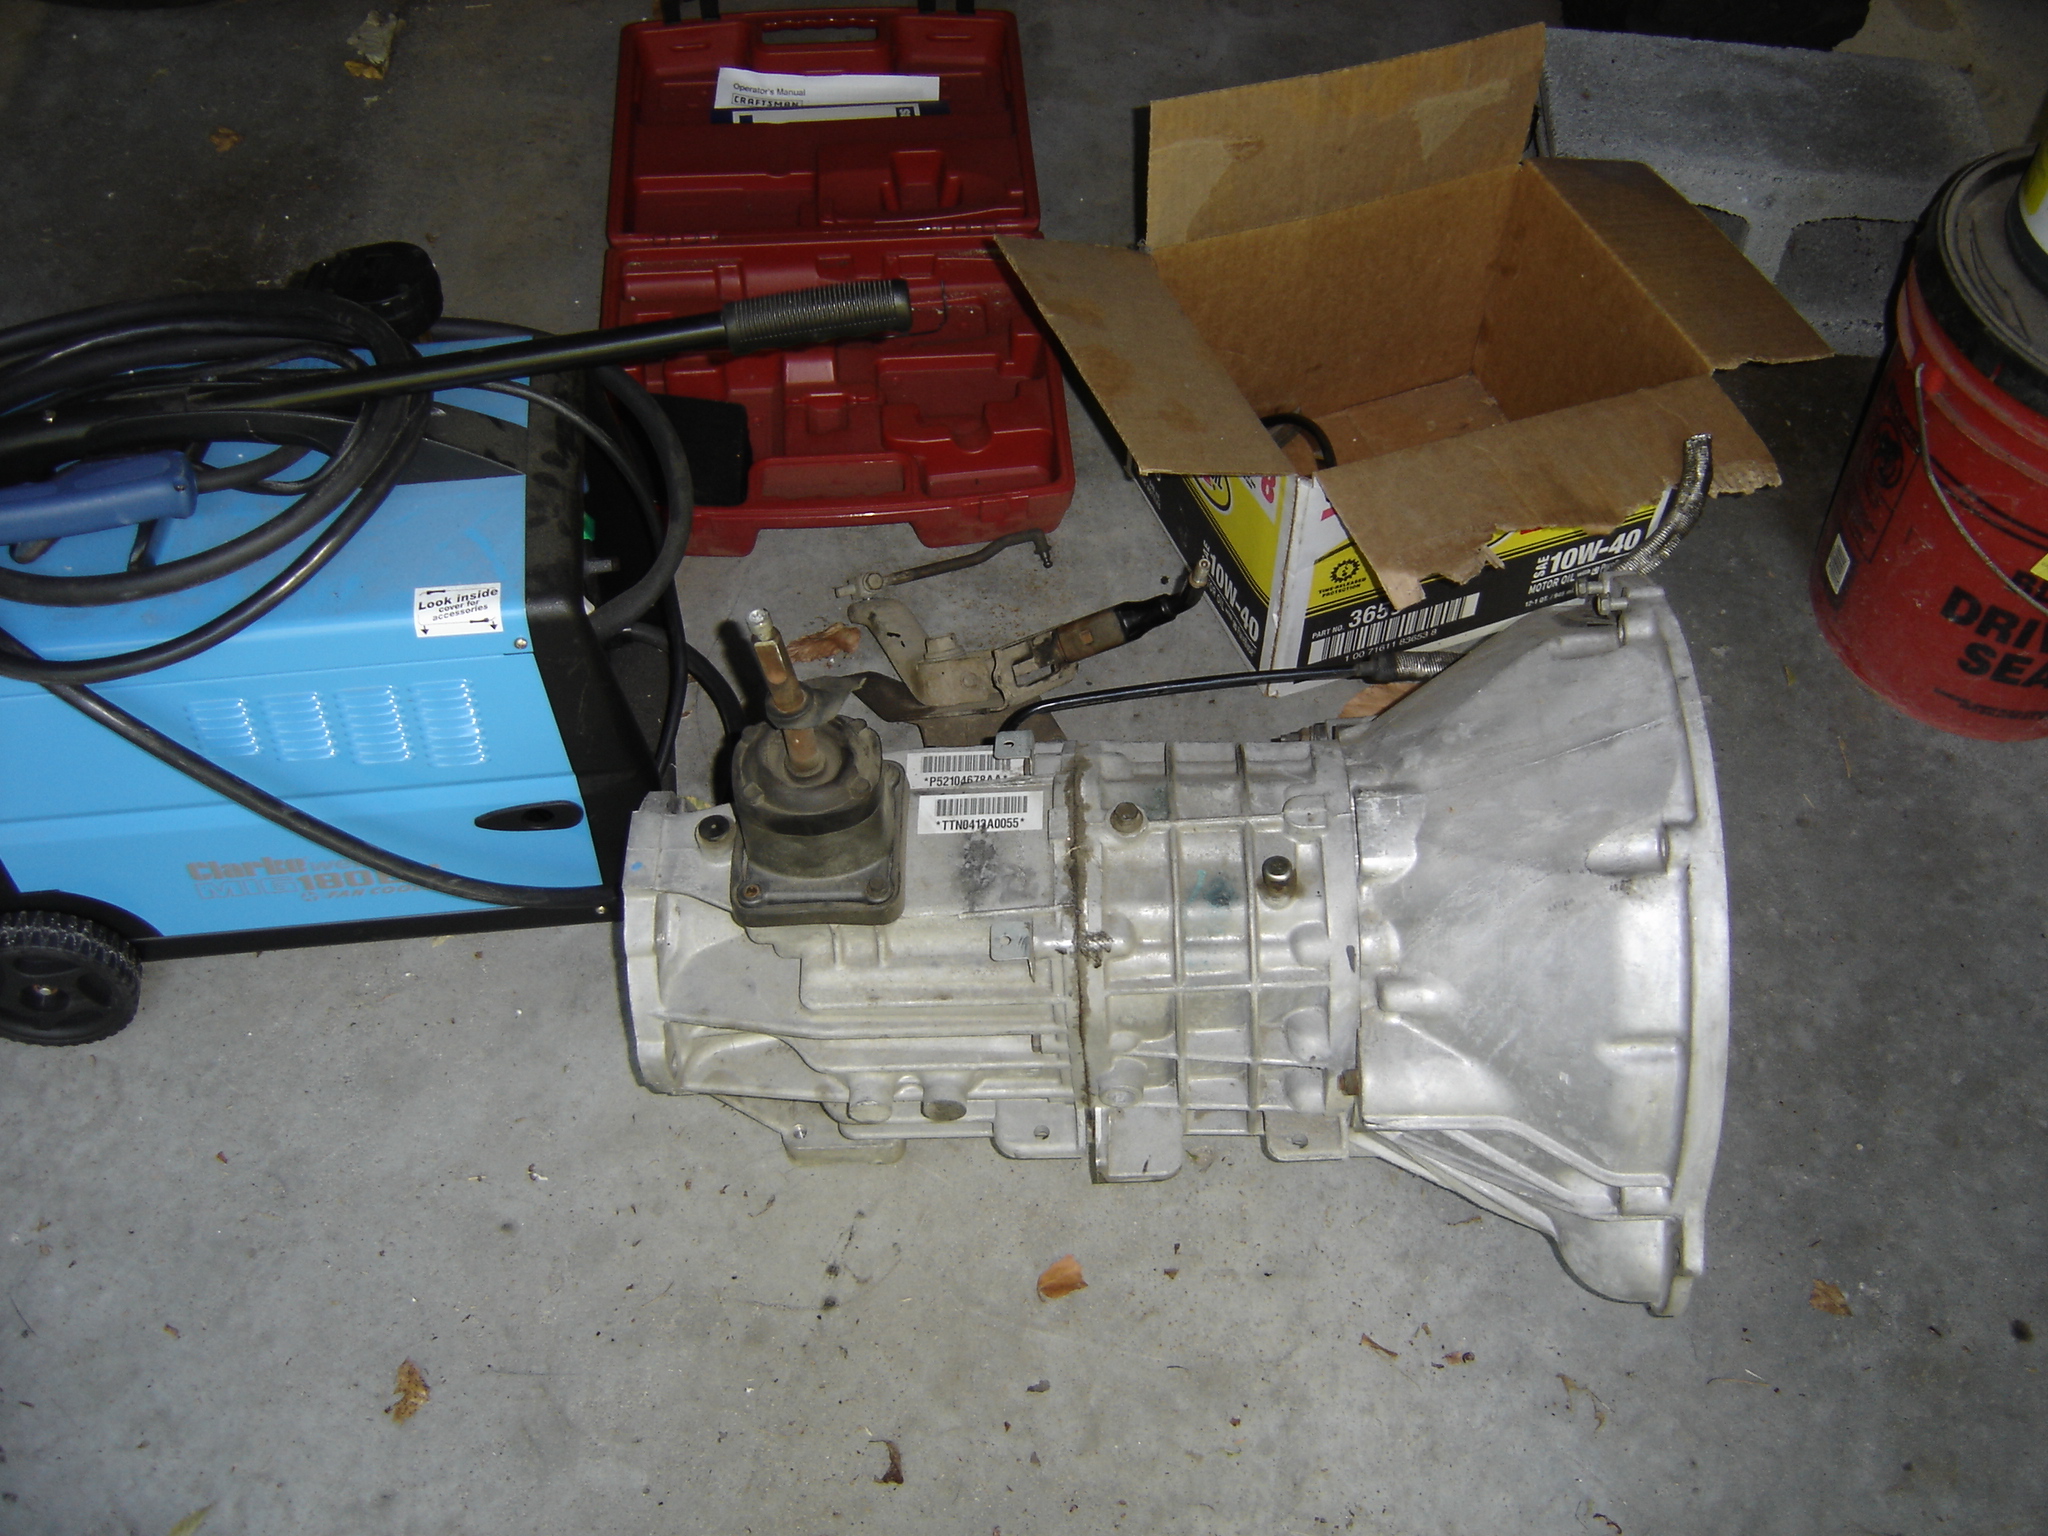
We un-bolted all of the bolts that connect the bellhousing to the engine block. There’s also a dust shield that needs to be removed, otherwise the bellhousing will not seporate from the engine. That is just a plate that is bolted to the bellhousing. You also need to remove the starter, as it’s actually bolted through this plate, and into the bellhousing. Also disconnect your reverse switch, and the CPS on the upper left of the bellhousing. Once thats disconnected, you’ll probably find out that you missed the two torx bolts at the very top of the bellhousing. Theyre a PITA! We ended up getting them out with a normal socket, I forget the size. We found it easiest to get to them through the hole in the floor that the shifter comes up through, with some extentions.
Now the trans “Should” pull straight back, sounds simple right? This took some muscle, and wiggling and such, but we got it off. We supported it with a floor jack so we wouldnt have to hold the entire weight of the trans. Once that was done we just lowered the jack to get the trans to the floor.
Once we had that out, we then removed the pressure plate, and the clutch assy. All was going rather well, so here’s where we had to run into a snag. The pilot bearing. My clutch kit came with a replacement, and from what ive heard here’s how you remove the old one. Fill the the hole that that pilot bearing seats in with grease, then take your clutch alignment tool and press it into the grease. This should push the grease, and the pilot bearing right out.
Welllllll.. it didnt. We tried for about 2 hours to get that damn thing out of there, and we couldnt. Finaly we gave up, and left it. My clutch and pilot bearing were replaced only three years ago, so I’m hoping that the bearing isnt going to come back to haunt me later. We just couldnt get it out. I don’t suggest leaving it in there, but we didnt have much of a choice. We only left it go because of the relatively young age of the bearing, and the fact that it seemed to be in pretty good condition.
Next we mounted the new clutch, and the new pressure plate. This is where your clutch alignment tool comes in handy again. I mean, this is what its for right? Put the clutch disc up to the flywheel, and then put the pressure plate over it. Once it’s on there stick your alignment tool through it. Then bolt the pressure plate back in place. We used an impact gun on this because when you try to loosen or tighten the bolts holding the presure plate on, the flywheel spins! So the impact gun eliminated that problem. Once the pressure plate is bolted on there, remove your alignment tool, and you’re ready to go!
Next was mounting the NV3550. This is the exact same procedure as removing the AX-15, except in reverse, and the 3550 is quite a bit heavier. Just lift it up (again, a jack comes in handy here) and slide it into the clutch assy. Make you have the 3550 in gear, because if the splines dont line up you can just turn the output shaft a bit to line them up. Then just slide the trans into the engine/clutch assy. Once that’s in place, tighten the bolts back up, bolt that dust cover back on to the bellhousing, and reconnect the starter.
At this point we called it a day, we were already late for a party that our signifigant other’s wanted us to attend. So….. we headed out for the day.
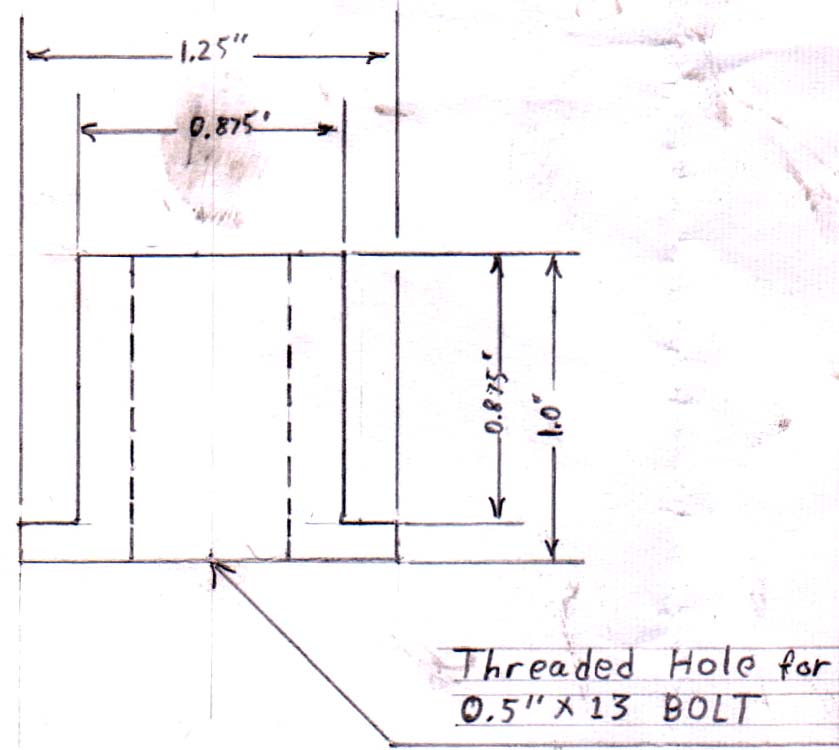
It was at this point that I had to start figuring out what the heck I was going to do with those frame inserts. As I mentioned before, I tried looking for inserts and no one makes anything large enough. So I sat down and drew up a sketch of what I thought might work. I then took that sketch to my dad, who happens to know a bit about technical drafting. He drafted a nice depiction of what I wanted, and took it to our buddy that works in the machine shop (that I mentioned above). In just two days he came back with these:
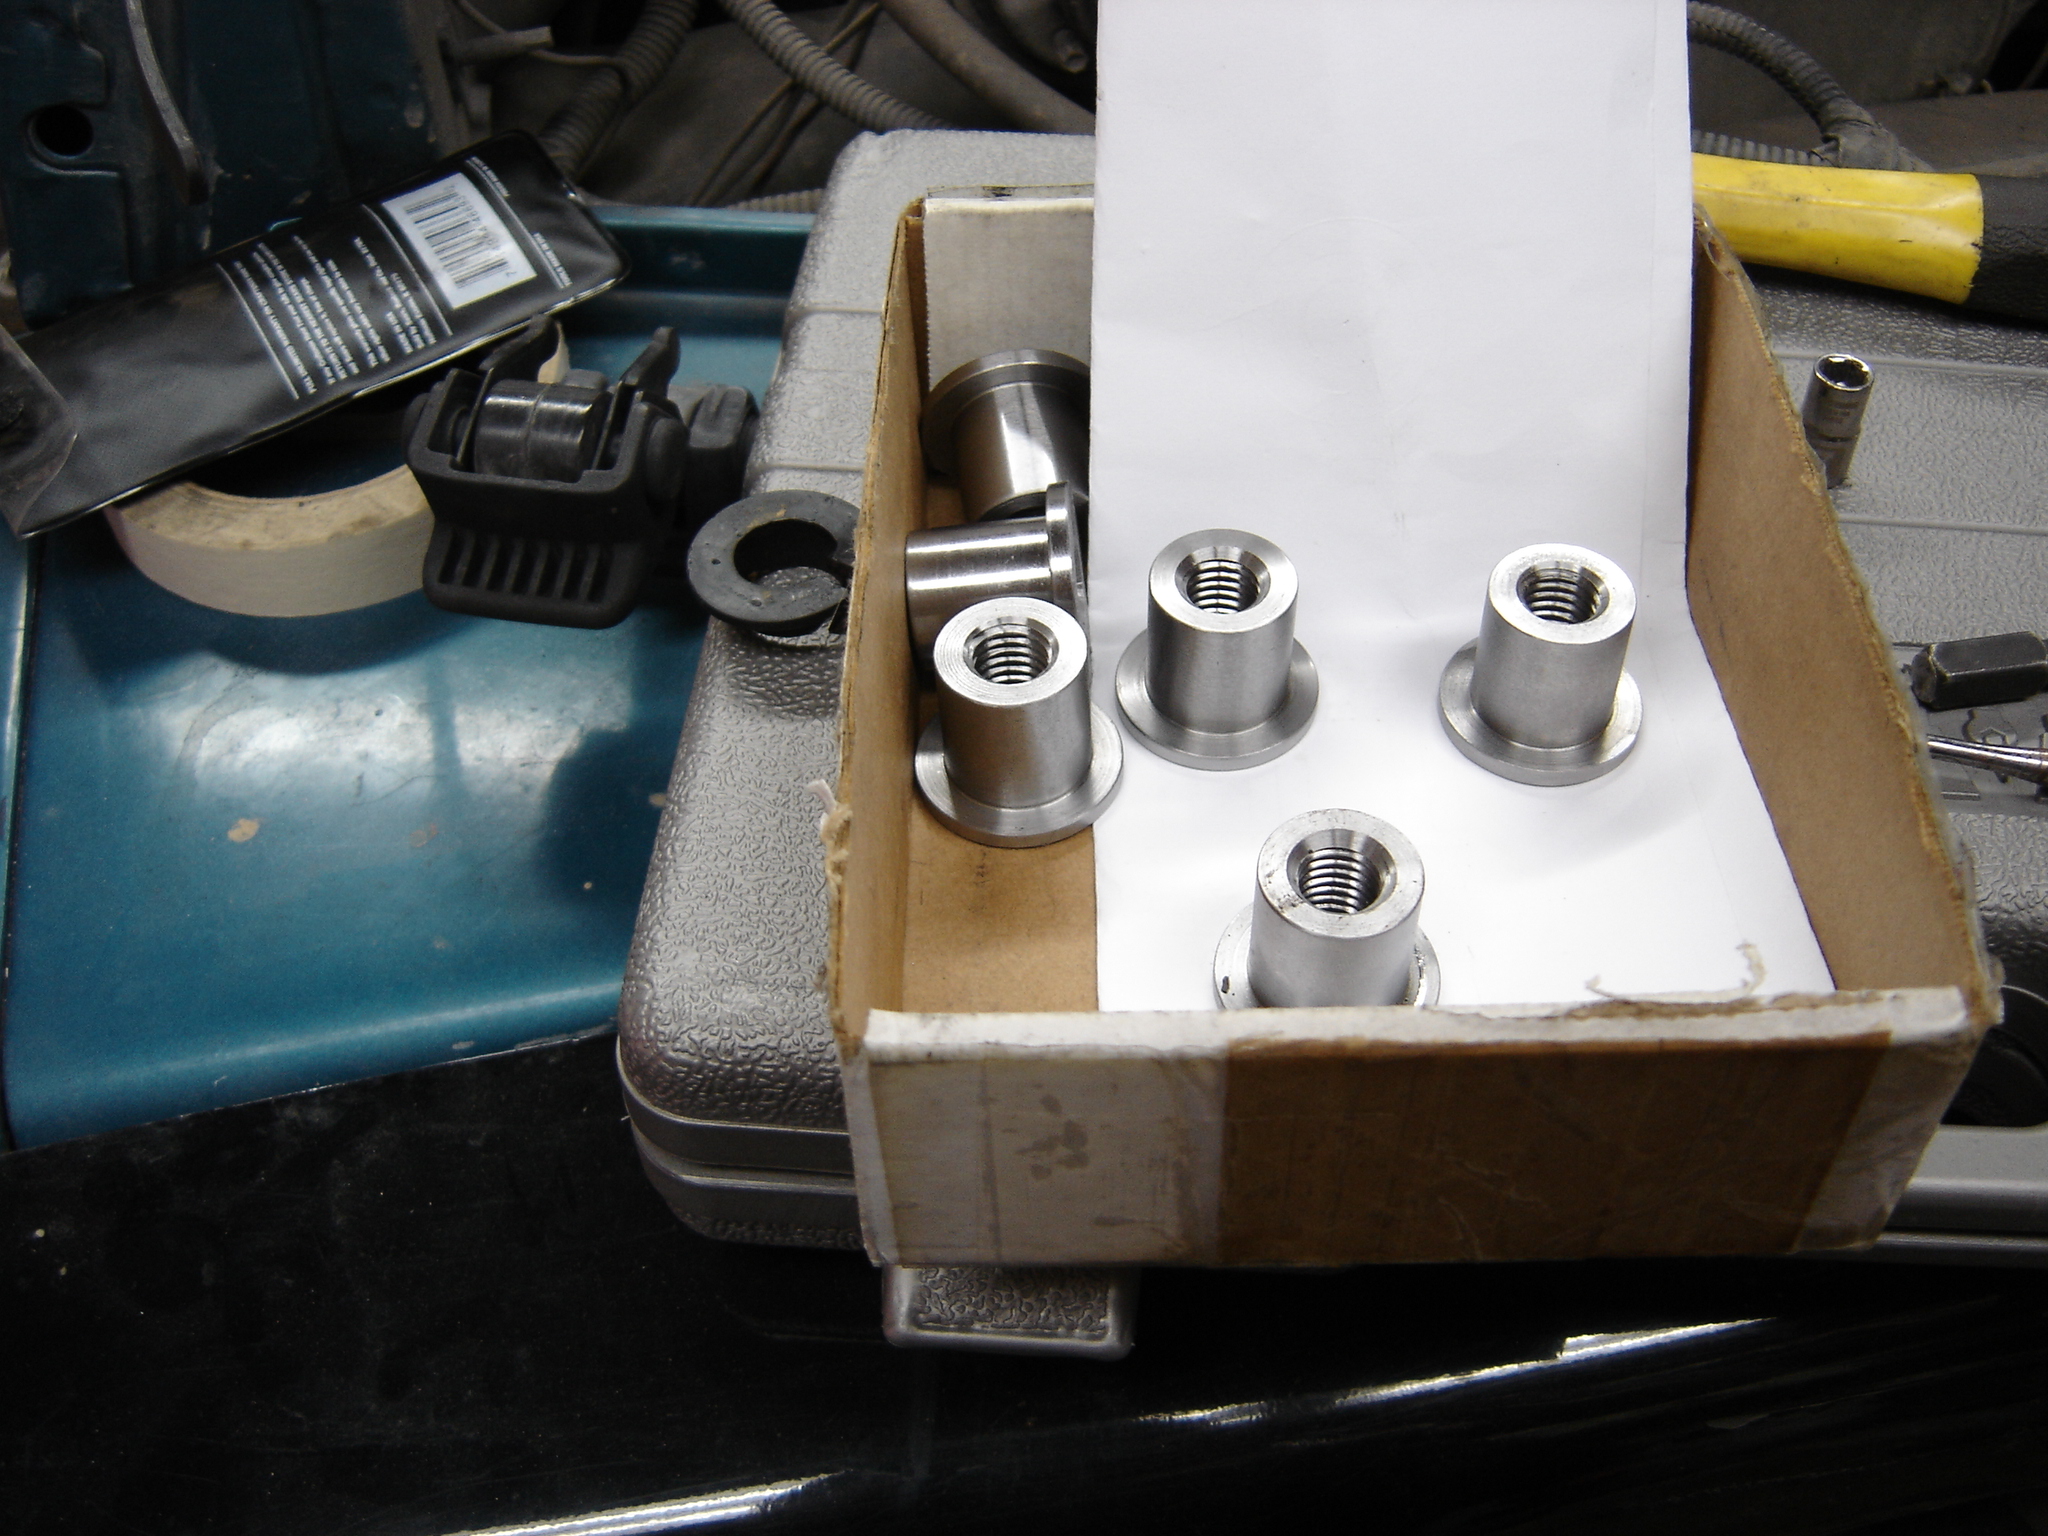
SWEET!
Theyre basically a piece of 1.25″ round bar, cut to 1″, and all but 1/8″ turned down to 7/8″. Then drilled and tapped for a 1/2 x 13 bolt.
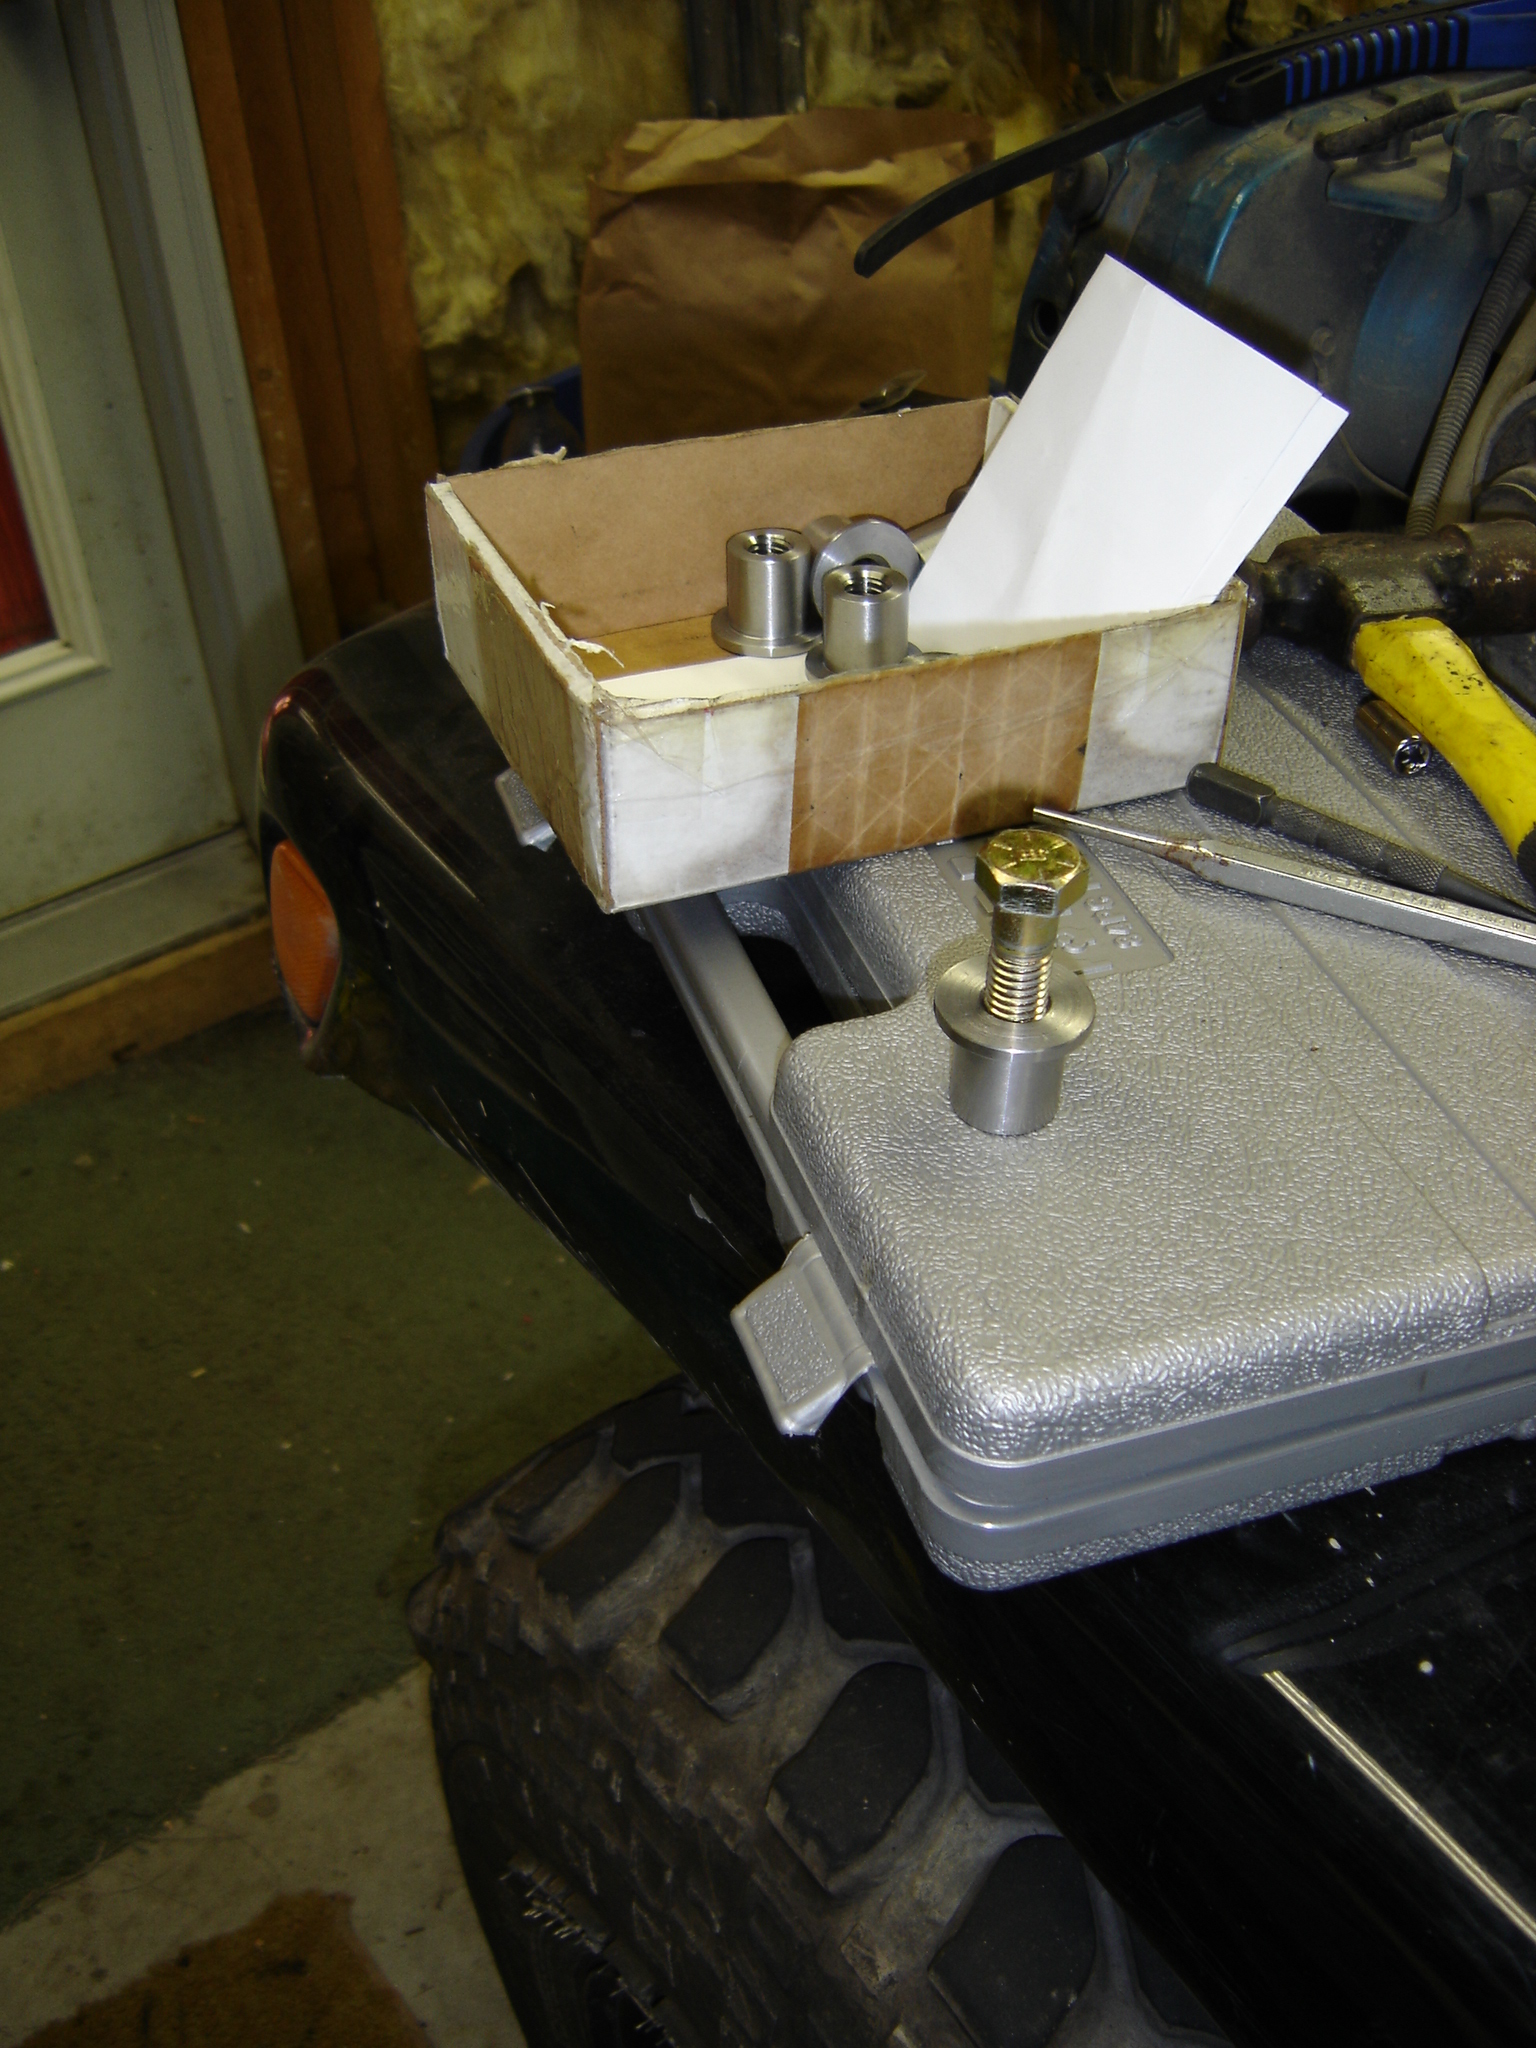
Here are some more pics.
And here’s the drafted sketch.
I couldnt have asked for better work. These turned out even better than I expected. So at this point I want to give credit to Jim, Excellent work Jim!
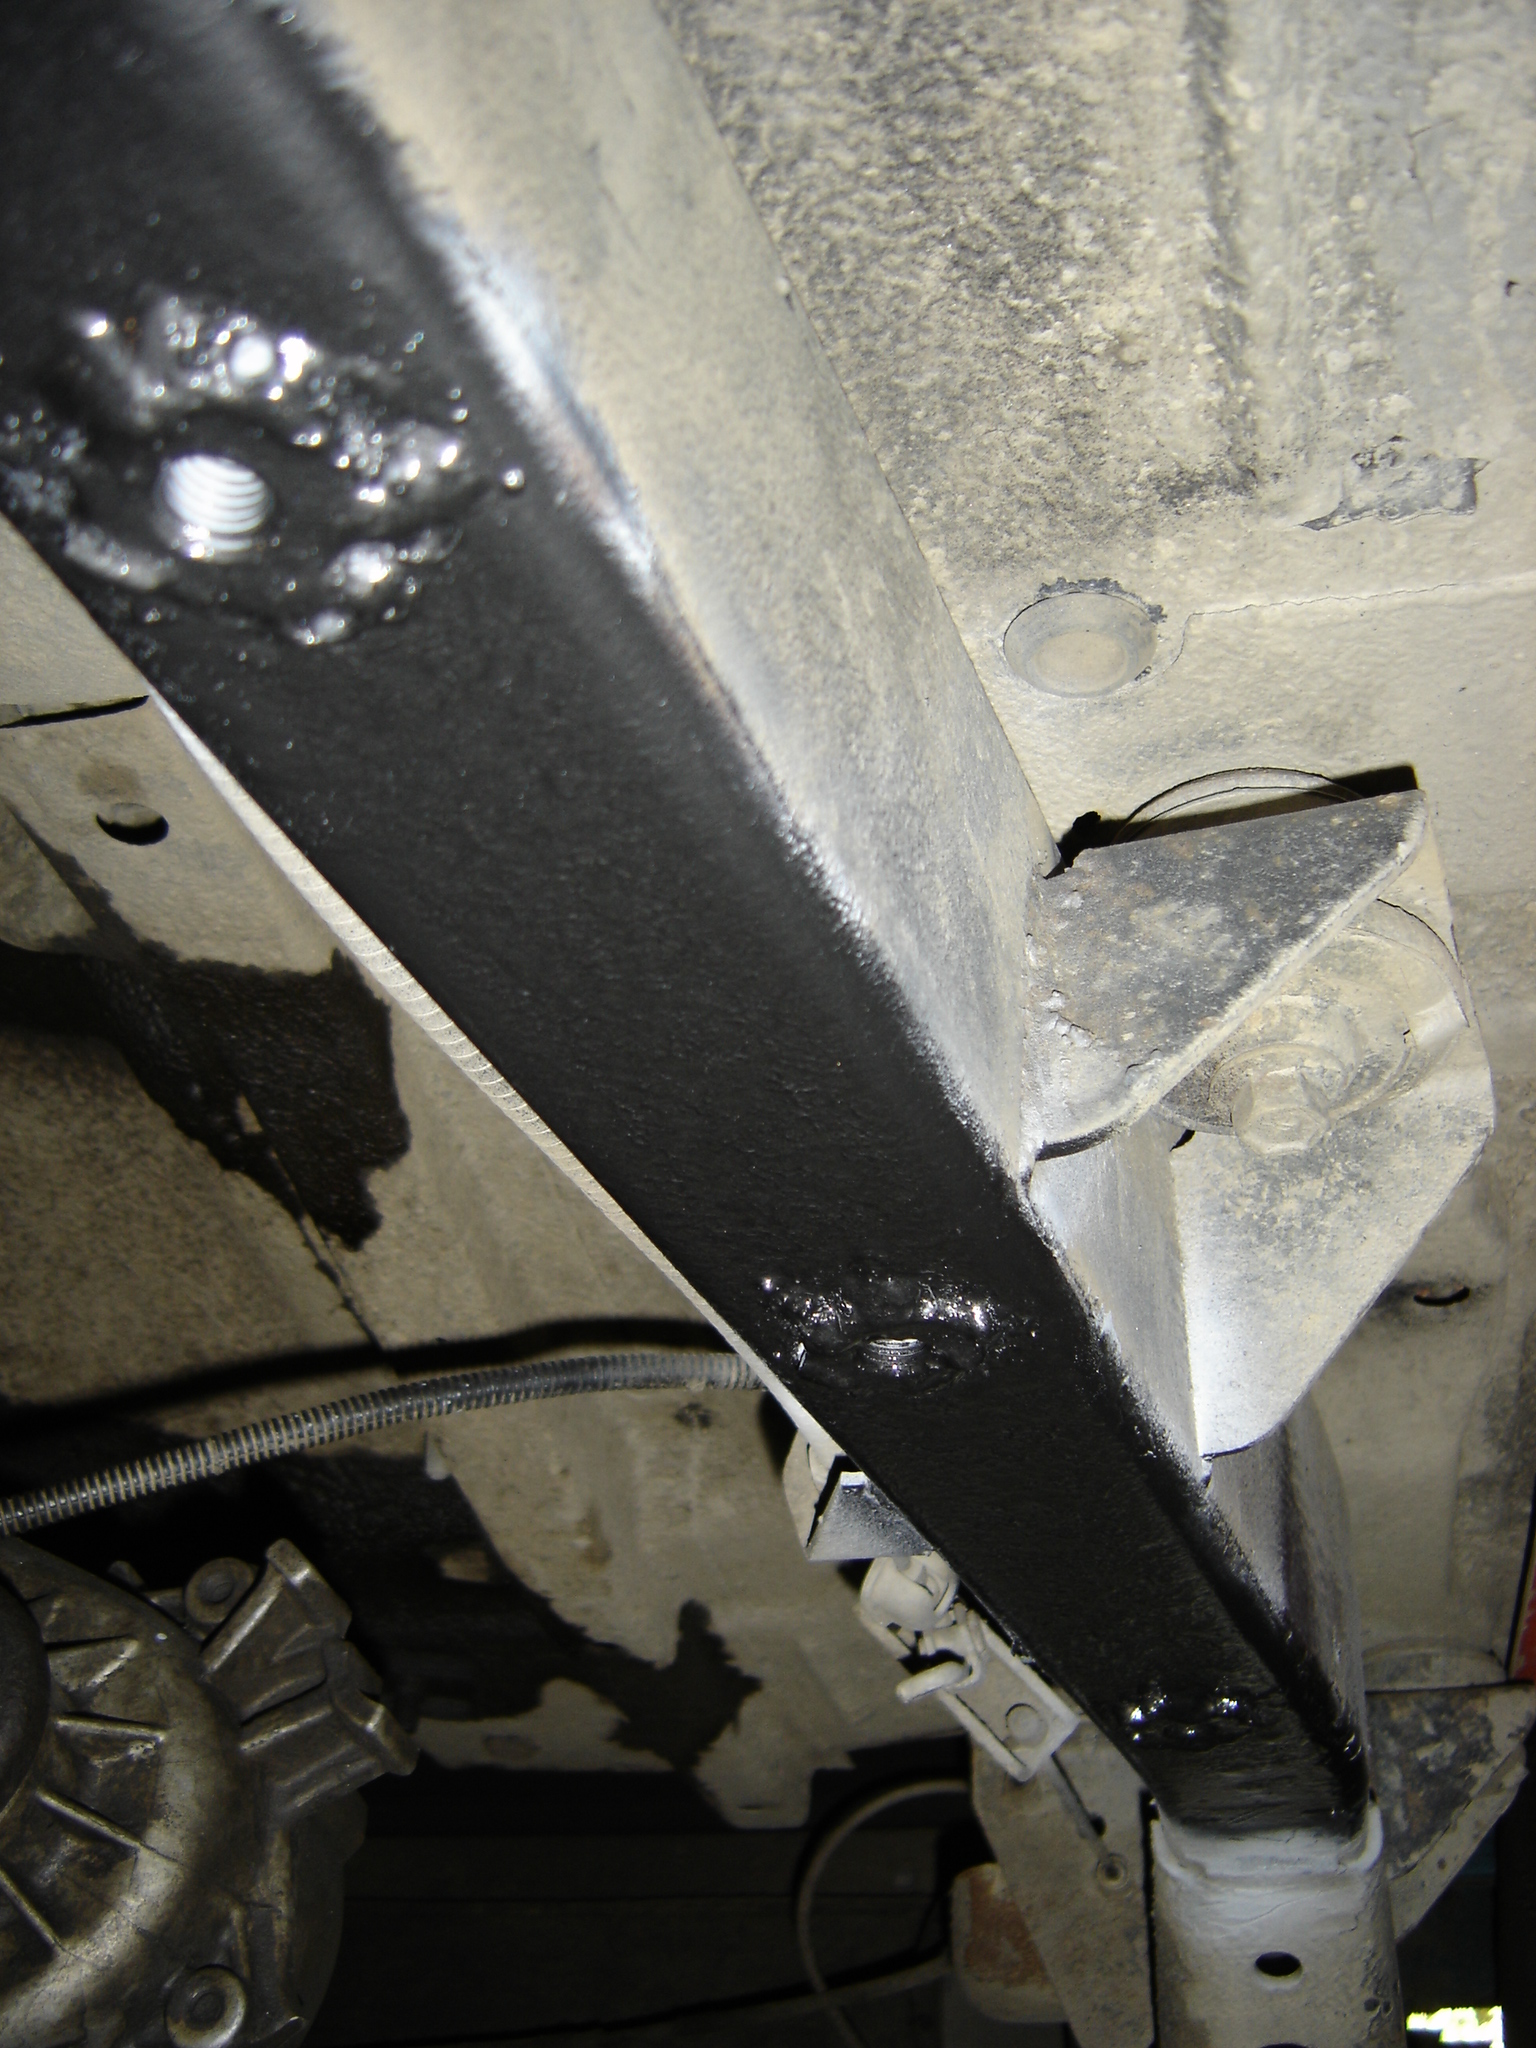
So now that I’ve got the inserts, it’s time to get to work! I had them made so that they’ll fit into a 7/8″ hole. I bought myself a 7/8″ drill bit for just this occasion. I drilled out the existing frame holes, and while I was at it, I cut out the three frame inserts that hadnt rusted off yet, and drilled those holes out too. Then I cleaned up the frame with a flapper wheel in my angle grinder. Just to get any undercoating, mud, and surface rust removed. Then I started welding inserts in. I started on the passenger side, and I found out when I was done, that I managed to foul the treads up on two of the inserts. Leave it to me! Just by welding them! Luckily we had a tap and die set. The largest tap that my dad has is luckily the one that I needed! Great! So I ran a tap through the first one that I ruined. That fixed it. I started on the other one, and I couldnt get the tap started… I ended up fouling the treads even worse before I was done. I ended up having to take a dremel tool, and cutting about 1/4″ of threads out, and then try again with the tap. luckily I got it through after that. Whew! To protect the threads when I did the drivers side, I threaded the bolts that I had all the way through the insert before welding them. Then I removed the bolt after I’d finished welding. This did a MUCH better job. I managed to weld all three inserts on the drivers side without a problem.
Then I hit the whole section of the frame up with some primer, and then some black Rustoleum Hammered. Came out very nice!
Passenger side:
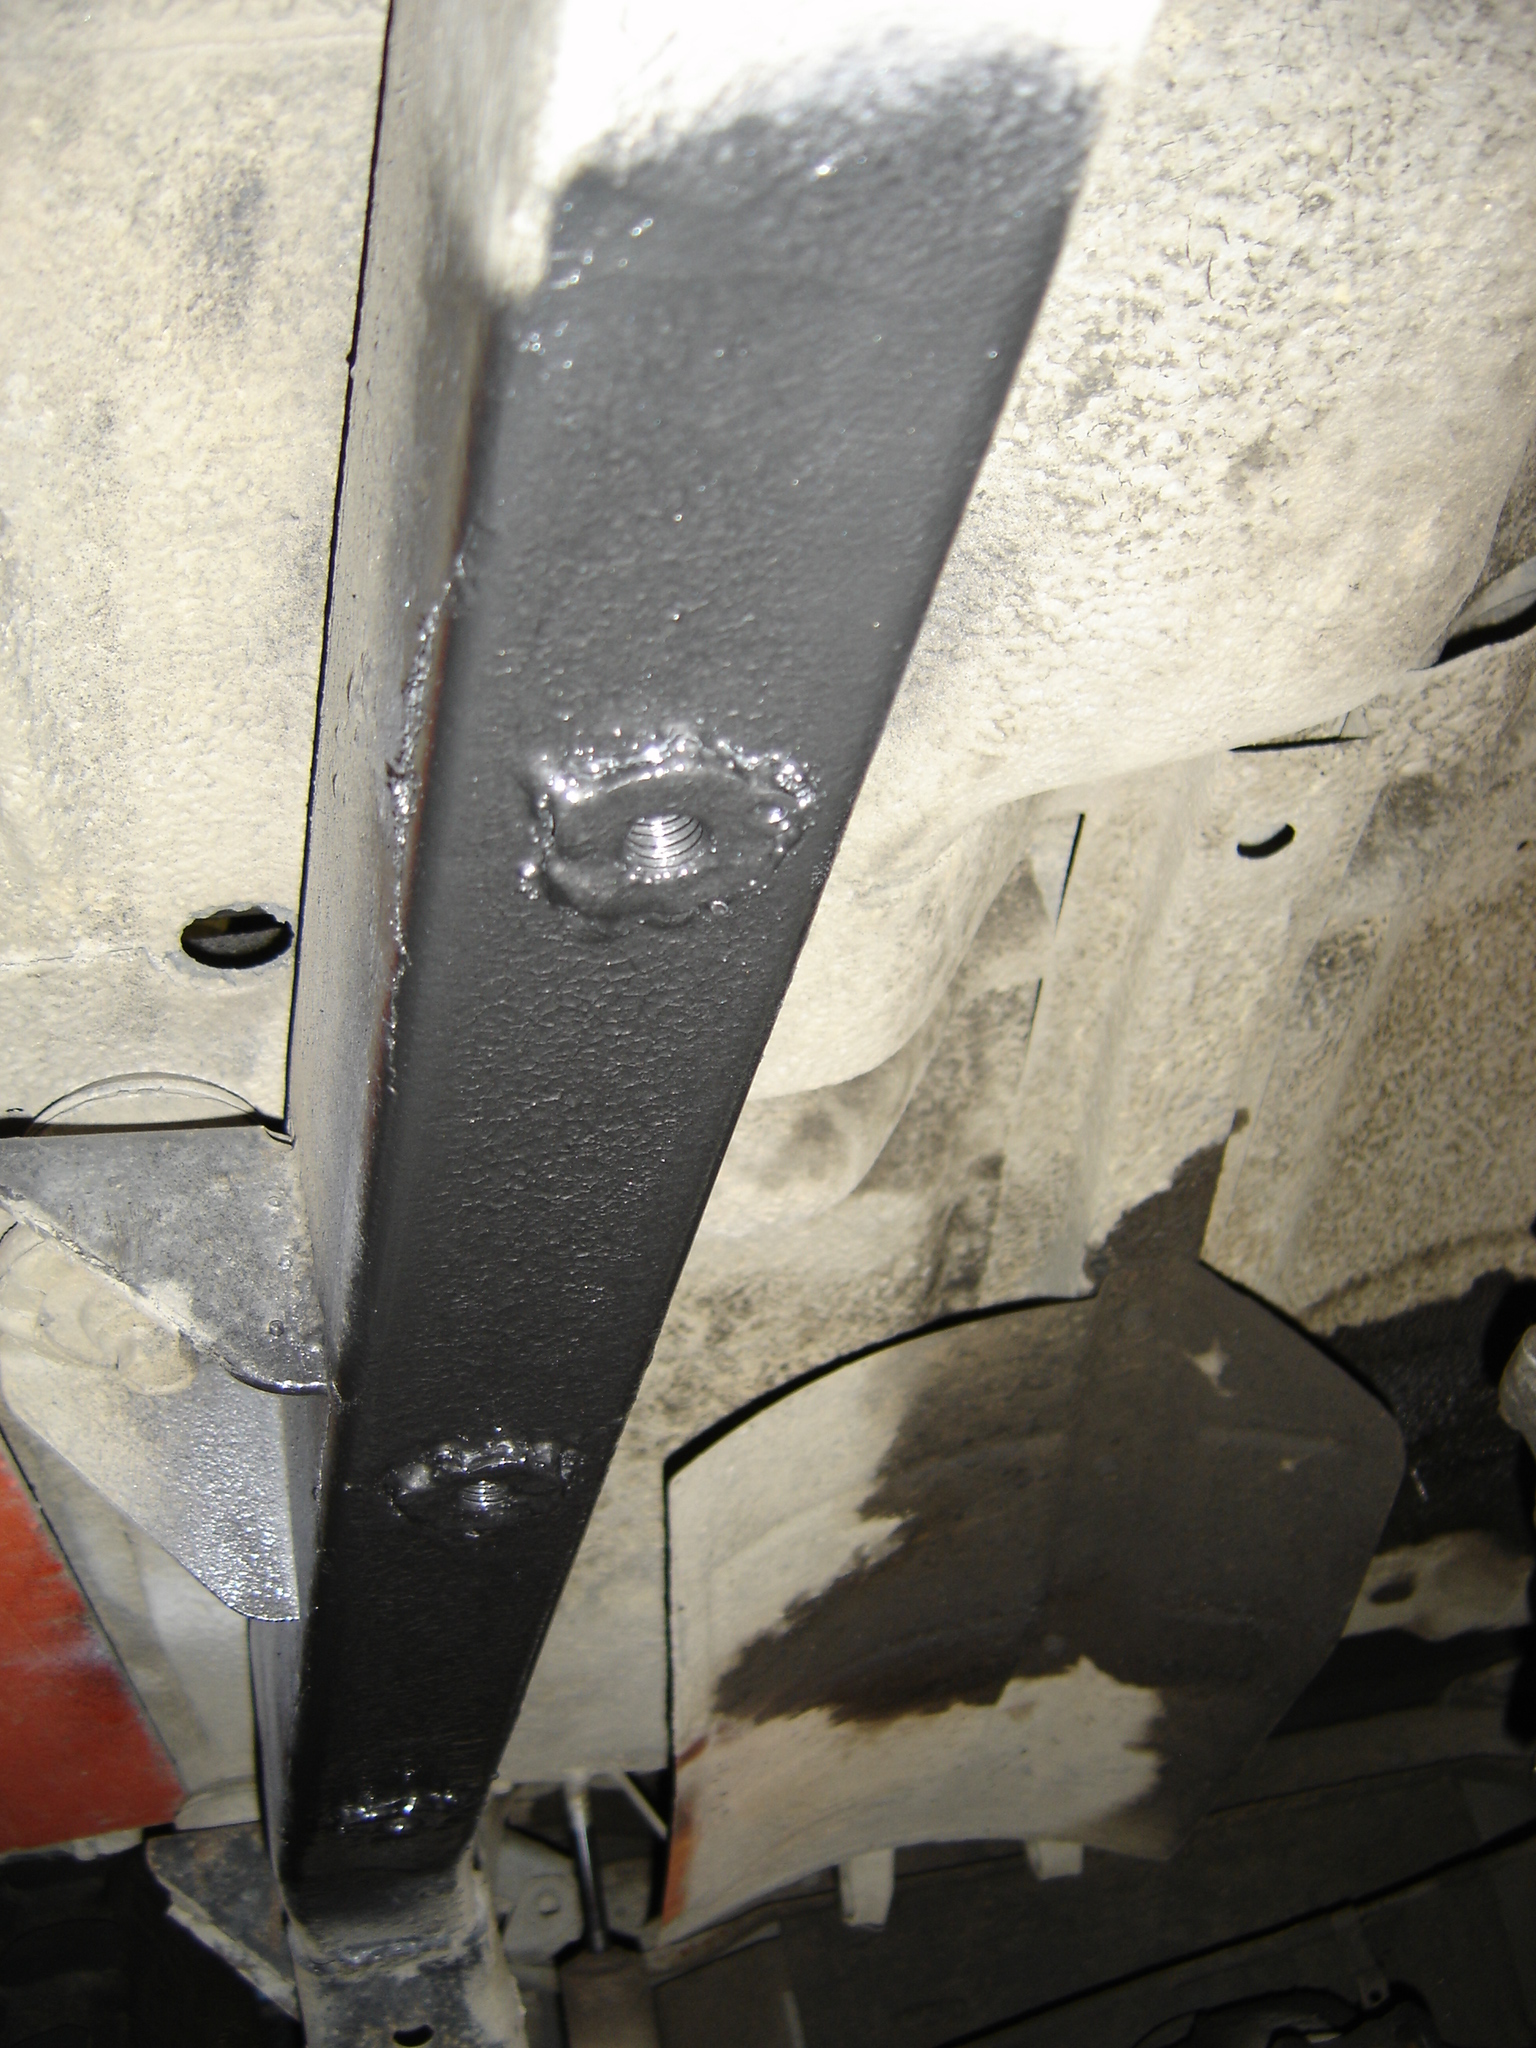
Driver side:
I really like this paint, I’m almost considering painting the whole jeep with it, when the time comes. But thats a whole other write-up.
So, with that taken care of, I can now rest easier, and continue with the project.
While I was waiting on those inserts to be made, I tackled another of my snags. The hydraulic clutch line… My YJ came from the factory with an internal slave cyl. If your YJ is older than 1994 or so, you’ll probably have the same. It meant that I had to replace the bellhousing, and get an external slave cyl. Supposedly any bellhousing from a 4.0, with an external slave, will work with the 3550, I lucked out and found an NV3550 that came complete with an external slave, half a hydraulic line, and a bellhousing (and one of those slick TJ shifters!).
So anyway, the fitting at the slave cyl end of my clutch line doesnt match the fitting on the external slave! I’ve found that YJ’s that came with an external slave have the right fitting on the slave cyl end, but I’ve never been able to look at the master cyl. I assume its the same as mine.
So I went to a local jeep boneyard, Northfield 4×4, I mention the name of his shop becuase he’s helped me out numerous times on hard to find parts, and his prices are very reasonable. He generally gets junked jeeps, and tears them down for parts. So I called him up, and he hooked me up with a TJ hydraulic line, we figured there was a chance that the master cyl fitting on this line should match the master cyl in my YJ, and really, for the $10 that he charged me, I wasn’t complaining. He didnt have a YJ external slave line, so the TJ one was the best I could get ahold of.
As it turns out, the fitting on the master cyl is different on the YJ… So, this leaves me with a problem. What I ended up doing was cutting the fitting out of my old line, and cutting the master cyl end off of the TJ line. Then heating up the hose, and pushing the YJ master cyl fitting into the hose. It took some force, but that’s good, I figure that means that it’ll grab hold better. With my newly modified clutch line in hand, I went and installed it. I was able to connect it, and even bleed the system without any leaks. I’m hoping that this means that it’s going to hold for me. Only time will tell though.
I enlisted the help of my dad to get the Transfer case back in place. Again, it’s hevy, I needed help lifting it into place. Reconnecting it is as simple as removing it, other than the weight that is. Slide it back into place, re-attach the six nuts, I also put my fabricated tcase linkage bracket on two of the studs, then reconnect the vac. lines, breather, and speed-o sensor. Youll find that unlike the AX-15, the NV3550 gives you enough room for a 3/8 ratchet with a 9/16 socket on it. This makes tightening these nuts on MUCH easier!
And here it is!
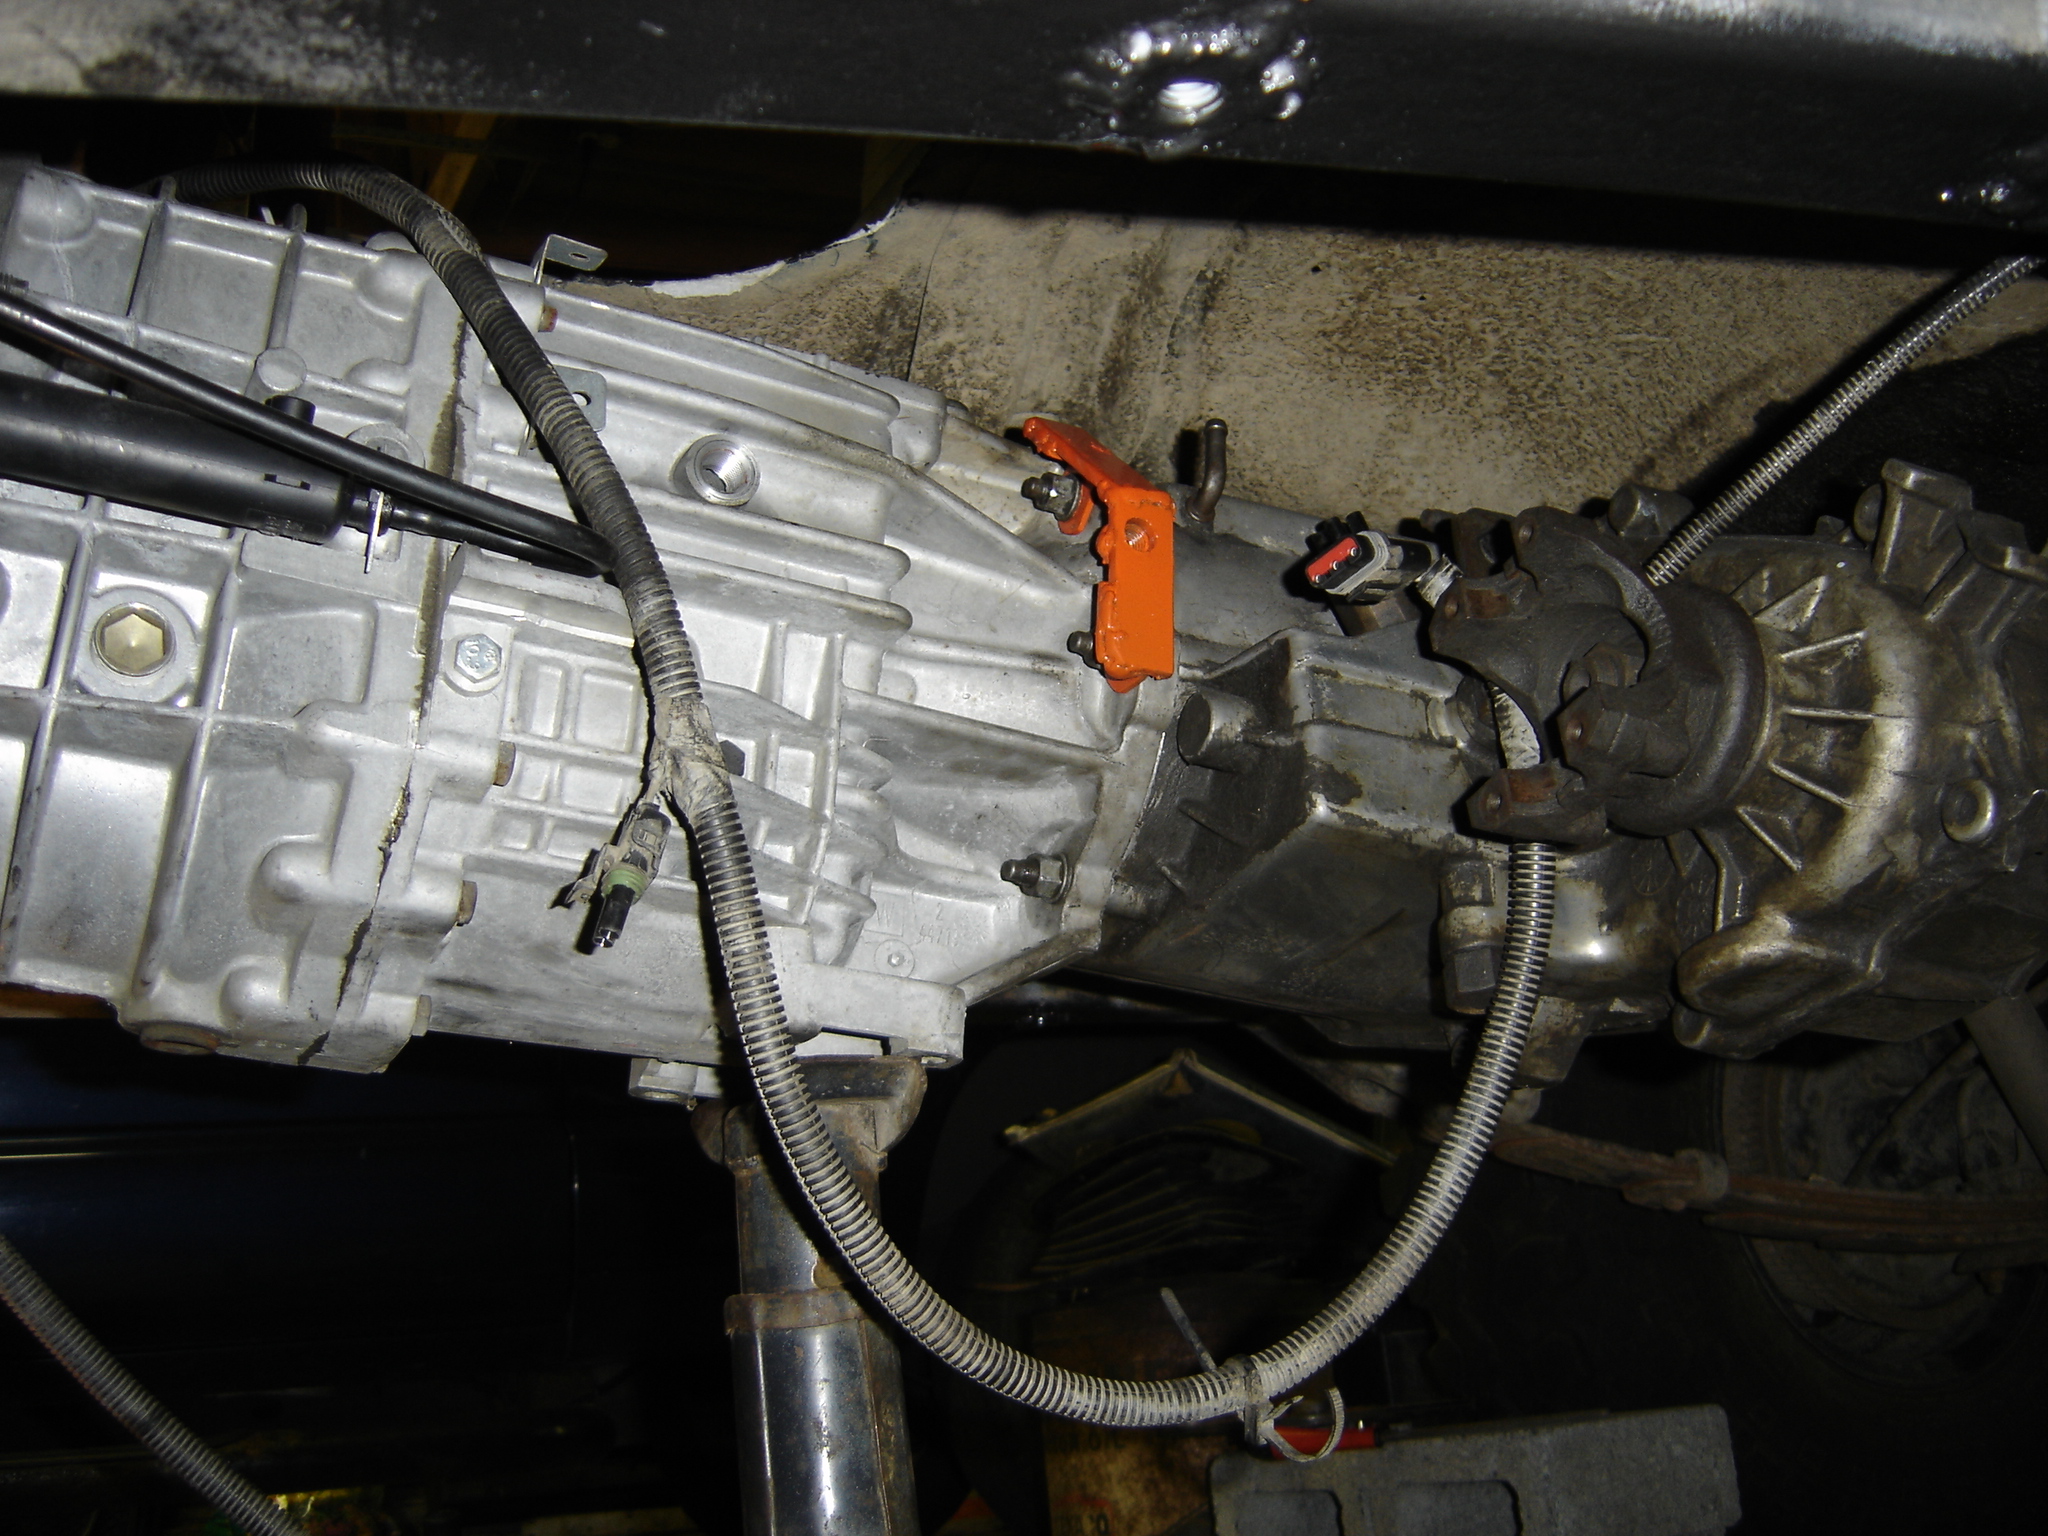
(Did you notice my slick home made bracket in there? 😉 )
With all of that in place, its time to take care of some little things, like your reverse switch…. You may have better luck than I did, but the reverse switch on my AX-15 has a very slightly different plug on it than the NV3550 does. The plastic housing of the plug mated properly, but the contacts inside of the case did not match, they were both female! There’s nothing worse than a gender confused reverse switch plug. My dad came up with a solution though, while I worked on getting things ready for the skid plate being reinstalled. He took a smaller, different style connector that looked like it would mate properly, and shaved its casing down so that it would plug into the reverse switch. Then used a rubber o-ring to seal it so it wouldnt let water inside. All that was left to do then was to replace the plug on my jeep’s wiring harness with the one the he modified. A simple task.
On to bigger and better things.
I re-attached my exhaust, we removed it before removing the transmission to get it out of the way. Once that was back in place, I put the plate that bolts to the bottom of the transmission that holds the transmission mount, and torque arm mount. This plate has a rubber grommet that slides on to an arm thats coming off of the exhaust near your catalytic converter. So it’s easiest to install this after the exhaust is in place. There are four bolts that hold this plate to the bottom of the transmission, they matched perfectly.
Next I filled the Transmission up with fluid. I ended up buying it right from the dealer, its $9 a quart. They say I only needed two quarts, and another write-up I read confirmed that. So I took my rather expensive synthetic gear oil and poured it in through the opening in the top of the case that my shifter would soon be bolted to. I figured why fight gravity and try to fill it through the fill plug if I have such a nice access point right there. Once it was filled up, I bolted the shift tower in place, and attached the transfer case shifter to the transmission using my nifty bracket. Then I attached the shifter lever. It sits pretty nicely in the cab, the only problem is that it is positioned such that it actually contacts my home made center console when in gears 2, 4, and reverse. This is easily fixed, simply by moving my console back a bit. No big deal, I’ll attack that once I get this all buttoned up and the shifter knob in place. It’s also possible that once I have the skid plate in place, it may lift the transmission up slightly, and it might even clear the console. The only way to find out is to finish the install and see. If the only drawback to this install is having to move my console back 2″, I’ll consider myself lucky!
Next I started working on the skid plate. Between the rocks at Paragon and our beating on this plate to get those stuck bolts out, my skid plate is a little mis-shapen. I was not able to get two of the three holes to line up with my inserts. So while it was partially in place I took a moment to at least check to make sure that my trans. mount lined up, and the torque arm mount was in the right place. All appears well. I removed the skid pan so I could work on re-shaping things so they line up better.
So today I woke up feeling pretty sick, but I knew that the Jeep only had a little bit of work left on it to finish it up, so I forced myself out of bed, and down to my parents place to work on the Jeep.
I got down there, and started with the skid plate. I fixed up the holes a bit so I could get them to line up, and then bolted the skid plate in place. Once I finished that up I lined up the trans mount, and threaded the bolts, then I realized that I forgot to put a washer on the stud on the torque arm bolt. One needs to be on the top of skid pan, and the other on the bottom. So I removed the skid plate, and put the washer on. Then put the skid plate back up, and once again threaded the bolts into the trans mount. Then I put a washer on the underside of the skid plate for the torque arm bolt, and threaded the nut on there. Then I tightened everything down.
I’m getting close now! With the transmission supported by something other than jack stands now, I decided it was time to start up the jeep and run it through the gears. First I filled the tcase back up with fluid. I’ve always been told to use automatic transmission fluid to fill the tcase, and I havent had any problems with it thus far, so thats what I did. It took about a quart and a half. With that full I started the engine, and ran it through the gears. Worked perfectly! The clutch made a little bit of noise though, which worried me at first, but I figured it was just becasue it was new. I watched the speedometer to make sure that the drivetrain was operating properly. Sure seems to be! Once I was satisfied, I shut the engine back off, and started on my next tasks.
First was to put the shifter boot back in place. So I screwed the plate back on to the floor, and then the rubber cover, and then of course the shifter boot. Then I ran it through the gears to make sure nothing was binding, I also shifted the transfer case into each gear, it worked well. I also found that now that the transission was at its final height, the shifter no longer contacts the center console!! WooHoo!
Then I stopped for some lunch. Once I was finished eating, I stuck my hand in my pocket and noticed that two of the shift tower bolts were there… Suddenly I rememberd that I needed a replacement for one of them, and I took one of the origionals with me to the hardware store to get a replacement. Both of which were now in my pocket, and not in the shift tower where they belong… Sigh… So after lunch I removed the shifter boot, and floor plate, so I could install these other two bolts. I found that there wasnt enough room in there for me to install these bolts, so I, again, had to lower the skid plate a bit. Once I did that, I was able to get the bolts installed. Then raise the skid plate, put the floor pan back on, and the shifter boot.
OK! SO now its time to connect the driveshafts! When we were removing my front driveshaft we managed to ruin one of the u-joints, so I took it as an opportunity to use my J.E. Reel Driveline gift certificate that I won from Jeepaholics Anonymous! So the front driveshaft isn’t going in at this time, I need to measure for a new shaft, and call J.E. Reel. That’ll happen sometime soon. The rear driveshaft however bolted right back into place as it always has. Now I should be in business! I moved all of the clutter away from my tires, and from underneath my Jeep, and pulled it out of the garage! It hasnt moved for close to a month, so I’m sure it was happy to be mobile again! I took it up the driveway and back down, and then got back to cleaning up the garage.
All in all this was a pretty smooth swap! I hit a few snags along the way, but I was able to deal with each one as it came. At this point, I’ve only driven the jeep about 10 miles since the swap, from my parents place to my place. Once I get some more miles on it I’ll add some opinions on how I like the trans to this write-up.