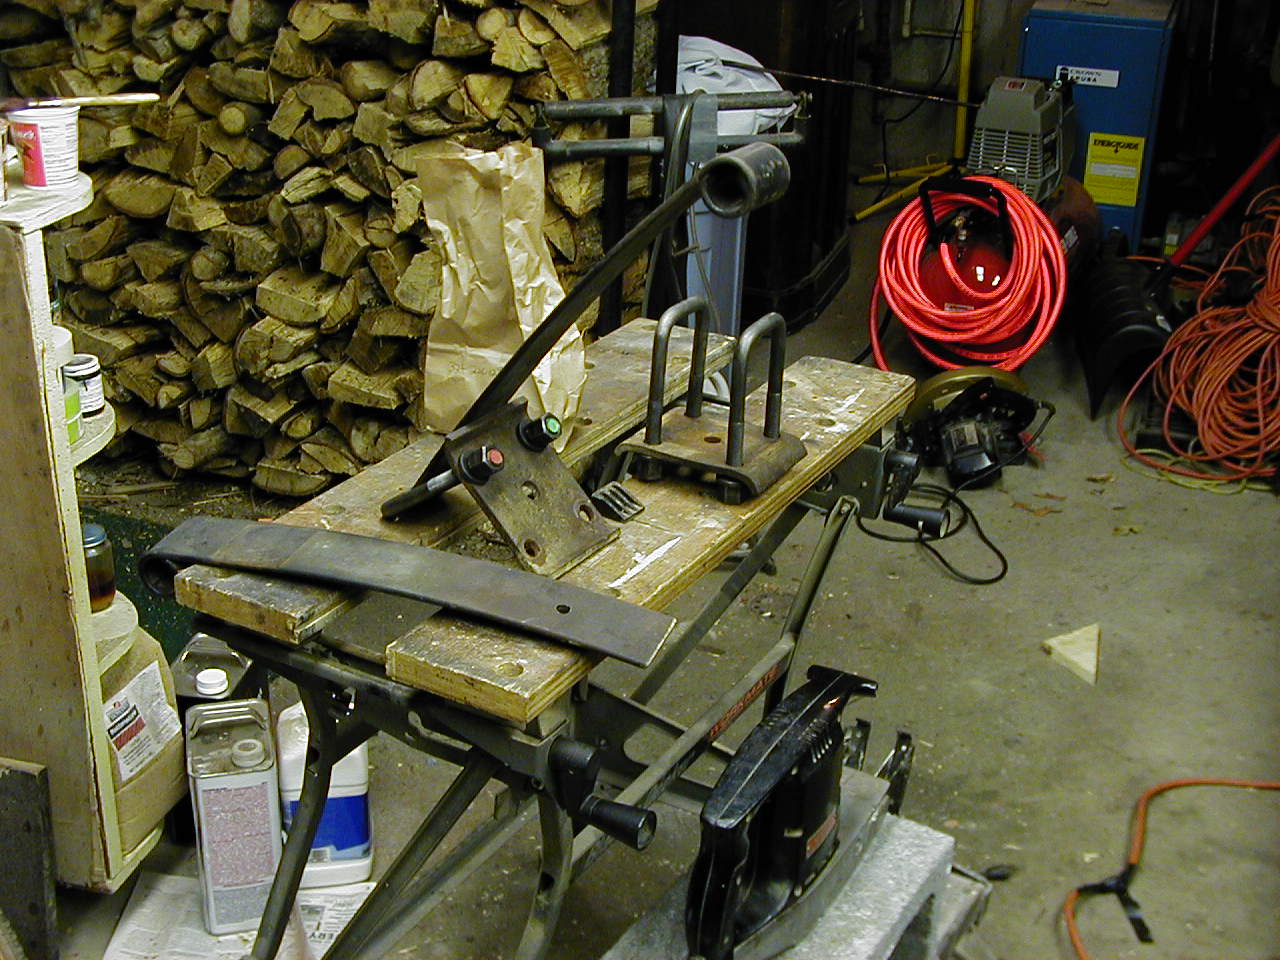
On Thursday, May 15th 2003, I had the day off, and I was planning on spending the day working out my overhead console, after installing the cage, the console no longer fit, and concidering I had made the thing using a bumper to begin with, I should be able hack it up and make it fit. Well after spening an hour or so cutting it to size, and trimming this and that I just couldnt make it fit. The angle of the bars on the front of the cage just wouldnt allow me to mount it like i wanted to. So it got shelved, for re-design, or maybe ill just junk it and start from scratch.. I dunno yet. But this left the rest of the day open! It’s rare that I truly have a day off, my Fiance was at work, so I wasnt going to be seeing her until after 5PM, What was I to do? Well, I thought for a moment…. I’ve got the parts laying in the basement waiting to be installed….. I could do that Buggy Spring setup I’ve been planning!
So I have the parts, I have the theory in my head… Now to put it all into action. First of all, I gathered all of my parts, and checked over it in my head to make sure I had everything I was going to need. I didn’t. I needed some sort of center pin, I’ll go over this later in more detail, but basically, the spring portions for the buggy spring setup are held in place using U-bolts, and theyre kept from sliding back and forth using center pins.. I didnt have any center pins. A center pin can be anything from a nut/bolt, to a piece of rod stock welded to the spring… As long as it sticks out of the spring, and slides into a hole in the frame, and the hole in your spring plate. I could have used the one that it ook out of the spring pack when I cut the spring portions, but I couldnt salvage it. I had to cut it off with a grinder when I did that part of the project. So, i decided that a sturdy sheet metal screw, with a hex head would do the trick. I’ve since reconsidered that, but I’ll continue with the events as they happened for now.
So, I went to the hardware store, picked up a new 9/16 drill bit, and two sheet metal screws, with fender washers, and a hex head. The 9/16 bit is used later, I’ll get into that when the time comes.
So, to begin, here’s my final list of items that I needed/used for this install.
- 4 6″Lx2.5″Wx9/16D Square Top U-bolts (with nuts, and washers). Custom bent by a local spring shop.
- 2 Stock YJ Rear spring plates
- 2 sheet metal screws, with hex heads
- 2 fender washers
- 2 spring portions from stock YJ springs
- 1/2″ ratchet socket drive
- 11/16″ Socket
- 3/4″ Socket
- 3/4″ Wrench
- Drill to support 9/16″ bit (big, heavy drill)
- 9/16″ drill bit
- Hammer
- Punch
I’ll be inserting a section about spring cutting and such here, as soon as i take some measurements and get all of my facts straight. 😉 Until then, you can read about how I installed the rest.
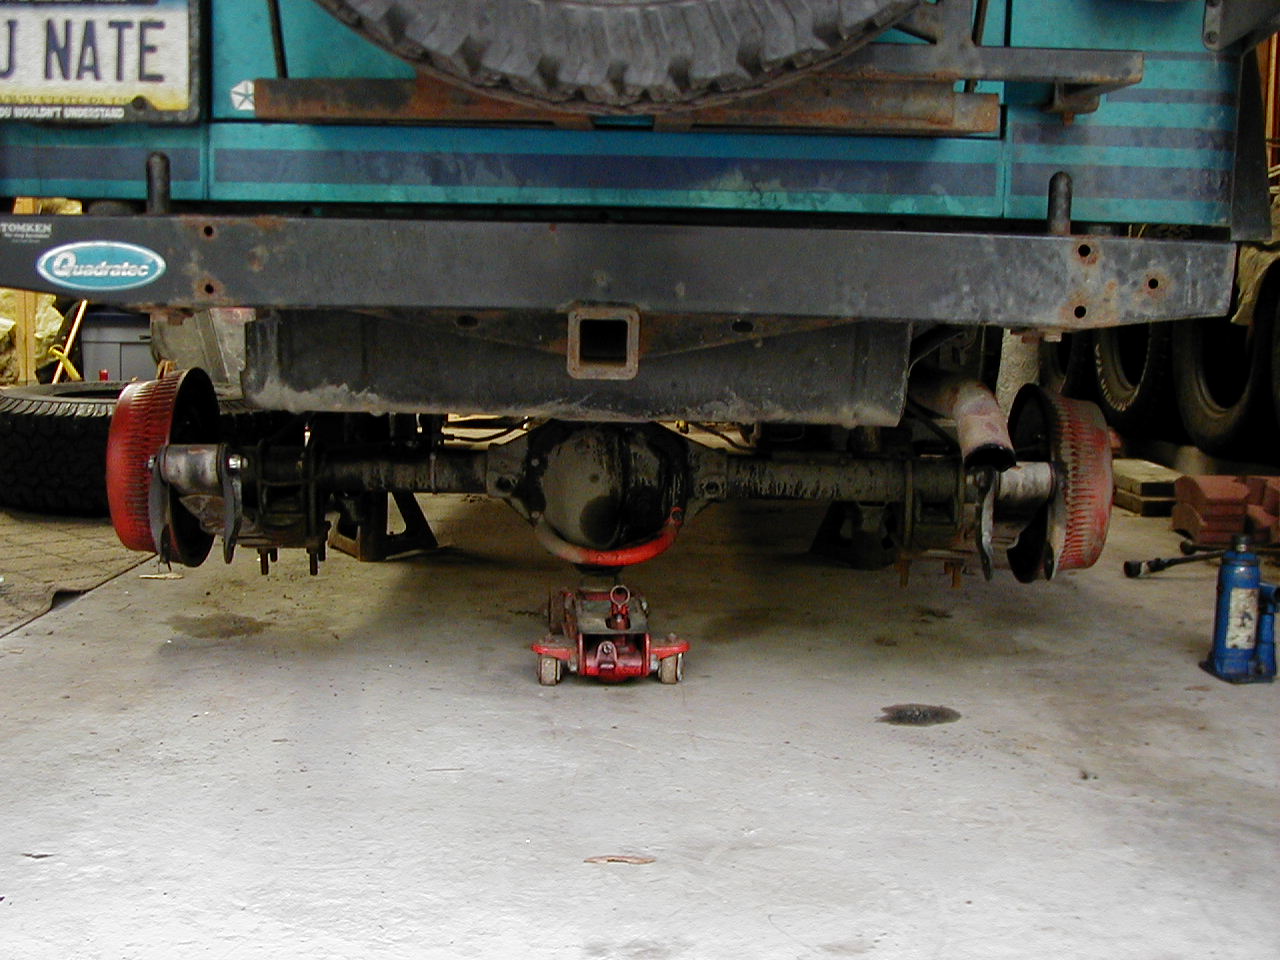
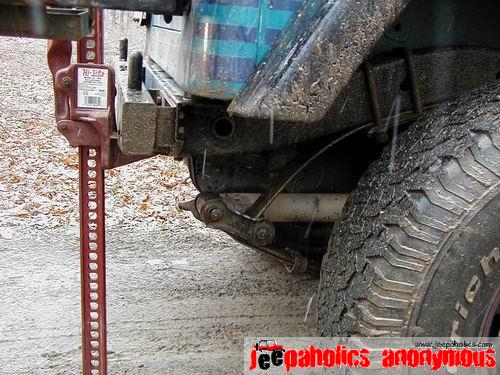
Now, to put it all together. The first thing you need to do is disconnect your rear shackles from the frame. This is pretty simple, if you’re already lifted you should be familiar with how to do this. Just jack the jeep up, support it with jack stands, remove the tires, support the rear axle with a floor jack, and take some of the weight off of the rear. Then remove the upper shackle bolt. It usually helps to loosen the lower bolt to take the pressure off of things. Once that upper bolt is out of both sides, you should be able to then lower that floor jack under the axle and this should give you room to work. Things to watch for when lowering that axle are: Driveshaft length, Make sure youre not putting awkward pressure on your driveshaft or u-joints, and brake lines! Make sure youre not putting pressure on your brake line either, if you are, you could dammage it, and make things leak once its all back together again. Chances are that if you’re dammaging anything by lowering the axle this much, youll probably need to correct whatever’s binding, or not long enough, before you try to take advantage of your new buggy spring setup anyway. Anywho, once you have this disconnected as I mentioned, you should end up with something like this:

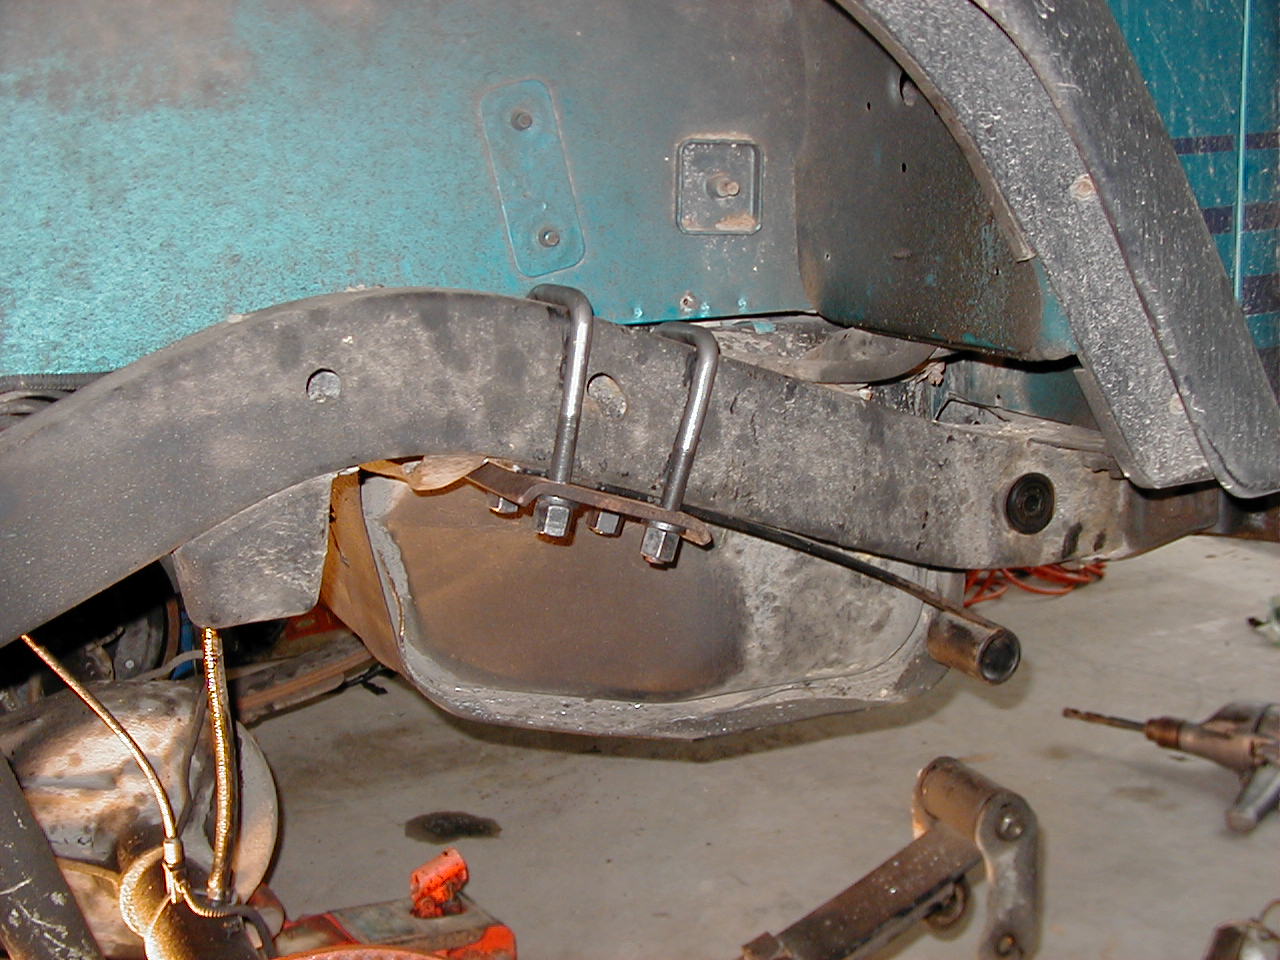
The next step is to put the spring portions in place so that you can figure out where you need to drill to mount the u-bolts. There’s a few ways to do this. You could use a c-clamp to hold everyting in place, or a friend could hold it.. Or you could do what I did. I took the spring and put it where it had to be, butted up against the cross member. Once it was there, I makrked where the center pin hole was. Then I removed the spring, and drilled the hole. Then attached the spring using the sheet metal screw that I mentioned above. Ended up with this:
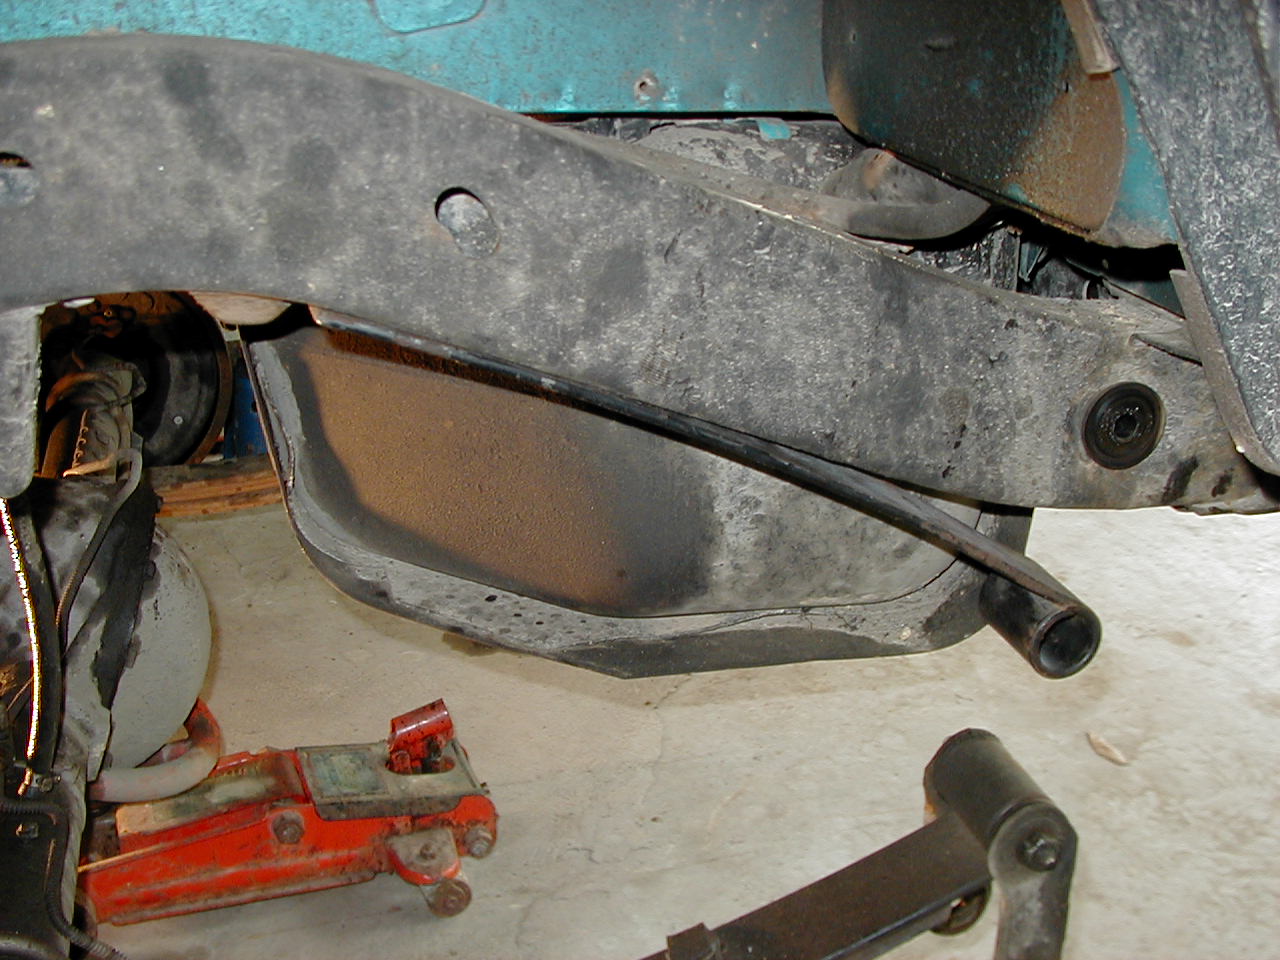
This worked really well, or so it seemed. I found out later that i should have just clamped it in place, and done it that way. But this seemed like a good idea at the time. Well, next I marked, and drilled a few holes. See that cross member that you butt the spring up against, actually covers part of the frame where your u-bolts need to go. So you need to drill 2 9/16″ holes through the cross member to put your u-bolts through. So that I did. The metal’s not thick, but it sure was a bear. You need to lie on your back, and heft the drill into place. Then of course drill. What I did was took a smaller drill bit to start the hole, otherwise the huge 9/16 bit just walked all over the place. The drill I used is my father’s, and probably as old as I am, this equates to one heavy drill! But it’s the only drill we own that has the right sized chuck to fit this bit.. I’m not a big guy and I’m pretty out of shape (i have a desk job!) so this was pretty difficult for me. But i got the holes drilled (pictures will come as soon as i get some taken..). Next is to mount the u-bolts and plates. This is where i decided that mounting the center pins first was a bad idea. See, the plates arent as easy to move around as i hoped, so aligning them to the u-bolts, and the already in place center pin was difficult. I ended up squishing the head on the bolt on the passenger side on accident when i tightened it all down. Thatll have to be replaced. Which brings be to another mistake of mine. Dont use self taping sheet metal screws like i did. I intend to correct this once I have the time. Use a center pin, or a nut/bolt combination through the frame. It sounds difficult, but it’ll be worth it i think. For peace of mind anyway. I have some 3/8″ grade-8 bolts at home that i will be replacing these wimpy center pins with once I have the time. I’d say do it right the frist time if you’re planning this though.
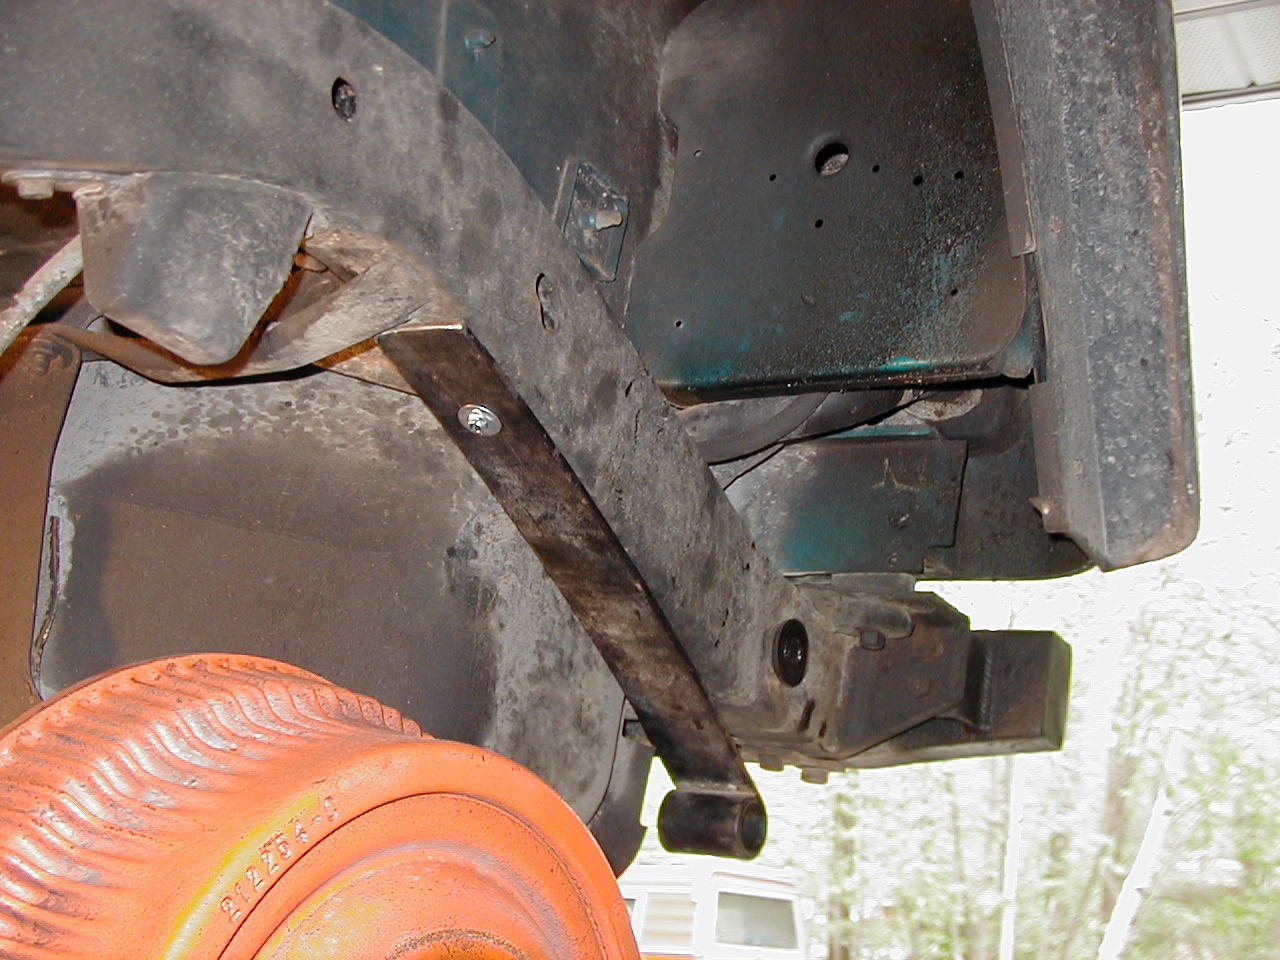
Anyway, back to what I was saying about the center pin holes. What you should do is get the u-bolts and plate in place, line up the center pin hole in the spring with the center hole in the plate, and then mark and drill the hole. Everything ends up lining up better that way.
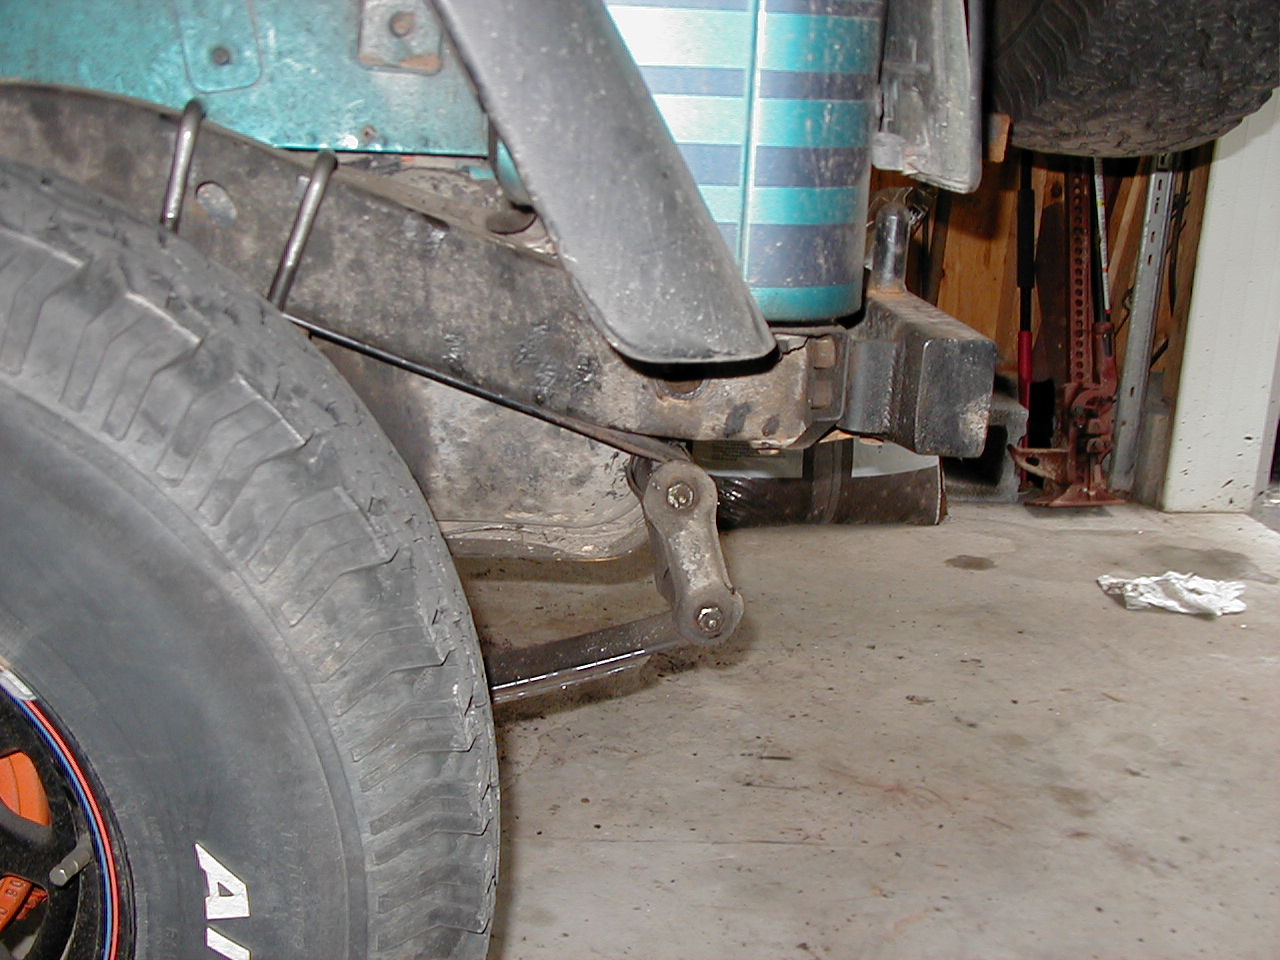
Well, once you have those u-bolts in place, you’re just about done!
You need to move your bushings from the frame mount, to the new spring eye, and then attach your shackle to new spring rather than the frame where it was.
Put your tires back on, and lower the Jeep back to the ground.
Driving
A lot of people told me before I did this that I wouldn’t even notice it on the road. Well, I have to say that they were wrong. If you come into this thinking that your jeep will behave exactly as it did before this mod when you’re done, you’ll be dissapointed when you’re done. It’s not a horrible change, and it’s not something you won’t get used to, but it IS slightly different. You get more sway in the rear, at the moment, I have my sway bar disconnected, i’m thinking that if I reconnect that, i’ll have less sway, and it’ll be less noticeable. Once you get used to it though, youy change your driving to compensate, and its no big deal.
Regrets
My only regret after doing this mod is that it took me too long, and I had to cancel dinner plans with my Fiance, cost me a Dozen Roses. If you have plans for the night, start earlier than I did! I started around 11AM.
Conclusion
This is a great mod for some cheap extra flex. Other than the Roses, I only paid about $40 for all of the stuff, including a a $20 drill bit! I flexed it a bit the other day, and i was impressed by the amount of droop I now have in the rear. Once i get some longer shocks in place, i’ll flex it all out and get some pictures to put here.
Update 4/19/2007
It’s been about 3 years since I installed these springs. In that time I’ve done quite a bit of wheeling, talked to quite a few very experienced wheelers, and most importatnly, paid very close attention to how exactly this mod has affected my Jeep. Here’s what I’ve noted:
- Pro’s
- Improved on-road ride: the rear suspension is actually softer with these installed
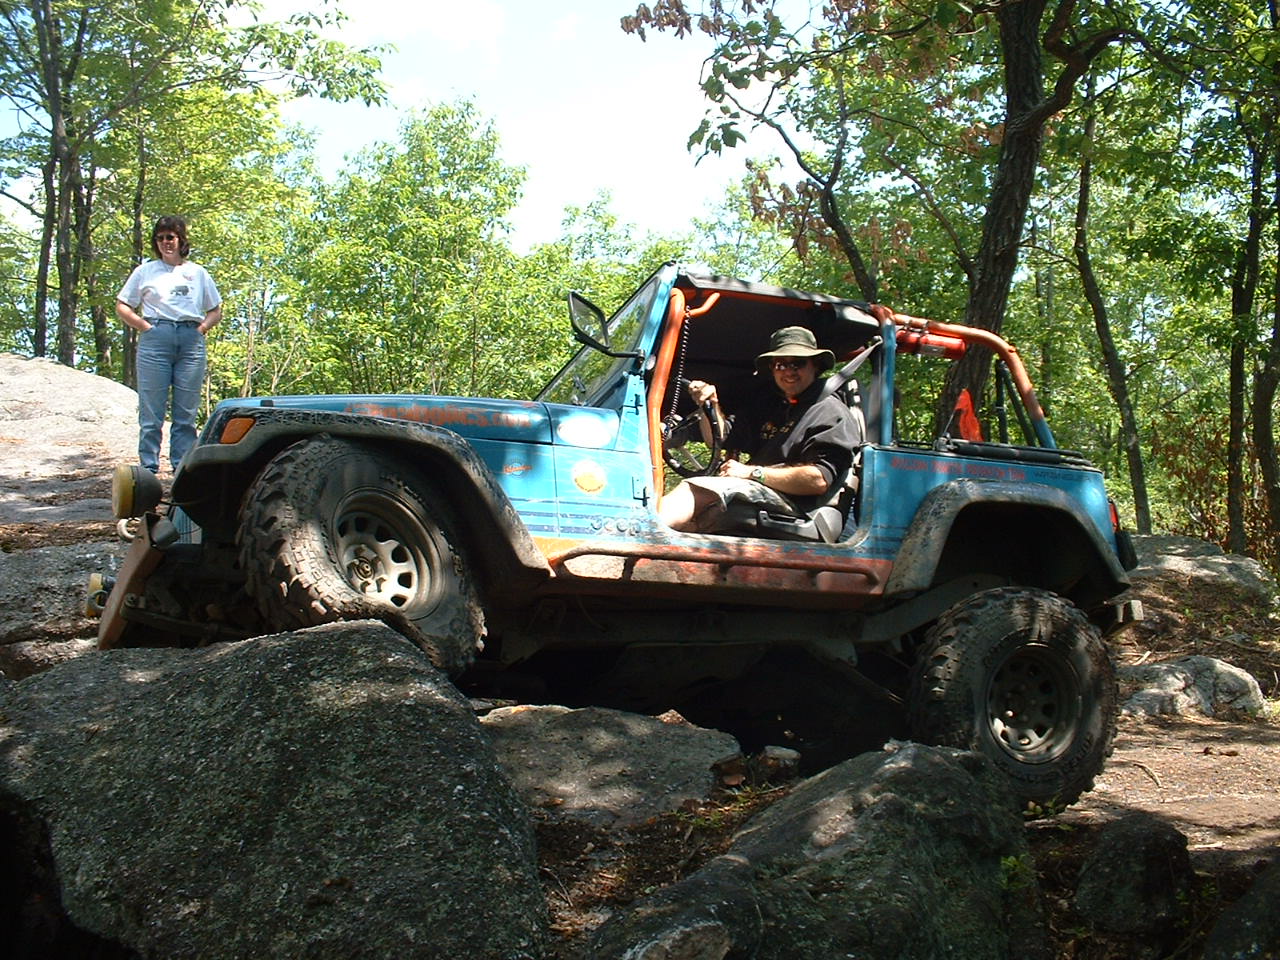
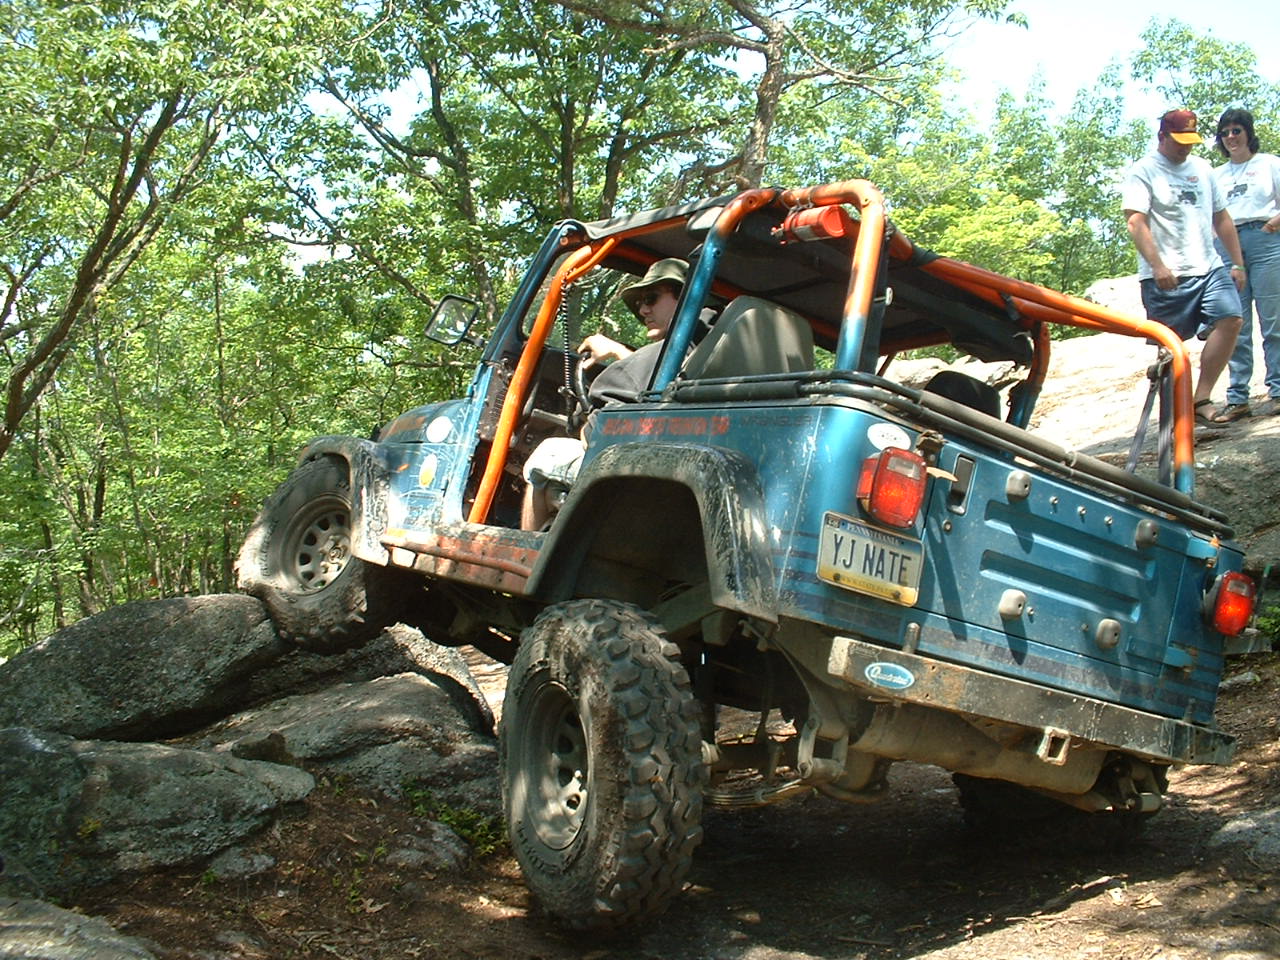
- Improved flex: These buggy springs REALLY help with flex, See the below pictures
- Con’s
- Wheel Hop: its hard to describe in writing, but what it comes down to is a loss of traction off-road
- Shackle Inversion: As my leaves got older, shackle inversion became a problem
Improved Flex
The buggy springs really allow that rear axle to drop! The whole time I had them installed, my shocks were just a little too short. Which meant I didnt really fully utilize them, but they still helped quite a bit. The proof is in the pudding, so here’s some pics
Wheel Hop
Like i said, this is hard to describe… When I first realized that this was a problem, I was at Paragon AP for one of the JAOCMJ Runs. I was on a seemingly un-challenging bit of trail. Some rocks mostly buried in dirt, but enough exposed that you needed some traction and technical tire placement. The front drivers side tire was against the face of a rock, it needed to climb that rock in order to continue moving forward. The front axle is NOT locked (still an open diff), the rear tires are both against the face of a long rock, which was wider than the Jeep, not a tall face, just enough that the rear needed to climb over it in order to continue moving forward the rear IS locked, Detroit soft locker.
Here’s what would happen: Every time I tried to move forward, the rear wold start to climb the long rock that the rear tires were against, and the front would resist because the tire which is against the face of the rock in the front has no power to it (like i siad, open front end). Just as the rear tires are about to crest the rock, and give the front the traction that it needs to climb the rock in front of the front ds tire, the buggy springs would unload, causing the rear of the jeep to ‘hop’ and drop back down to the bottom of the rock that the rear tires were climbing.
The only way around it was to use more throttle than I like to use. One solution MIGHT have been to add a front locker, but I’d suspect that this would still be evident in other situations.
Shackle Inversion
As my sperlift springs got a little older, they started to sag. As they sagged, the rear shackles got pushed further and further out. Eventually it got to where if i hit a hard enough bump, even on-road, they would invert. Causing the buggy spring to bend tward the front of the jeep, and rest against the leaf spring. I tried to fix this by taking the buggy spring off, and moving them back about 1″, but it was only temporary. After a few more months the springs sagged a bit more and the problem returned. You can get around this by putting the springs far enough back to begin with, but after i had modified it once, it was difficult to move the springs again without filling in the holes i drilled somehow, and drilling new ones.
Removal
Ultimately, I decided that the Con’s outweighed the Pro’s and removed the springs from my Jeep. I am planning to go SOA, and didnt feel that the buggy springs would be needed anymore anyway.